Projects from THE COMPOUND!

User avatar
DRIVEN
Posts: 7643
Joined: Thu Jun 27, 2013 7:05 pm
Location: I've been everywhere
Has thanked: 1176 times
Been thanked: 1151 times

Re: Projects from THE COMPOUND!

#21

Post by DRIVEN » Thu Jun 27, 2013 9:22 pm

Sun was shining yesterday (actually about a year ago, now) so we grabbed a rare opportunity. After I got the engine/trans swap done on my dad's '64 he had my brother detail it. It had been painted by my brother about 12 years ago and hadn't been buffed or polished since. The '68, which he just painted, still isn't completely reassembled or finish detailed yet but still looks pretty nice in the sun. My '66 is is just there for contrast.
Image
Image
Image
Image
When the only tool you have is a hammer every problem starts to look like a hippy.

User avatar
DRIVEN
Posts: 7643
Joined: Thu Jun 27, 2013 7:05 pm
Location: I've been everywhere
Has thanked: 1176 times
Been thanked: 1151 times

Re: Projects from THE COMPOUND!

#22

Post by DRIVEN » Thu Jun 27, 2013 9:23 pm

Sold one of my long term toys today (4/16/12):
Image
Now I have some spare cash to put braces on my daughter and start in on my '35 pickup.
When the only tool you have is a hammer every problem starts to look like a hippy.

User avatar
DRIVEN
Posts: 7643
Joined: Thu Jun 27, 2013 7:05 pm
Location: I've been everywhere
Has thanked: 1176 times
Been thanked: 1151 times

Re: Projects from THE COMPOUND!

#23

Post by DRIVEN » Thu Jun 27, 2013 9:24 pm

Proving that I'm a whore that will work on anything...
Image
Image
'49 Plymouth with 318. I had nothing to do with the build in any way. It was dropped off for timing cover gasket replacement due to coolant leak. Timing chain too since I was there. The engine is pretty tired but at least it sounds good through the lake pipes. Kinda cool so I thought you guys might want to see it.
When the only tool you have is a hammer every problem starts to look like a hippy.

User avatar
DRIVEN
Posts: 7643
Joined: Thu Jun 27, 2013 7:05 pm
Location: I've been everywhere
Has thanked: 1176 times
Been thanked: 1151 times

Re: Projects from THE COMPOUND!

#24

Post by DRIVEN » Thu Jun 27, 2013 9:25 pm

My brother has his '69 Volvo 145 wagon for sale. That means his '72 Westy will become his daily driver. The transmission has always been really noisy (bearings) so he picked up another one a few months ago. Hopefully it's quieter. All racked up.
Image
Yank the engine. Replaced the rear motor mounts.
Image
Old one out and on the floor.
Image
Replacement installed after replacing all the shifter bushings.
Image
Dropped the surprisingly heavy exhaust to replace the copper O-rings where they meet the heads. Hopefully no more leaks.
Image
I'm waiting for him to bring me a new clutch. Throwout bearing was SUPER loud and the disc had 2 cracks between the cushion springs. Never seen that on a VW before. I guess I'll start cleaning the shop up in anticipation of the new arrivals tomorrow. More to come.
When the only tool you have is a hammer every problem starts to look like a hippy.

User avatar
DRIVEN
Posts: 7643
Joined: Thu Jun 27, 2013 7:05 pm
Location: I've been everywhere
Has thanked: 1176 times
Been thanked: 1151 times

Re: Projects from THE COMPOUND!

#25

Post by DRIVEN » Thu Jun 27, 2013 9:25 pm

Well, looks like a clutch set is $250-up and 3 days out. Plan B (don't laugh :oops: ) was to just weld a bead at the cracked spots and punt. If the clutch didn't work fine and look almost brand new I swear it wouldn't have gone back in. Still not sure why it had contact marks from the flywheel bolts on the hub.
Image
Image
Empty bay = success! New transmission is quiet and shifts better than the old one too. Time to clean the shop.
When the only tool you have is a hammer every problem starts to look like a hippy.

User avatar
DRIVEN
Posts: 7643
Joined: Thu Jun 27, 2013 7:05 pm
Location: I've been everywhere
Has thanked: 1176 times
Been thanked: 1151 times

Re: Projects from THE COMPOUND!

#26

Post by DRIVEN » Thu Jun 27, 2013 9:26 pm

Spent most of the last three days cleaning the shop. It may not look much different but I did a ton of organizing and pressure washing. It hasn't been this clean since I moved in 12 years ago. If nothing else, I just feel better. Here's some before and after shots.
Before--
Image
Image
Image
After--
Image
Image
Image
Image
All to make room for this--
Image
Image
That's original paint. The odometer shows less than 6000 miles. For you guys familiar with points and judging, this car is a 997. Solid lifters sound sexy. Don't be jealous.
When the only tool you have is a hammer every problem starts to look like a hippy.

User avatar
DRIVEN
Posts: 7643
Joined: Thu Jun 27, 2013 7:05 pm
Location: I've been everywhere
Has thanked: 1176 times
Been thanked: 1151 times

Re: Projects from THE COMPOUND!

#27

Post by DRIVEN » Thu Jun 27, 2013 9:27 pm

Well, the Impala is pretty much done. All the little leaks are fixed and the tune-up stuff is done. This thing sounds GREAT! Been waiting on the water pump for over a week. Since this is a mega-numbers-matching car I had to send the original out to be rebuilt. It's been sitting in my empty bay patiently waiting. It should be wrapped up Tuesday or Wednesday. It's replacement is already loaded in the trailer. Stay tuned.

While it was in a holding pattern I went over to the owner's house and pulled the exhaust manifolds on his '55 convertible. He didn't like the rust look so I had them ceramic coated in cast iron finish. I would consider all of his cars over-restored and this one is no exception. No car ever came out of a Detroit factory this nice. The bottom side is just as clean as the top. I should have grabbed a couple pics.
Image
Remove
Image
Coated
Image
Installed
Image
Other side too. If you've never been up close to one of these, the PS pump in on the back of the generator.
Image
All done.
Image
When the only tool you have is a hammer every problem starts to look like a hippy.

User avatar
DRIVEN
Posts: 7643
Joined: Thu Jun 27, 2013 7:05 pm
Location: I've been everywhere
Has thanked: 1176 times
Been thanked: 1151 times

Re: Projects from THE COMPOUND!

#28

Post by DRIVEN » Thu Jun 27, 2013 9:28 pm

The Impala finally went home yesterday. But not until a last minute accelerator pump failure. Starts so easily now and runs perfectly. It ran pretty good before but was getting harder and harder to cold-start. It didn't help that the restored had disabled the choke. So, the owner picked up the '62 and dropped off his Tbird. This one is just needing some brake work and a hose clamp to fix a coolant leak. Probably a battery too. The color is hard to describe in person. It looks really pink in the photos but more red in person. Yes, he bought this one for his wife.
Image
Image
Image
When the only tool you have is a hammer every problem starts to look like a hippy.

User avatar
DRIVEN
Posts: 7643
Joined: Thu Jun 27, 2013 7:05 pm
Location: I've been everywhere
Has thanked: 1176 times
Been thanked: 1151 times

Re: Projects from THE COMPOUND!

#29

Post by DRIVEN » Thu Jun 27, 2013 9:29 pm

The upsides are that nothing is rusted in place and everything is clean. The downsides are that parts are expensive and aren't usually just down the street and I need to take a lot of time protecting everything. For example, I had to replace the water pump on the Impala. Since everything needs to stay numbers-matching I had to have the original rebuilt rather than just replacing it. Napa charged me $170 just for the rebuild service and it took over a week (so the car was taking up a bay). Once I got it back I had to try 3 different brands of paint to get the right color match. Once I had it installed I had to spray the same paint onto a sheet of plastic and use a Qtip to dab along the gasket mating surface to hide the fact that it had been disturbed. It's deceiving because you look at it and think, "That's pretty wide open. I can probably whip that out in 20 minutes." Wrong! There's also the pucker factor of worrying about damage and just keeping everything clean. These are fun to work on but I make waaay better money on Camrys, Explorers and Outbacks.
When the only tool you have is a hammer every problem starts to look like a hippy.

User avatar
DRIVEN
Posts: 7643
Joined: Thu Jun 27, 2013 7:05 pm
Location: I've been everywhere
Has thanked: 1176 times
Been thanked: 1151 times

Re: Projects from THE COMPOUND!

#30

Post by DRIVEN » Thu Jun 27, 2013 9:30 pm

Not sure which car is next. In the meantime I'm gearing up for the next big project. I'll be doing an LT1 Swap in my brother's '36 Ford pickup. Ordered a bunch of parts, picked up the engine and transmission, pressure washed everything. Stay tuned.
Image
When the only tool you have is a hammer every problem starts to look like a hippy.

User avatar
DRIVEN
Posts: 7643
Joined: Thu Jun 27, 2013 7:05 pm
Location: I've been everywhere
Has thanked: 1176 times
Been thanked: 1151 times

Re: Projects from THE COMPOUND!

#31

Post by DRIVEN » Thu Jun 27, 2013 9:37 pm

My wife LOVES her Neon. It's been totaled 3 times and brought back from the dead. The most recent was an SUV backing into the left quarter in a parking lot. After the dust settled we got a check just big enough to persuade my brother to repaint the whole car. It had been spotted in so many times in the past that it looked horrible and the only way to set it right was to shoot the whole car at once. I misplaced my camera for all the before stuff. Here it is this morning after being painted yesterday. Mmmm, fresh flame red. Time for me to start putting it back together.
Image
Image
I gutted the interior so I could pressure wash the carpet and scrub it with Tide. It's a trick I learned when I worked at a detail shop 20 years ago. Updates to follow.
Image
Image
When the only tool you have is a hammer every problem starts to look like a hippy.

User avatar
DRIVEN
Posts: 7643
Joined: Thu Jun 27, 2013 7:05 pm
Location: I've been everywhere
Has thanked: 1176 times
Been thanked: 1151 times

Re: Projects from THE COMPOUND!

#32

Post by DRIVEN » Thu Jun 27, 2013 9:37 pm

Mostly back together.
Image
Image
The clean carpet and interior back in. Added some seat covers and heavy duty mats for protection.
Image
Image
You'll see a gauge cluster with a factory tach. I added that a couple years ago. I've been collecting upgrade parts at the yard when I see stuff I like. You may have noticed the "power bulge" hood. That's a fresh addition too. I always liked the look of the Sport edition with the gray door trim and bumper detail. Here's the bumper covers as of right now before a good scrub and gray paint. They are textured and molded in red plastic rather than painted.
Image
I've also been sitting on this piece for a while too. These racks weren't really common back in the day and you rarely see them now. Thinking I'll toss it on top after a good cleaning. More to come later.
Image
When the only tool you have is a hammer every problem starts to look like a hippy.

User avatar
DRIVEN
Posts: 7643
Joined: Thu Jun 27, 2013 7:05 pm
Location: I've been everywhere
Has thanked: 1176 times
Been thanked: 1151 times

Re: Projects from THE COMPOUND!

#33

Post by DRIVEN » Thu Jun 27, 2013 9:38 pm

Image
Image
Gray trim, license plate holder, wipers and roof rack on. It's now 98% done. Still have the black trim right above the side windows to repaint black. The cat has been rattling for about 4 years now. I parted out a Volvo with a brand new one a few months ago so I'll see if I can make it fit. It'll be nice not to hear that in the drive-thru. I'll be keeping an eye out for some factory alloy wheels for the finishing touch. Time to jump into the '36 pickup for my brother. Watch for progress in that thread.
When the only tool you have is a hammer every problem starts to look like a hippy.

User avatar
DRIVEN
Posts: 7643
Joined: Thu Jun 27, 2013 7:05 pm
Location: I've been everywhere
Has thanked: 1176 times
Been thanked: 1151 times

Re: Projects from THE COMPOUND!

#34

Post by DRIVEN » Thu Jun 27, 2013 9:39 pm

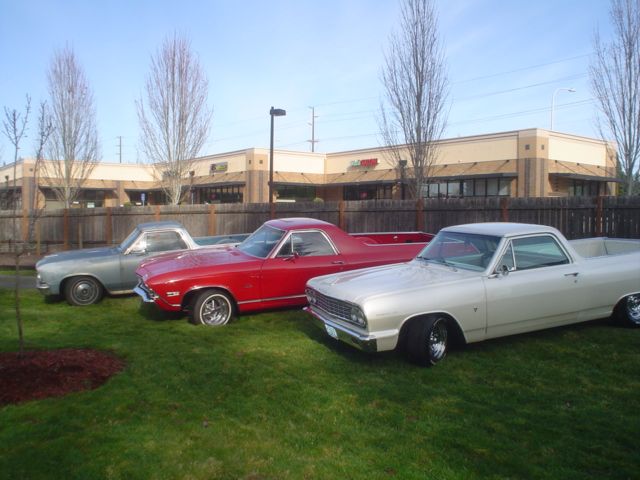
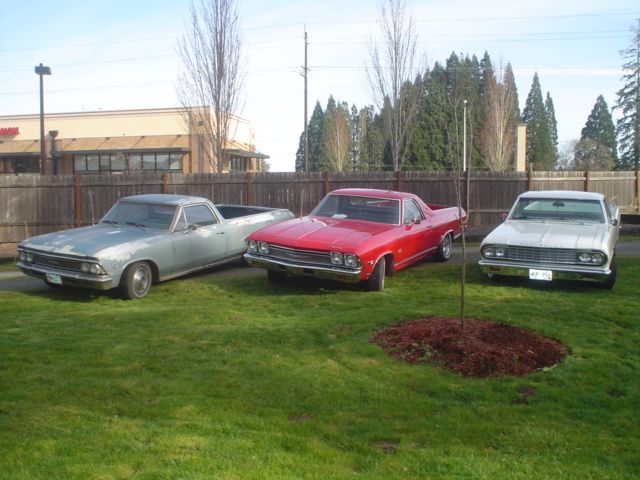
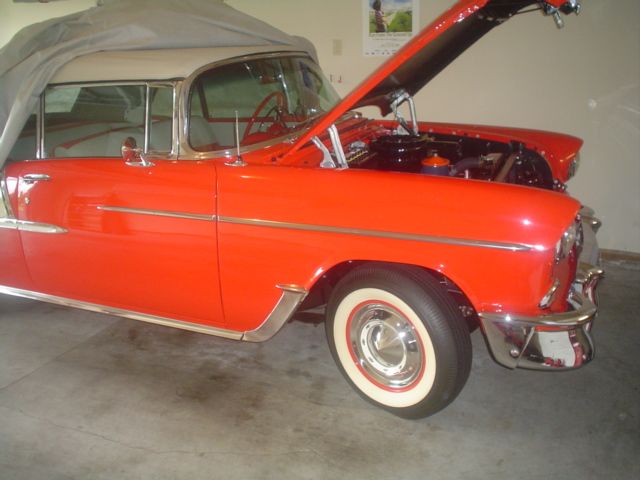
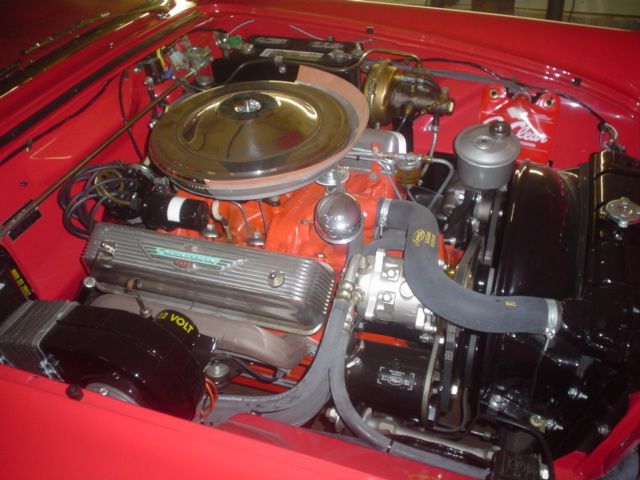
Rutt-roh! Look who's back.
Image
Image
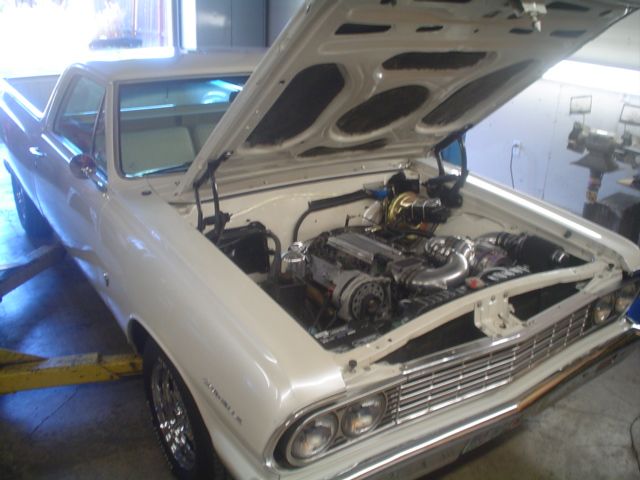
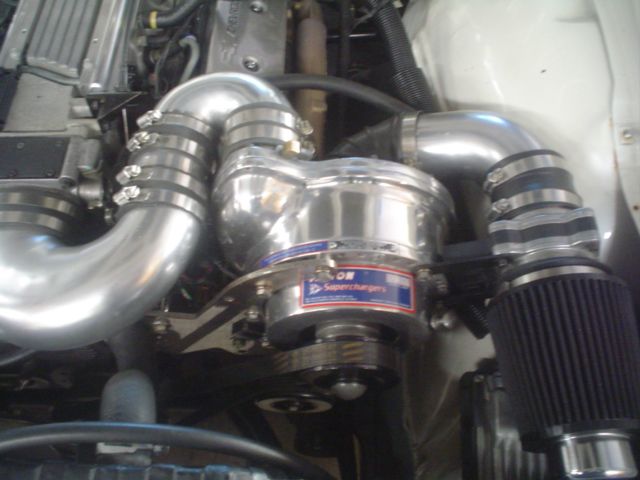
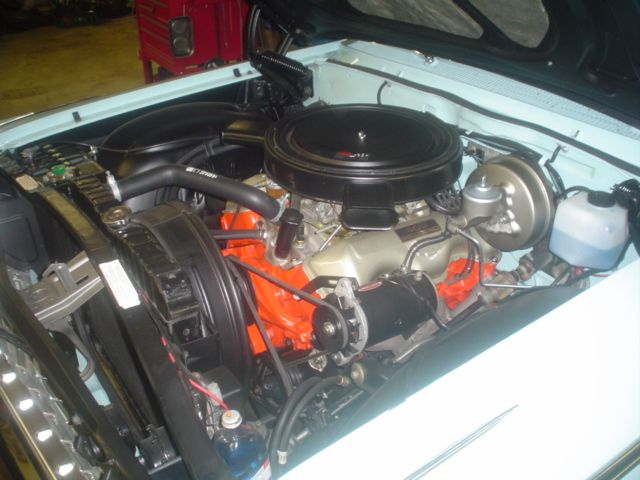
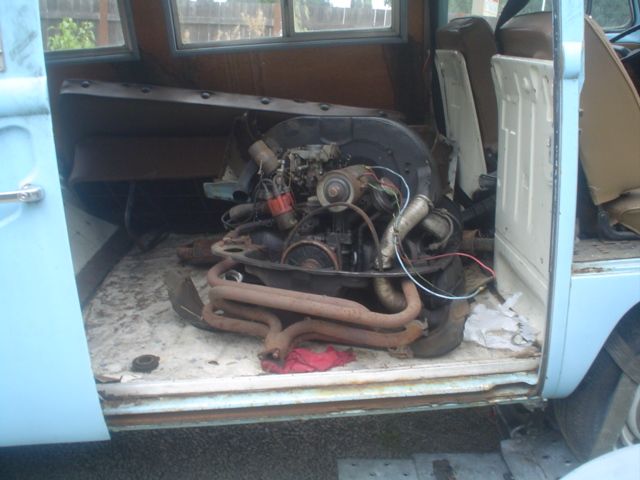
Got the call from my Dad Sunday night that he thought his '64 smoked a piston/pistons again. He put the Paxton back on and thought he had lugged it a little too much. It developed a miss that progressively got worse and started smoking badly. By the time it was dropped off yesterday morning it was almost impossible to start, was running on 4 or 5 cylinders, and had almost no manifold vacuum. I was expecting to have to pull the engine and break it down. But first...
-Pulled the plugs. 3,7,6 & 8 extremely fuel fouled.
-Compression test. All 190-195 except for #8 -- 260psi! What?
-By this time I noticed a huge puddle of fuel under the car.
-Hooked up the fuel pressure gauge and cycle the key on and off. 45psi then immediately dropped to zero. Repeated 3 times. Bump starter over and fuel poured out #8 plug hole.
Image
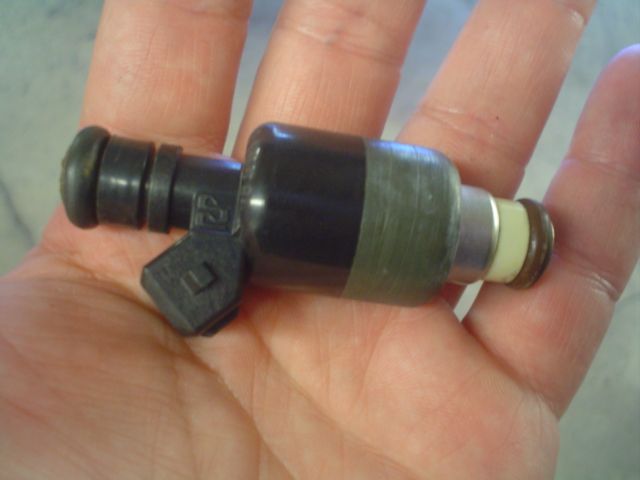
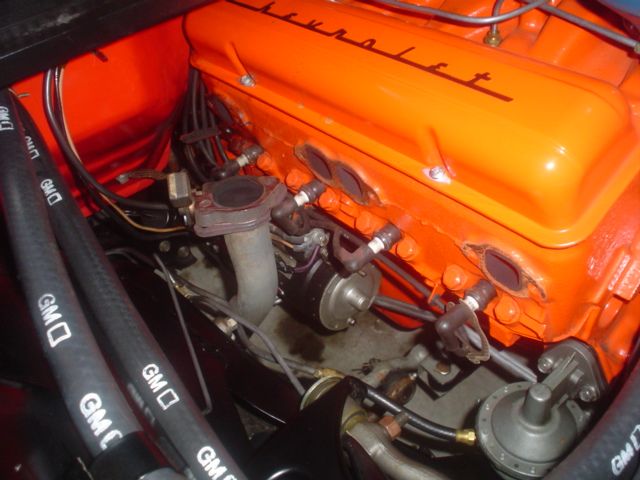
Yup, just a stuck injector. Replaced it, cranked the fuel out of the cylinders, cleaned and reinstalled the plugs. It fired right up, ran great and had 20in manifold vacuum. Took a while to cook all the fuel out of the exhaust system but all better now.
When the only tool you have is a hammer every problem starts to look like a hippy.

User avatar
DRIVEN
Posts: 7643
Joined: Thu Jun 27, 2013 7:05 pm
Location: I've been everywhere
Has thanked: 1176 times
Been thanked: 1151 times

Re: Projects from THE COMPOUND!

#35

Post by DRIVEN » Thu Jun 27, 2013 9:40 pm

And...it's back. This was a scheduled appointment though. He's been driving around with a 2.56 BOP posi 8.2" for several years and it was just plain too tall. Earlier this year I did a 500 mile trip and found that at 70mph it got better mpg in 4th than in 5th gear. He picked up a 3.08 (which was the stock ratio) and decided to try it for a while.
Just a quick ID shot of the BOP version. Note the smooth, roundish cover with the scallops at 3 and 9 o'clock.
Image
We were told that his particular unit left the factory under a '65 Lemans. They really don't share many common parts with the more familiar Chevy version. The axles have a pressed-on bearing like a Ford 8" or 9" and no C-clips. The carrier is different and I've seen conflicting info as to whether the gears are interchangeable. The yoke was larger and obviously the housing is different. I believe the brake parts are the same.

Here's the new one. You can clearly see the Chevy cover on it. Started with some degreaser and pressure washing.
Image
The plan was to swap new axle and pinion seals along with brake cylinders. It's never as simple as you plan. Drained the REALLY nasty oil out and extracted the axles. Uh-oh:
Image
I called around for axle availability and was quoted $250-$300 and 3-10 days out. Ended up going with an offset "repair" bearing for now. We'll keep an eye out for a better axle.
Image
And out with the old:
Image
New one in, bled the brakes and topped off the new gear oil. It is noticeably quicker off the line now. Stops great and so far no noisy bearings although the condition of the oil that came out has me a bit nervous. Time will tell. I also drove it down to the shop and did a fuel injection service since the injector I replaced last week looked so filthy inside. Then I ran it over the hill and dropped it off. 15 miles and all is well.
When the only tool you have is a hammer every problem starts to look like a hippy.

User avatar
DRIVEN
Posts: 7643
Joined: Thu Jun 27, 2013 7:05 pm
Location: I've been everywhere
Has thanked: 1176 times
Been thanked: 1151 times

Re: Projects from THE COMPOUND!

#36

Post by DRIVEN » Thu Jun 27, 2013 10:01 pm

Aw geez...it's contagious. After being around my brother's Westy and borrowing it for a camping trip, my dad decided he'd like one too. This will probably just be a flip that he plans to drive through the winter. He has his eye on a relative's newer Vanagon that may be a permanent addition to his fleet. But in the meantime this will be yet another distraction. Should be fun!
Image
Image
Image
1968 VW bus. It's a bit of an odd (rare) duck. Turret top camper and first year of the bay windows. That means it was originally a panel. Overall it's in better than average condition. Normal rust in the front floor boards and battery tray -- easy fix. Some rust puckers in various places down low but nothing cancerous. Looks to have originally been white (or white and yellow), then yellow, then this blue color over a very straight body. Hasn't been on the road in about 10 years.
Front half of the interior is pretty decent. Presentable rubber floor mat. Great headliner in the front. Nice seats and dash.
Image
The back is gutted and there's a standard bench seat sitting in there. It's supposed to have a cabinet on the passenger side, a folding Z-bed, a drop down table on the driver's side, and a single seat backing up to the driver's seat.
Image
Some assembly required:
Image
The engine is a locked up 1600DP with a 009 distributor and aftermarket exhaust. I'll see if I can break it loose but it might just be cheaper to replace than repair. More to come.
When the only tool you have is a hammer every problem starts to look like a hippy.

User avatar
DRIVEN
Posts: 7643
Joined: Thu Jun 27, 2013 7:05 pm
Location: I've been everywhere
Has thanked: 1176 times
Been thanked: 1151 times

Re: Projects from THE COMPOUND!

#37

Post by DRIVEN » Thu Jun 27, 2013 10:02 pm

My brother stopped by last night and looked it over. He's the in-house bus expert. I was showing him the big stack of receipts I found along with the original owner's manual and purchase paperwork. We verified that it's an early Riviera. Here's the history lesson: Back in the day the factory authorized and sold campers that were built by Westfalia. These are far and away the most common camper you'll see around. The problem was that they sold like hotcakes but VW corporate would only allow dealers to buy a percentage of Westys. So, to get 10 campers, dealers were required to also buy 10 transporters (regular buses), 5 pickups, and 5 panels. <<Those numbers are probably not accurate and were meant to illustrate the circumstances<<. Many dealers just couldn't justify buying the harder to sell body styles just to get the Westys. So, Riviera Motors in Beaverton, OR (5 miles from me) decided that they would just buy panels (which had no purchase restrictions) and convert them. They quickly became popular and soon they were distributing their conversions to dealers all over the USA. In the '70s and '80s the Riviera was a strong seller and was similar to the Westy but had a larger pop-top and the interior cabinetry was different.
According to the paper trail it appears that this thing has had about 8 owners but never lived more than about 100 miles from where it was originally sold. Pretty interesting to see a receipt from 1970 that covered an "engine inspection" along with a valve adjustment and new valve cover gaskets. Total parts and labor cost was $5.90 :? .
When the only tool you have is a hammer every problem starts to look like a hippy.

User avatar
DRIVEN
Posts: 7643
Joined: Thu Jun 27, 2013 7:05 pm
Location: I've been everywhere
Has thanked: 1176 times
Been thanked: 1151 times

Re: Projects from THE COMPOUND!

#38

Post by DRIVEN » Thu Jun 27, 2013 10:02 pm

There's still deals out there if you look under the right rocks. My brother's '72 was abandoned at his friend's house 8 years earlier by a 3rd friend after it lost power and no one could figure it out. He got it for a case of beer. Turns out the power loss was due to the throttle rod falling out of the slot in the bottom of the pedal. He cleaned out the inside, recovered the seats, put in a laminate floor, painted the wheels and bumpers and restored the poptop. He'd have no problem getting at least $5k for it today.
When I was building my sandrail a few years ago I bought a '71 Overniter (full camper without poptop) for $250 off ebay just for the transmission. Turned out that the engine was freshly rebuilt too. The body had rust but was certainly saveable (actually looks way worse in the pic than it really was). The interior was pretty nice too, just needed cleaning. Had I known then -- I would have saved it. In the condition I bought it I probably could get $3K today. Who knew?
Image
If you think prices are crazy here you should see what they go for in Europe. I wish I had an import/export hookup so we could make some serious money.
The market is hot right now so he had to pay a little more than the other two but this is intended to be a quick flip for max profit. Depending on the circumstances he may drive it through the winter to keep his El Caminos and Harley out of the weather. Stay tuned.
When the only tool you have is a hammer every problem starts to look like a hippy.

User avatar
DRIVEN
Posts: 7643
Joined: Thu Jun 27, 2013 7:05 pm
Location: I've been everywhere
Has thanked: 1176 times
Been thanked: 1151 times

Re: Projects from THE COMPOUND!

#39

Post by DRIVEN » Thu Jun 27, 2013 10:04 pm

Pulled the engine out and set it on the ground so I could have better access to everything. Poured 1/2qt ATF down the carb plus some Marvel Mystery Oil in each cylinder. Couldn't get it to budge.
Image
Thought I'd pull the clutch off so I could get a big breaker bar on the gland nut. What disc?
Image
Hopefully that's the reason the engine was pulled and it's just stuck in the bores from sitting not at the crankshaft from being blown up. It had oil in it so I'm keeping my fingers crossed. I'll just let the chemicals do their thing for a couple more days.
When the only tool you have is a hammer every problem starts to look like a hippy.

User avatar
DRIVEN
Posts: 7643
Joined: Thu Jun 27, 2013 7:05 pm
Location: I've been everywhere
Has thanked: 1176 times
Been thanked: 1151 times

Re: Projects from THE COMPOUND!

#40

Post by DRIVEN » Thu Jun 27, 2013 10:04 pm

My dad came by last night after work and scrubbed off some of the moss. I was amazed at how straight and shiny(ish) it actually was. I assumed that under all the green fuzz was some unseen bodywork sins. Sometimes I don't mind being wrong.
Image
He picked up a replacement engine for it last weekend. It came off a sandrail and was advertised as a 1600 but the seller said he suspects it's actually larger. Without pulling a head to measure bore and stroke there's no easy way to tell. The alternator and electronic ignition are nice upgrades. Either way it's an improvement over the single port that would have been original equipment. It'll get a reseal and a Krylon rebuild before it goes in. Haven't decided what will happen to the stuck engine that came with it.
Image
When the only tool you have is a hammer every problem starts to look like a hippy.

Post Reply