Wynona the wagon's resurrection!
- HRH
- Posts: 2366
- Joined: Sat Jan 18, 2014 8:54 pm
- Cars: Lots
- Location: Near flatcat
- Has thanked: 147 times
- Been thanked: 649 times
Re: Wynona the wagon's resurrection!
Hmm, would you look at that, someone makes a USA box for only 64 bucks. I might just get that.
https://www.revolutionelectronics.com/P ... _Pump.html
Also could do this, the old school way. Actually not bad for saving the engine in a loss of oil pressure event.
https://www.summitracing.com/parts/mrg-7872
https://www.revolutionelectronics.com/P ... _Pump.html
Also could do this, the old school way. Actually not bad for saving the engine in a loss of oil pressure event.
https://www.summitracing.com/parts/mrg-7872
"Self proclaimed most active poster on NWD." - Me
- HRH
- Posts: 2366
- Joined: Sat Jan 18, 2014 8:54 pm
- Cars: Lots
- Location: Near flatcat
- Has thanked: 147 times
- Been thanked: 649 times
Re: Wynona the wagon's resurrection!
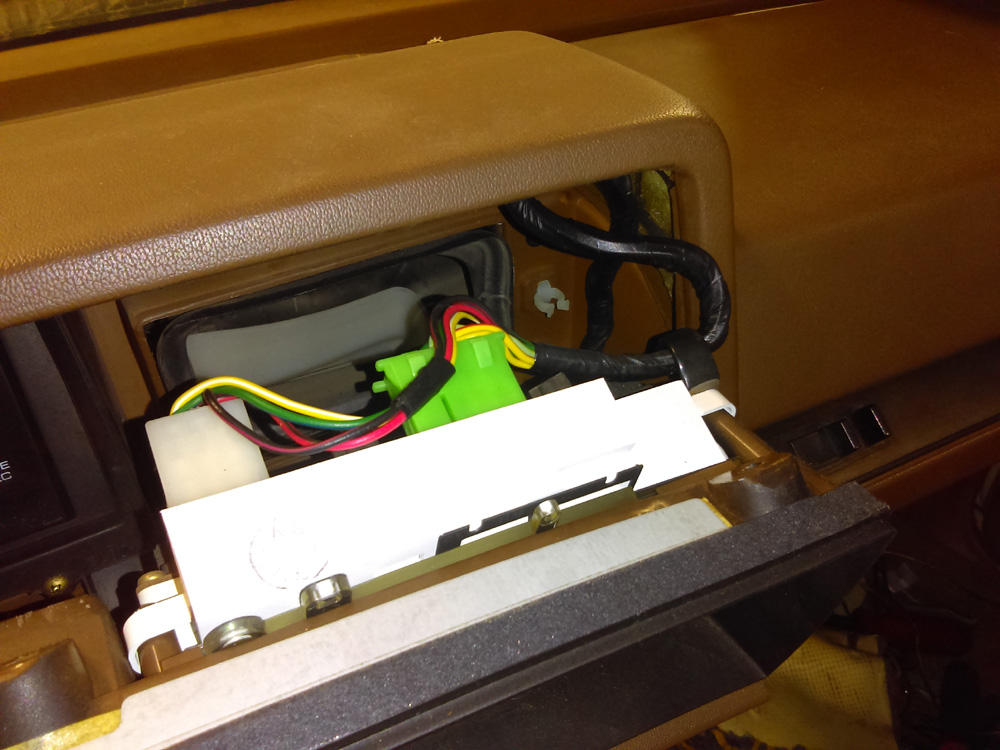
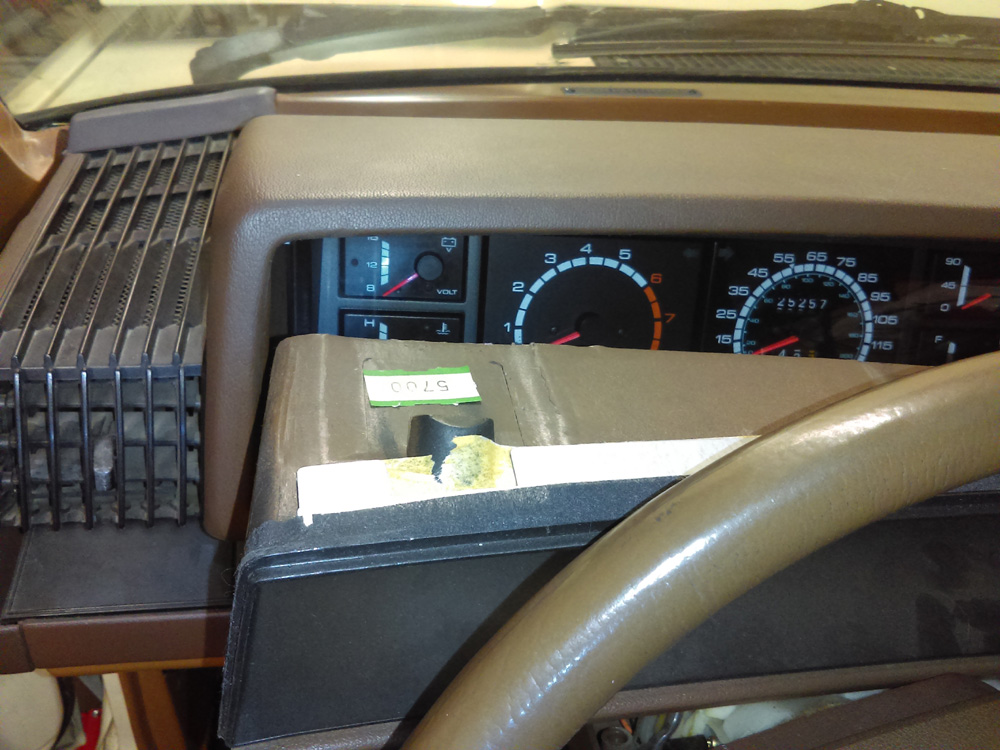
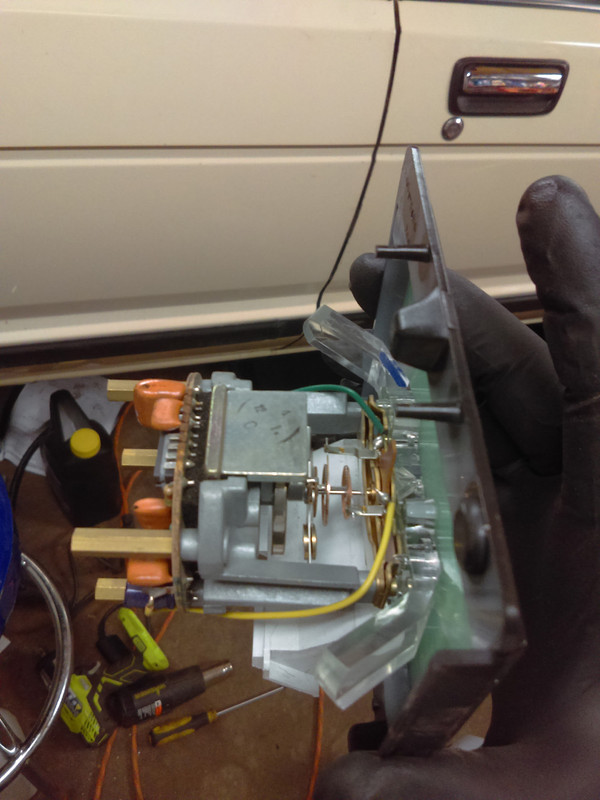
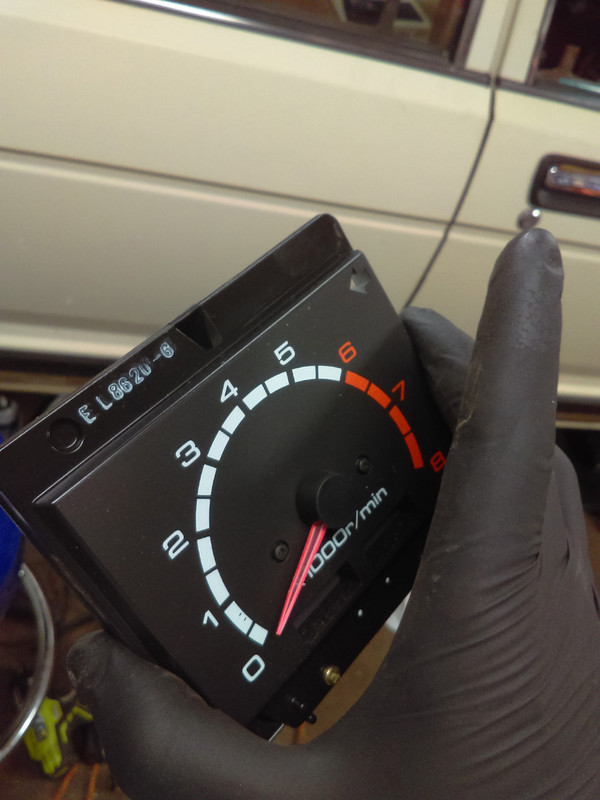
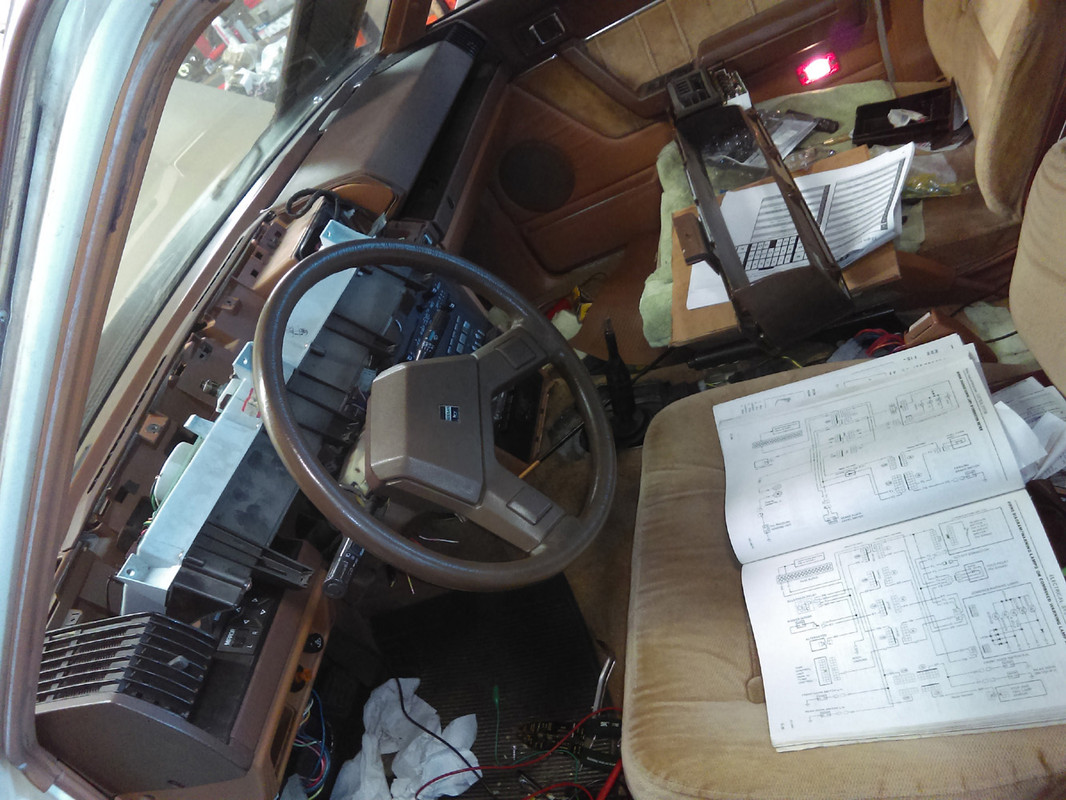
So I took off the dash the other day trying to source the tach wires, here are some pictures. Have to be sooooo careful not to crack shit.
Also, mounted my new wheels (2 years ago, ordered with engine), they look sooo nice on Wynona! I'm stoked. And the extra 7mm positive offset will help the tires not rub under hard cornering.
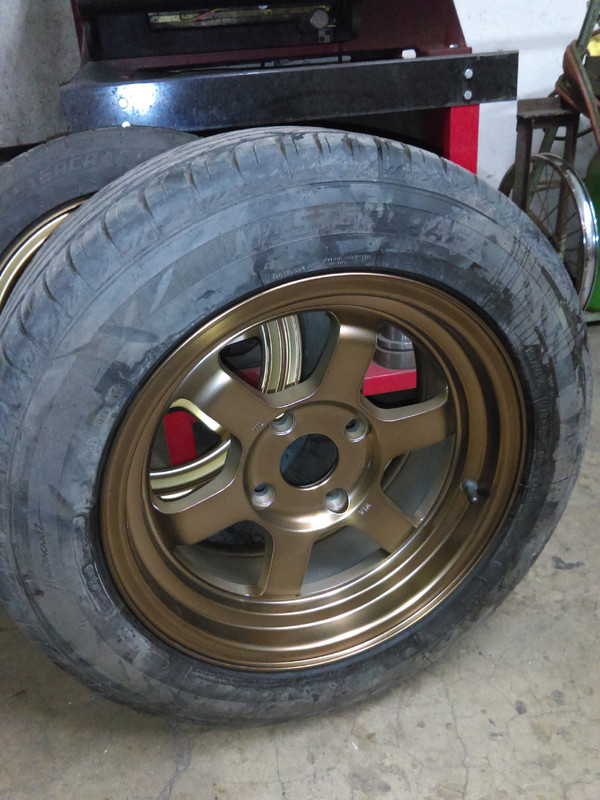
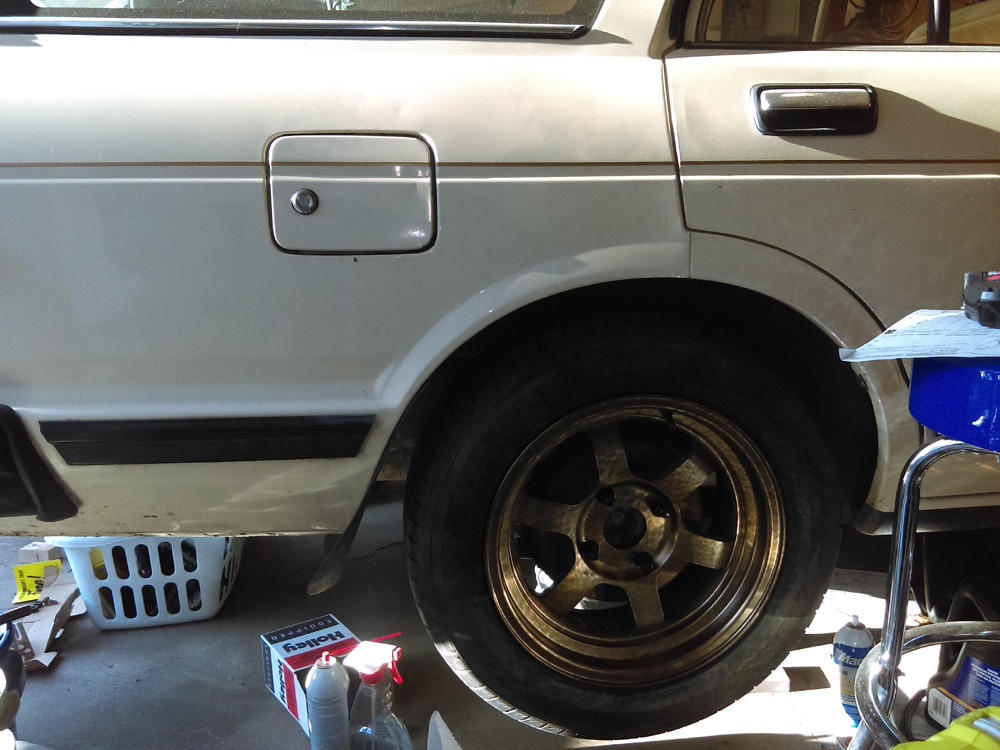
Have some weird reflection off a toolbox, they look more like the first picture.
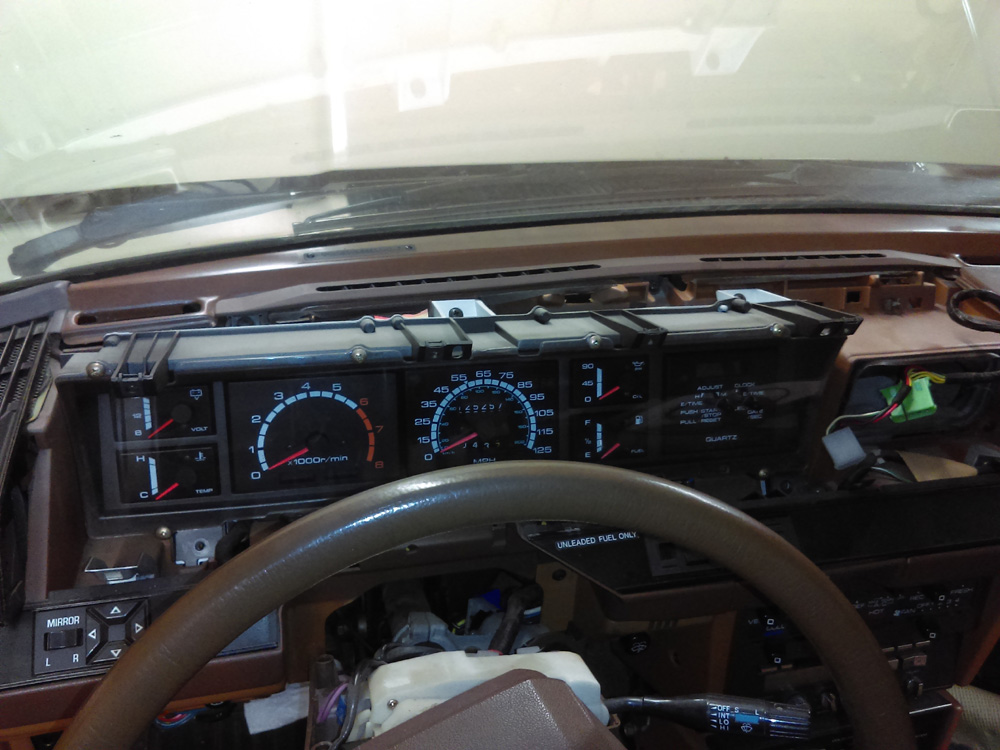
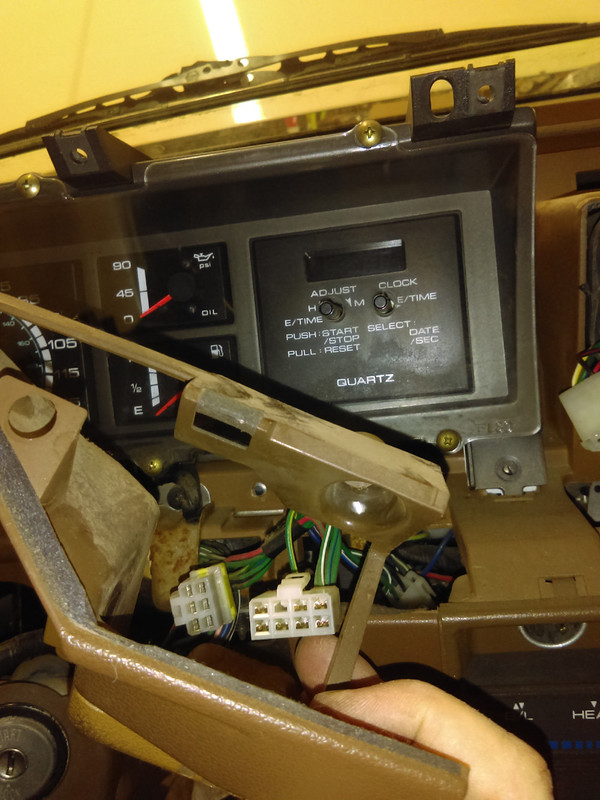

Also, mounted my new wheels (2 years ago, ordered with engine), they look sooo nice on Wynona! I'm stoked. And the extra 7mm positive offset will help the tires not rub under hard cornering.


Have some weird reflection off a toolbox, they look more like the first picture.


"Self proclaimed most active poster on NWD." - Me
- HRH
- Posts: 2366
- Joined: Sat Jan 18, 2014 8:54 pm
- Cars: Lots
- Location: Near flatcat
- Has thanked: 147 times
- Been thanked: 649 times
Re: Wynona the wagon's resurrection!
Alright, spent most of the day in the garage yesterday. Figured a few things out.
One: The old school tach won't work with the new style individual coil pack tach output. However, there is a way to do it according to my electrical genius buddy, so I'll make a tach adapter and try that. I'd like to retain the factory tach if possible. Worst case I can get another tach and work it into the gauge cluster but it wouldn't look right unless I replace all the gauges and even that would be iffy since they're all square. It would be easier to make a plate to go over the cluster then mount round hole gauges in, but like I said, I want it to remain looking factory.
Two: Found the alternator light spout, and the tach output spout and I've marked it for the 810/910 guys because it's really annoying unless you have an FSM. 8 million connectors in this car.
Three: Read up on the internets and found a guy who says a 93-97 J30 AC compressor will work, and it does look identical other than custom hoses.
Four: Wired in a toggle switch for now to the fuel pump relay ground (hidden safety switch) so that's good.
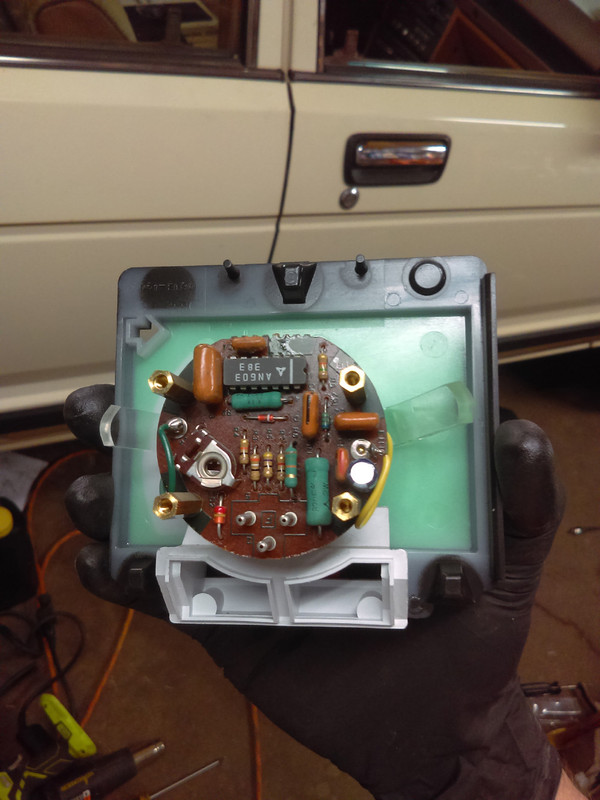
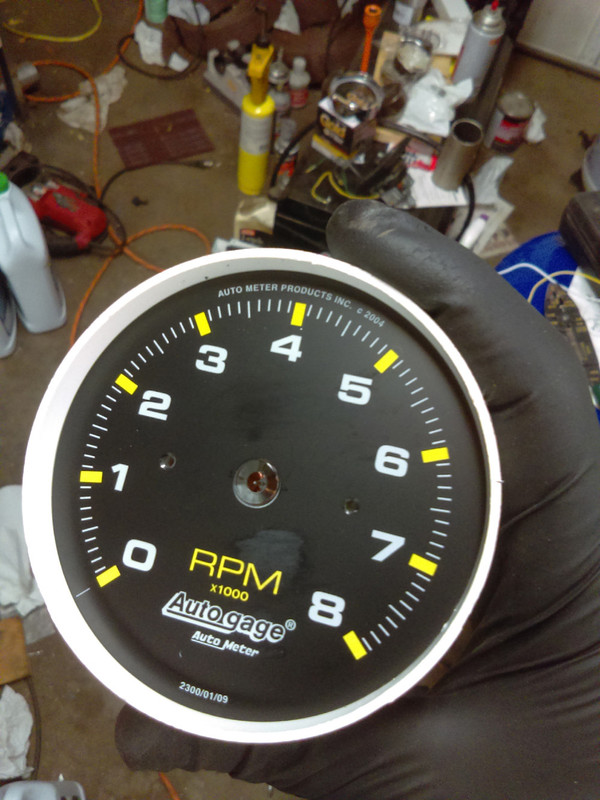
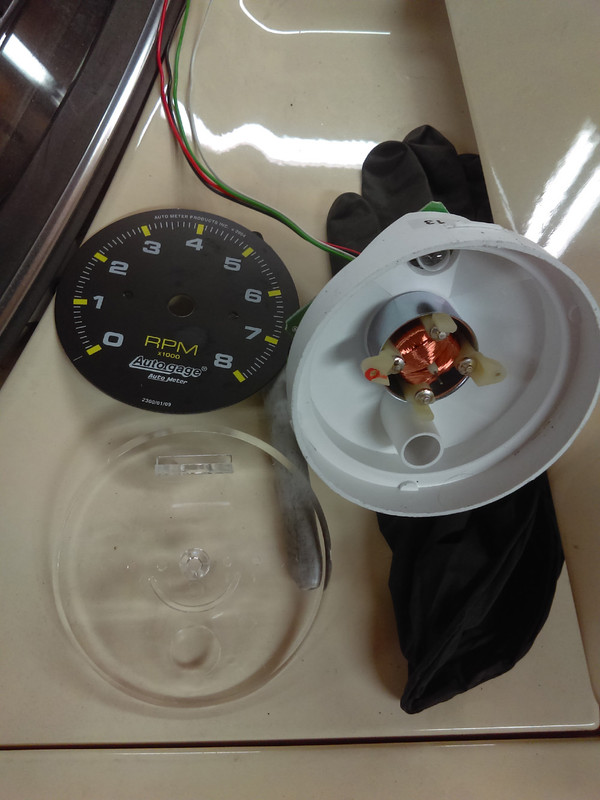
Five: This is the spare cluster from Ugly Betty I took apart. Also, when you take apart a new speedometer, don't use brake cleaner to clean a smudge off the face. It wipes the paint off. Whoops. You can see the mark in the picture. Fortunately it's a cheap tachometer. Also old Ugly Betty. The only annoying thing is the trip meter is broken in Wynona and I'm thinking about putting Ugly Betty's speedometer gauge in her, but that's 161k miles, instead of 125k. I suppose it really doesn't matter. I looked at taking it apart, but I would need special tools and a jig to get it back together and have it work. They make them to not be taken apart by the looks of construction.
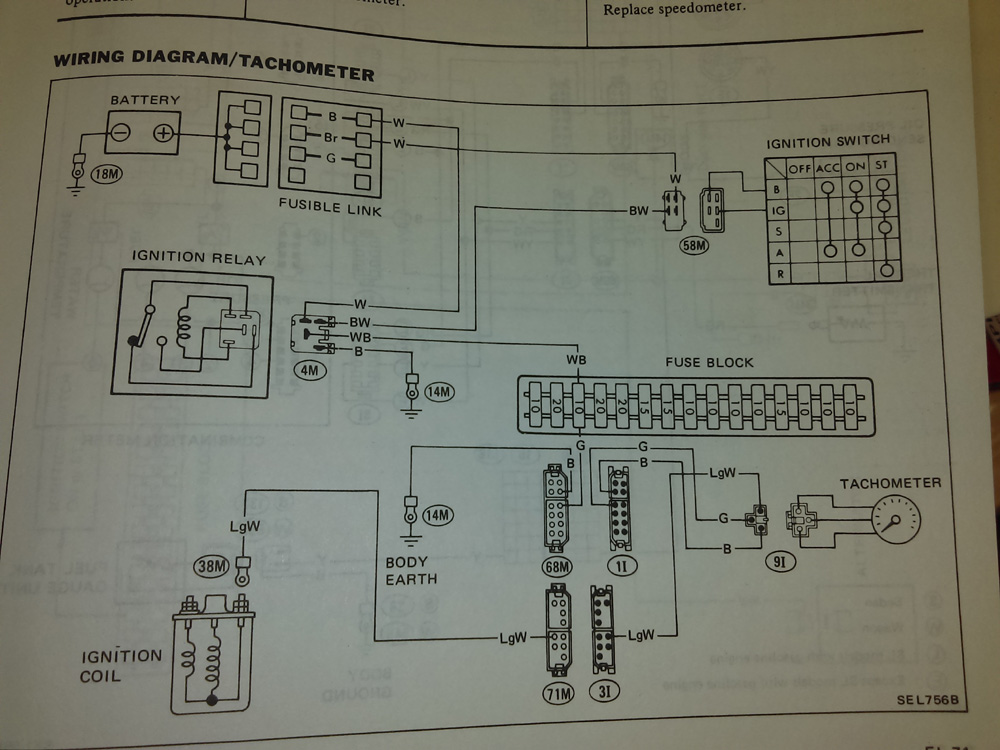
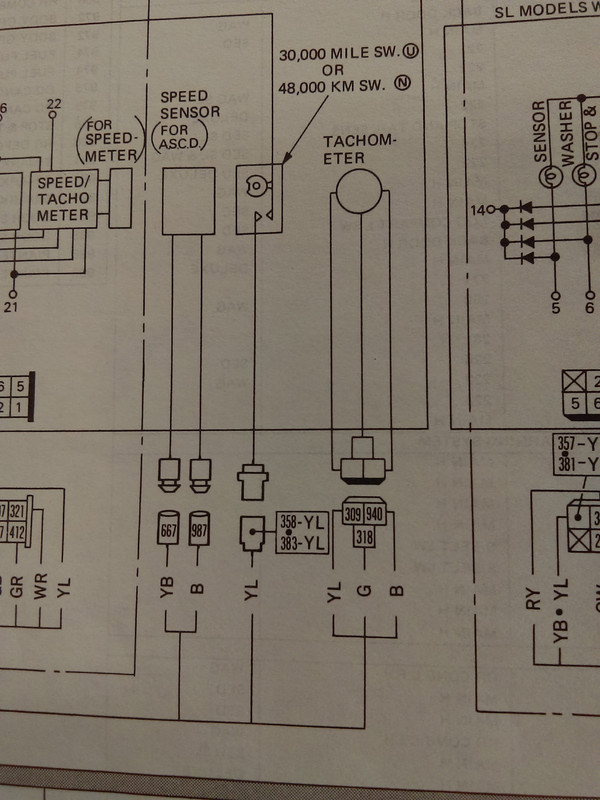
Tachometer wiring diagram!
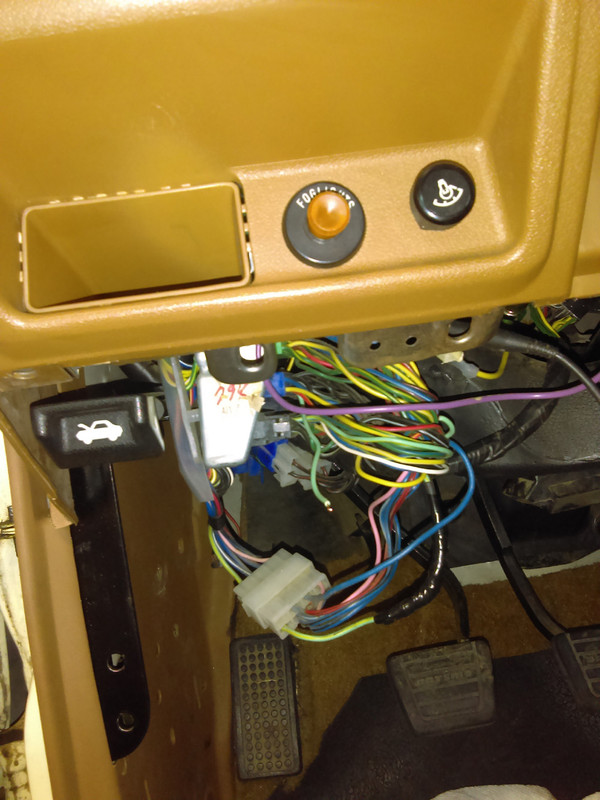
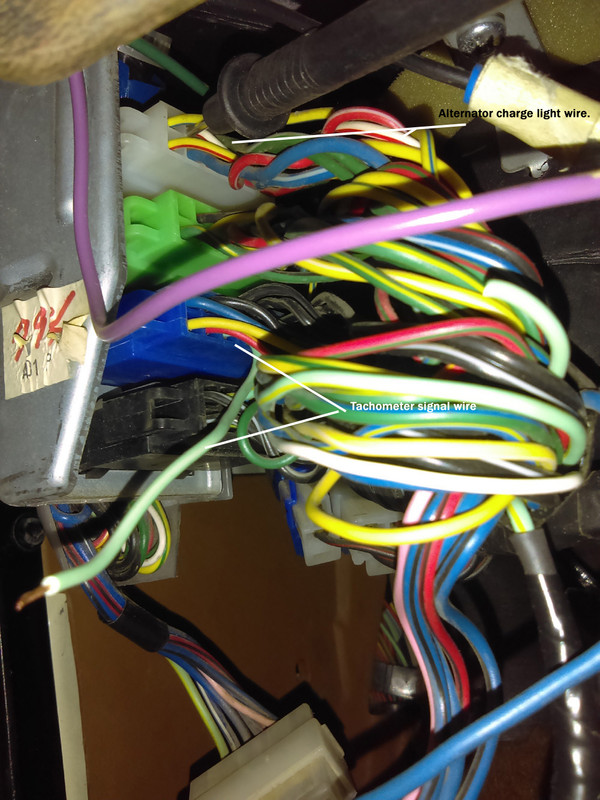
The two wires that are hanging out from the connectors. The upper white connector with the black multimeter lead in it is the alternator charge light. If I recall correctly that circuit goes to ground, then is interrupted when the alternator starts turning. The blue connector two below it has a green with white stripe wire third in that is the tach signal wire. But it will need a fly-by device to actuate it. Not what the RB harness has.
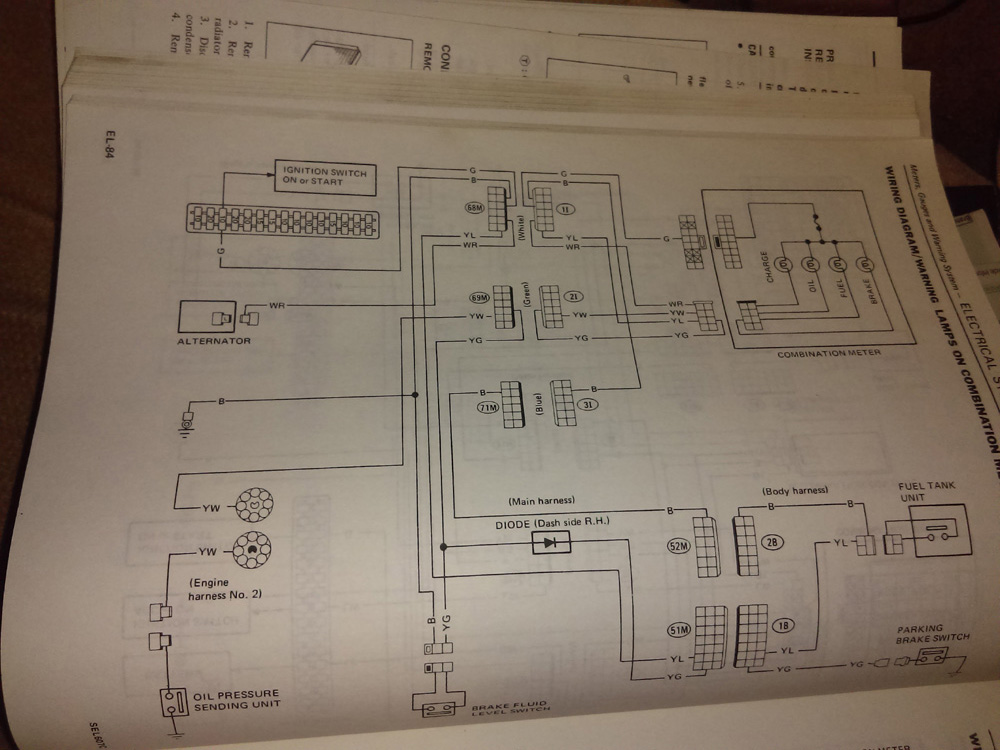
Charge light diagram!

Still working out! 5 months solid now lifting weights! Woohoo! I pulled off the L cylinder head all by myself this time.
One: The old school tach won't work with the new style individual coil pack tach output. However, there is a way to do it according to my electrical genius buddy, so I'll make a tach adapter and try that. I'd like to retain the factory tach if possible. Worst case I can get another tach and work it into the gauge cluster but it wouldn't look right unless I replace all the gauges and even that would be iffy since they're all square. It would be easier to make a plate to go over the cluster then mount round hole gauges in, but like I said, I want it to remain looking factory.
Two: Found the alternator light spout, and the tach output spout and I've marked it for the 810/910 guys because it's really annoying unless you have an FSM. 8 million connectors in this car.
Three: Read up on the internets and found a guy who says a 93-97 J30 AC compressor will work, and it does look identical other than custom hoses.
Four: Wired in a toggle switch for now to the fuel pump relay ground (hidden safety switch) so that's good.
Five: This is the spare cluster from Ugly Betty I took apart. Also, when you take apart a new speedometer, don't use brake cleaner to clean a smudge off the face. It wipes the paint off. Whoops. You can see the mark in the picture. Fortunately it's a cheap tachometer. Also old Ugly Betty. The only annoying thing is the trip meter is broken in Wynona and I'm thinking about putting Ugly Betty's speedometer gauge in her, but that's 161k miles, instead of 125k. I suppose it really doesn't matter. I looked at taking it apart, but I would need special tools and a jig to get it back together and have it work. They make them to not be taken apart by the looks of construction.


Tachometer wiring diagram!


The two wires that are hanging out from the connectors. The upper white connector with the black multimeter lead in it is the alternator charge light. If I recall correctly that circuit goes to ground, then is interrupted when the alternator starts turning. The blue connector two below it has a green with white stripe wire third in that is the tach signal wire. But it will need a fly-by device to actuate it. Not what the RB harness has.

Charge light diagram!


Still working out! 5 months solid now lifting weights! Woohoo! I pulled off the L cylinder head all by myself this time.
"Self proclaimed most active poster on NWD." - Me
- Taterhead
- Posts: 2488
- Joined: Thu Jul 11, 2013 4:18 am
- Cars: '71 510 - Mine
'72 510 - Sons - Location: Central Alabama
- Has thanked: 1350 times
- Been thanked: 232 times
Re: Wynona the wagon's resurrection!
Just put it on jack stands and run it in reverse like Ferris Bueller
- HRH
- Posts: 2366
- Joined: Sat Jan 18, 2014 8:54 pm
- Cars: Lots
- Location: Near flatcat
- Has thanked: 147 times
- Been thanked: 649 times
Re: Wynona the wagon's resurrection!
You know what's funny? It does work in reverse. I can run the odo back if I spin the drill one way. Of course, the drill at full speed only makes 65 mph. So I'd be there a long time to get 40k off the clock, lol. In fact, about a mile a minute. And that would be 40,000 minutes, which is 666.66 hours, which is 27.7 straight days. That's a lot of drill batteries.
"Self proclaimed most active poster on NWD." - Me
- wayno
- Posts: 5309
- Joined: Thu Jun 27, 2013 8:44 pm
- Location: Vancouver WA
- Has thanked: 430 times
- Been thanked: 1295 times
Re: Wynona the wagon's resurrection!
Laugh out loud!!!
“The difference between genius and stupidly is that genius has its limits” Albert Einstein
- DRIVEN
- Posts: 7696
- Joined: Thu Jun 27, 2013 7:05 pm
- Location: I've been everywhere
- Has thanked: 1204 times
- Been thanked: 1180 times
Re: Wynona the wagon's resurrection!
you got something better to do for the next month?
When the only tool you have is a hammer every problem starts to look like a hippy.
- HRH
- Posts: 2366
- Joined: Sat Jan 18, 2014 8:54 pm
- Cars: Lots
- Location: Near flatcat
- Has thanked: 147 times
- Been thanked: 649 times
Re: Wynona the wagon's resurrection!
I dropped of a 720 one piece driveshaft for shortening today. Just need 1 inch longer. That way if the car ever gets switched back to L power, I'll have a driveshaft that will work. Not that I plan to, but it's also a bit harder to lengthen the driveshaft, rather than shortening it. Might even get it back tomorrow, we'll see. At least that will be one more thing done. I'm not too worried about the mileage. I'll just use Ugly Betty's gauge cluster and know it's 40k less. Although, I haven't yanked the original cluster apart. There's a possibility I can fix the trip meter. Doubt it by it's construction, but maybe.
"Self proclaimed most active poster on NWD." - Me
- HRH
- Posts: 2366
- Joined: Sat Jan 18, 2014 8:54 pm
- Cars: Lots
- Location: Near flatcat
- Has thanked: 147 times
- Been thanked: 649 times
Re: Wynona the wagon's resurrection!
Once I get an LSD in the wagon, I hope to do exactly that.
"Self proclaimed most active poster on NWD." - Me
- Taterhead
- Posts: 2488
- Joined: Thu Jul 11, 2013 4:18 am
- Cars: '71 510 - Mine
'72 510 - Sons - Location: Central Alabama
- Has thanked: 1350 times
- Been thanked: 232 times
- HRH
- Posts: 2366
- Joined: Sat Jan 18, 2014 8:54 pm
- Cars: Lots
- Location: Near flatcat
- Has thanked: 147 times
- Been thanked: 649 times
Re: Wynona the wagon's resurrection!
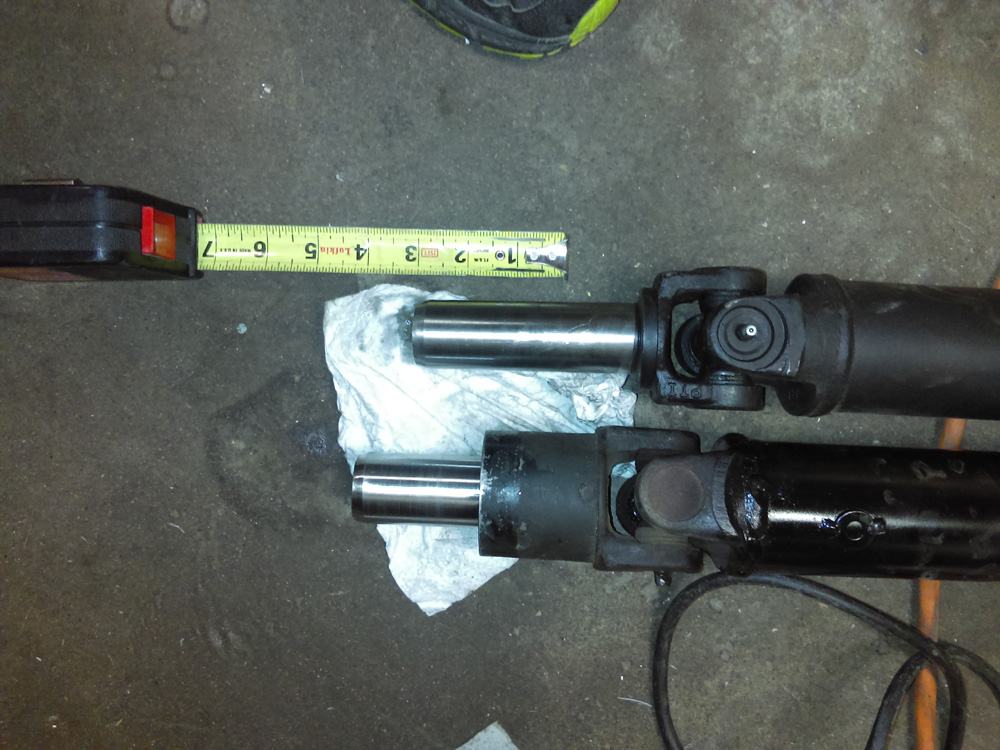
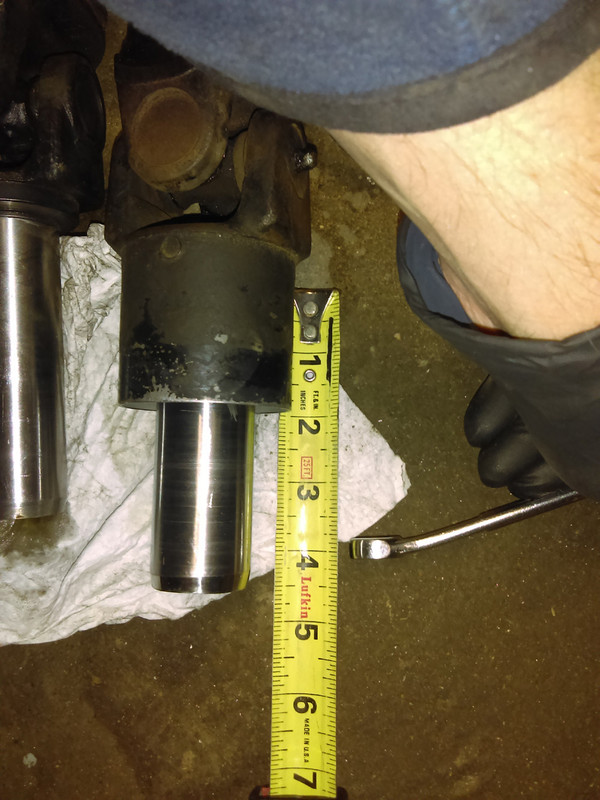
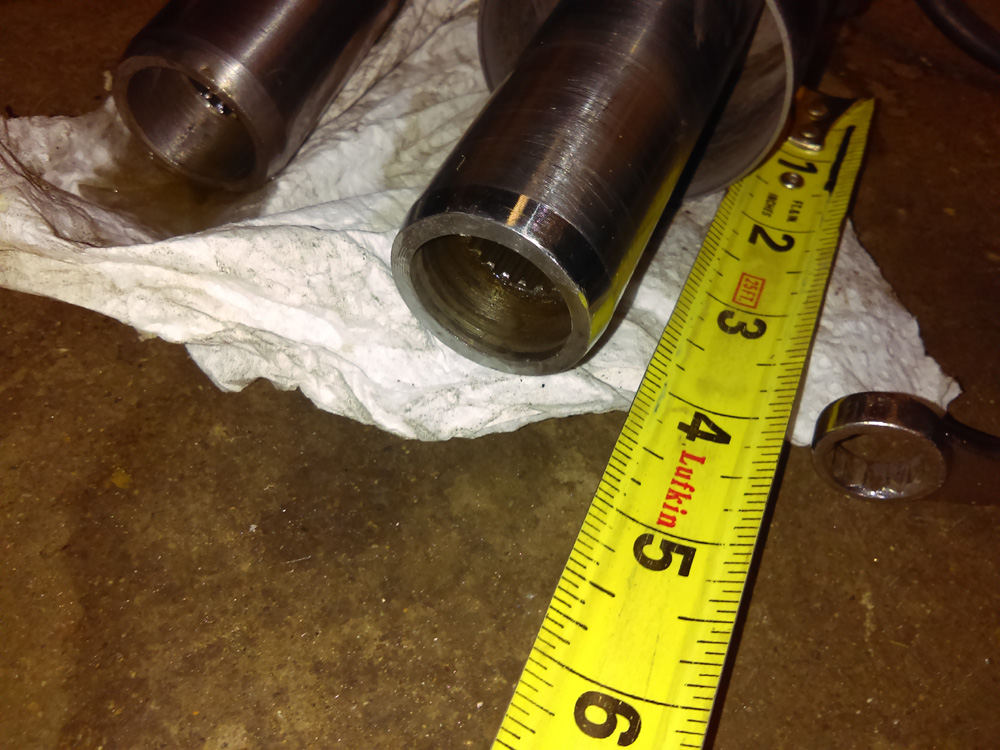
Ok, finally got the driveshaft back. It's only an inch longer than old driveshaft. And really, I probably could have left it as it was. But I now have 3/4- 1" of space between the diff flange and driveshaft flange with it fully pushed into the trans. That's with the car at level height. It doesn't move much, even at full droop and full stuff. Even 3/4" should be more than plenty movement and now I have about 2" of actual engagement of the splines, as opposed to only 1" to 1.25" engagement with the other driveshaft.
Where the 4" mark is marked with the wrench is where the splines actually start inside the shaft, fyi. I never paid attention to how far in it was from the angled snout.
I did have to cut off the driveshaft sleeve to fit it, it's that close. And while the u-joints moved smoothly, I did find one had excessive slop, so I got two new u joints today to put in. Not that I'm surprised. This modified driveline was out of a 720 I cut up for the engine and trans about 5 years ago.
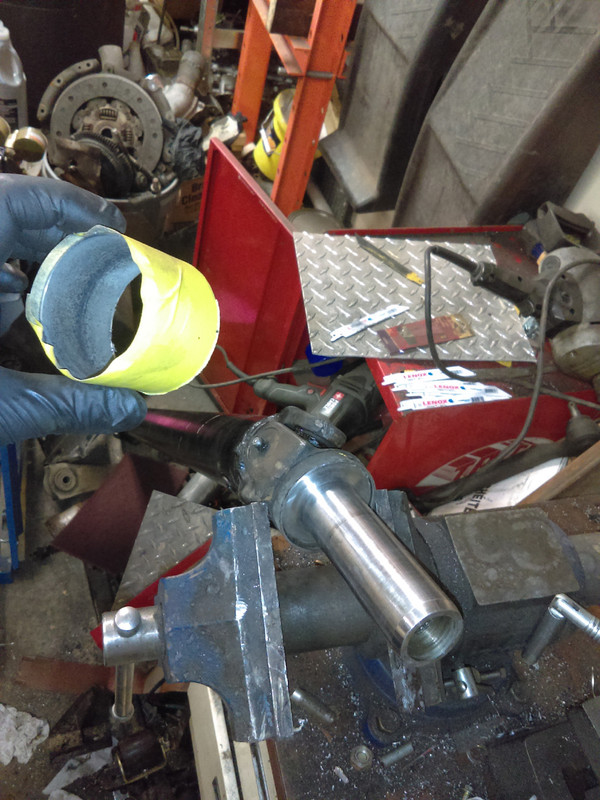
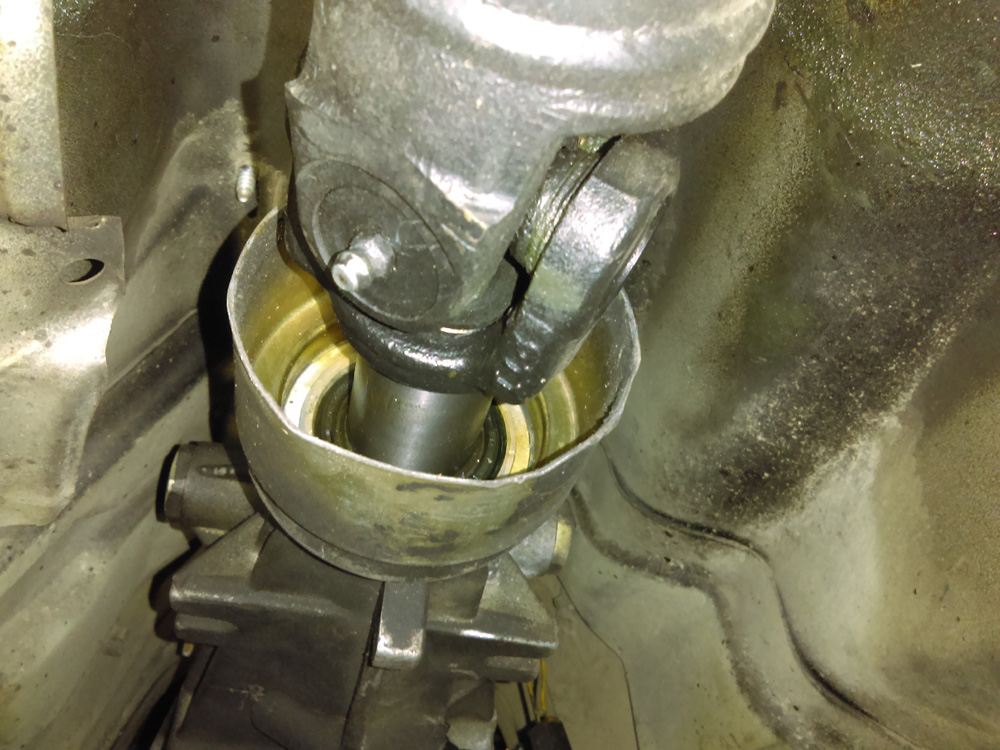
And Chris, my electrical guru is making a different tach adapter that should get my factory tach operational with the RB hopefully.
Where the 4" mark is marked with the wrench is where the splines actually start inside the shaft, fyi. I never paid attention to how far in it was from the angled snout.
I did have to cut off the driveshaft sleeve to fit it, it's that close. And while the u-joints moved smoothly, I did find one had excessive slop, so I got two new u joints today to put in. Not that I'm surprised. This modified driveline was out of a 720 I cut up for the engine and trans about 5 years ago.


And Chris, my electrical guru is making a different tach adapter that should get my factory tach operational with the RB hopefully.
"Self proclaimed most active poster on NWD." - Me
- HRH
- Posts: 2366
- Joined: Sat Jan 18, 2014 8:54 pm
- Cars: Lots
- Location: Near flatcat
- Has thanked: 147 times
- Been thanked: 649 times
Re: Wynona the wagon's resurrection!
Alright, since no one else is working on their Datsuns, I'll post some more updates!! 
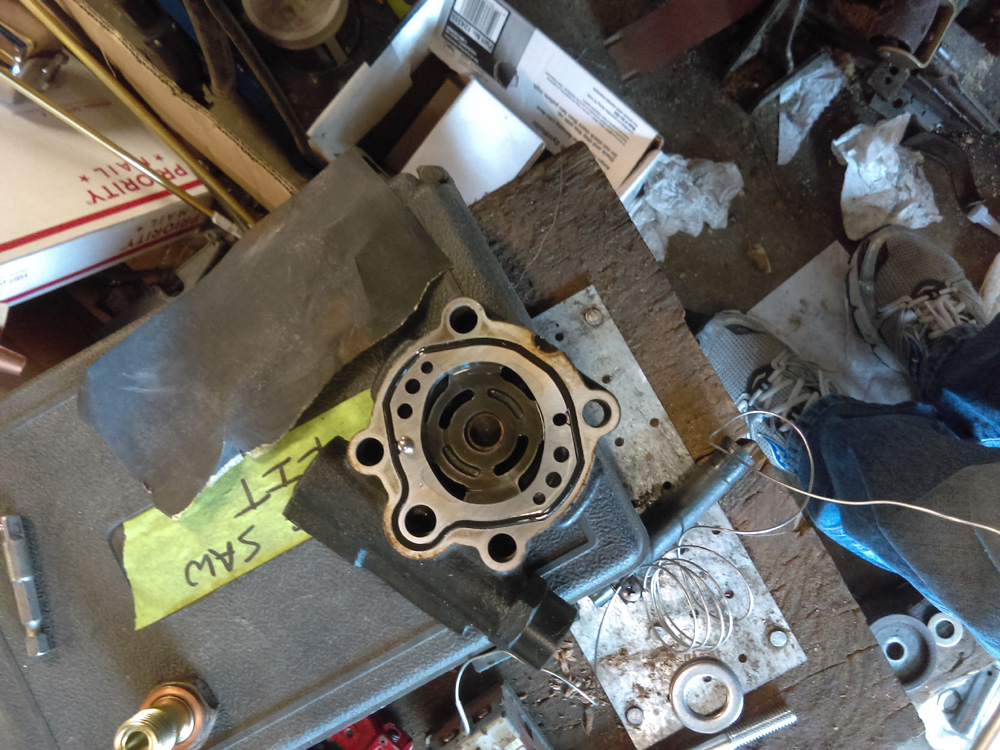
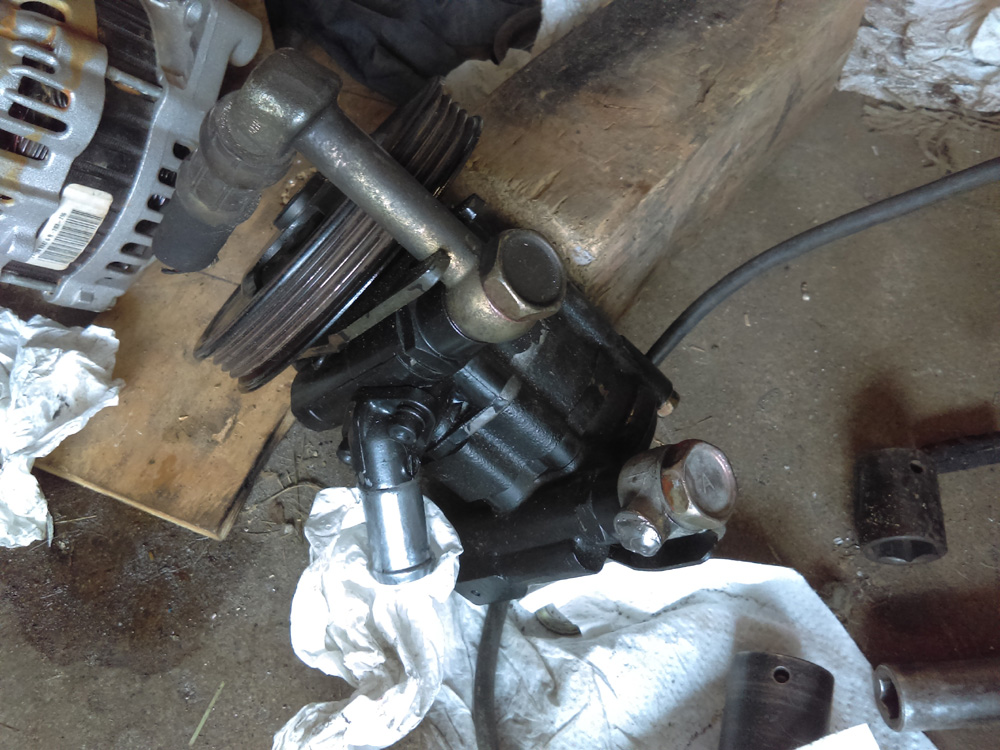
I was going to run two lines for the power steering system due to the rear steer option on my pump that doesn't exist on the wagon. I read a little bit about it and thought it sounded hard. But then today I yanked the power steering pump off and thought, you know, it looks pretty easy. So I put it in the vise and undid 4 bots and yep, the back came off super easy. It's held together like a transmission. Center section and then two caps on either end. The only thing you have to be careful of is when you undo one end, the other end can come off. And when you pull it off, the veins are little square bits of metal that are like mini apex seals. They pop right out. So to un-HICAS the pump, remove the end cap, slide out all the little square seal bits, and presto, you're left with the rotor that turns, but has no more veins to make pressure.
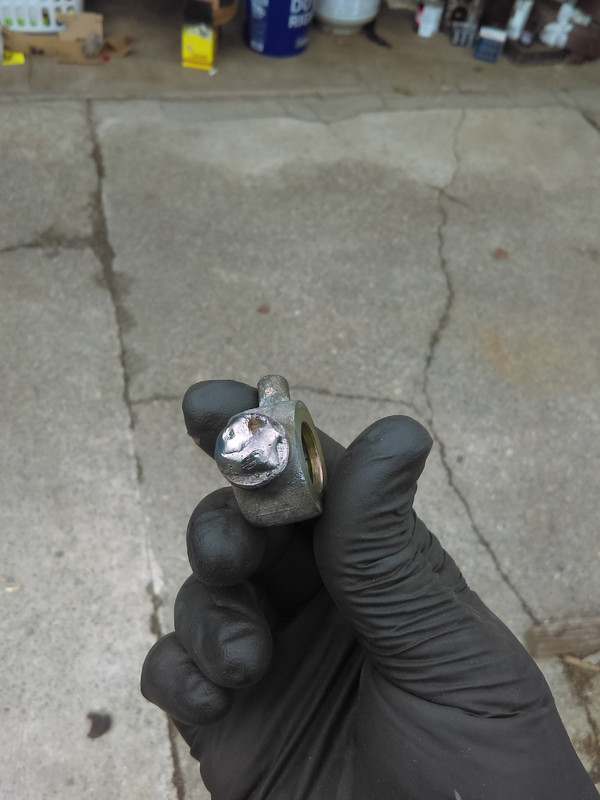
After that, I finally installed the new stinger assembly in the welder so I can use gas again and holy crap, what a better weld!! Cut off one of the mangled original hoses and welded up the banjo fitting so I could make a cap with the original bolt. Goodness knows where I'd find a 16mm banjo fitting cap or a bolt that big and short to put back in.
Anyway, also have an idea on how to modify a 99-04 Frontier power steering hose to be the new pressure hose for the pump. The return line I can cut off where ever and then just put transmission oil cooler line on it and run it to the reservoir. There are two return outlets on the reservoir, figure I'll just get a tee and run them to the one return. I was going to put a power steering cooler in, but really I think it's unnecessary for the wagon. She's not going to be a track toy, should be fine without it.
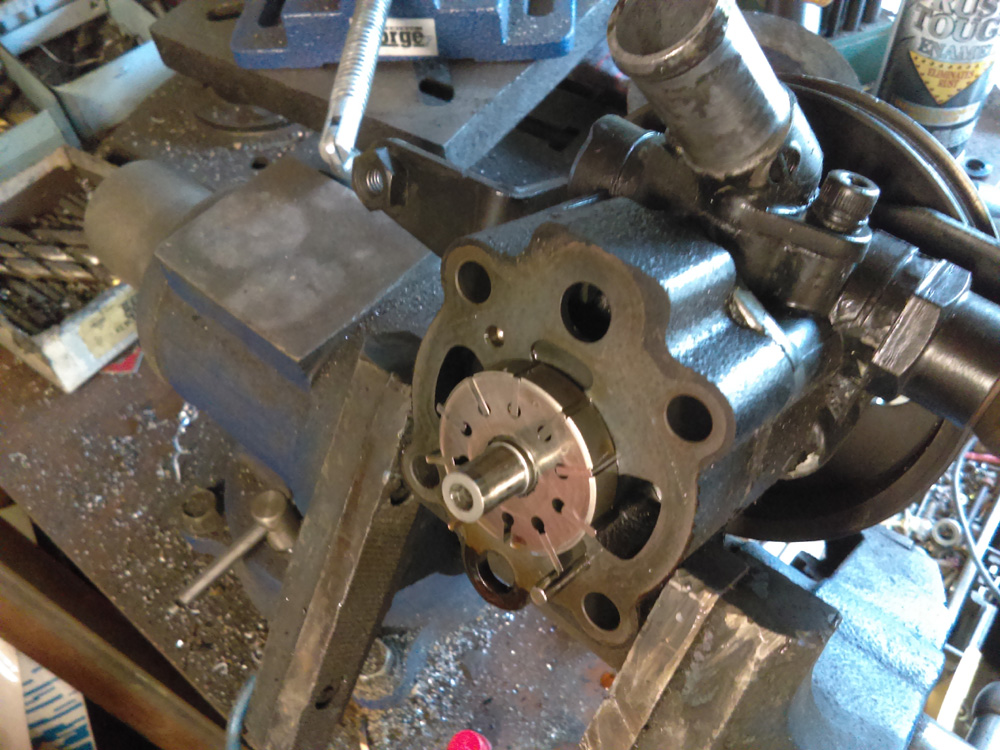
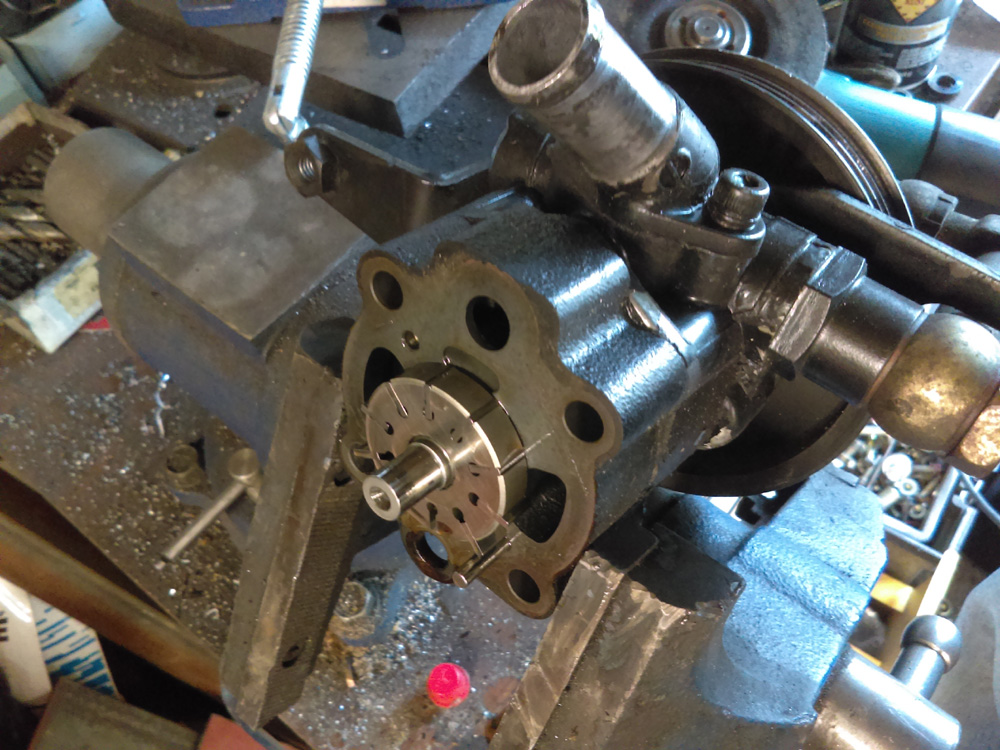


"Self proclaimed most active poster on NWD." - Me
- HRH
- Posts: 2366
- Joined: Sat Jan 18, 2014 8:54 pm
- Cars: Lots
- Location: Near flatcat
- Has thanked: 147 times
- Been thanked: 649 times
Re: Wynona the wagon's resurrection!
Well fuck this shit seven ways from Sunday!! So I made the perfect PS hose. Then ruined it. Tried 7 times to make a inverted flare and the second time I should have left it, but didn't. After getting angry for fucking up a good PS line, I realized the reason I'd failed was because I was using the tool upside down and it's only chamfered on one side. You'd think I'd notice that. But no, just blindly forged ahead thinking I had too much line in or out of the hole.
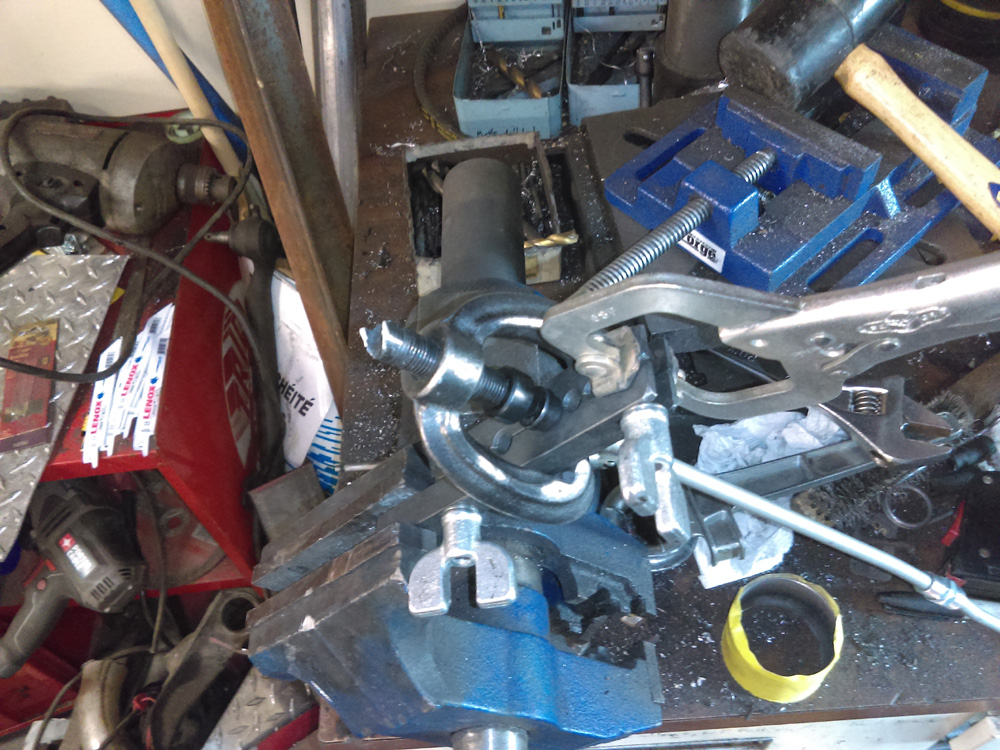
Anyway, got an inverted flare union. Proceeded to get one side done so I can still use the $65 dollar line I cut up. And wouldn't you know it, I saw the tool flex while tightening, so on went the vise grip since I had two more flares to make. And in the process of tightening, I snapped the head off the arbor. Fuck it. I'm done for the night. I'll get some new tools tomorrow and finish the PS system.
Anyway, got an inverted flare union. Proceeded to get one side done so I can still use the $65 dollar line I cut up. And wouldn't you know it, I saw the tool flex while tightening, so on went the vise grip since I had two more flares to make. And in the process of tightening, I snapped the head off the arbor. Fuck it. I'm done for the night. I'll get some new tools tomorrow and finish the PS system.

"Self proclaimed most active poster on NWD." - Me
- wayno
- Posts: 5309
- Joined: Thu Jun 27, 2013 8:44 pm
- Location: Vancouver WA
- Has thanked: 430 times
- Been thanked: 1295 times
Re: Wynona the wagon's resurrection!
That is exactly what vice grips are for!
I have always had trouble with larger flares with that tool, I have done a couple power steering line flares but they were not pretty, but if they don't leak I don't care.
If you were closer I would give you one of mine as I have 3 of them and I only use the one.
I have always had trouble with larger flares with that tool, I have done a couple power steering line flares but they were not pretty, but if they don't leak I don't care.
If you were closer I would give you one of mine as I have 3 of them and I only use the one.
“The difference between genius and stupidly is that genius has its limits” Albert Einstein
- HRH
- Posts: 2366
- Joined: Sat Jan 18, 2014 8:54 pm
- Cars: Lots
- Location: Near flatcat
- Has thanked: 147 times
- Been thanked: 649 times
Re: Wynona the wagon's resurrection!
I actually tried vise grips and even a pipe wrench! They wouldn't grab for crap. Surprising. Since it was already broken I just took the cutting wheel on the grinder and removed an arm to free it. I appreciate it Wayno. Probably just as well. This simple project kicked my ass all yesterday. Hopefully today will yield better results after I get a new tool.
"Self proclaimed most active poster on NWD." - Me
- Laecaon
- Site Admin
- Posts: 4793
- Joined: Wed Jun 26, 2013 7:21 pm
- Cars: '71 510 Wagon, 02 BMW 325i Wagon
- Location: PDX, West side.
- Has thanked: 288 times
- Been thanked: 329 times
Re: Wynona the wagon's resurrection!
Grab a name brand unit. Plumbing Ridgid is not Home Depot Ridgid. Plumbing Ridgid actually leases the name to Home Depot. That or buy a Parker.
This is mine, notice that it has a clamp on the side to pinch directly where you are flaring.$48 on Amazon They also sell individual pieces to do a double flare. I bought the piece to make it do a standard brake line double flare.

This is mine, notice that it has a clamp on the side to pinch directly where you are flaring.$48 on Amazon They also sell individual pieces to do a double flare. I bought the piece to make it do a standard brake line double flare.

- HRH
- Posts: 2366
- Joined: Sat Jan 18, 2014 8:54 pm
- Cars: Lots
- Location: Near flatcat
- Has thanked: 147 times
- Been thanked: 649 times
Re: Wynona the wagon's resurrection!
Not a bad looking unit. I'm debating getting the same kind and I realized I may be doing this wrong. You know how 8mm and 5/16 are ALMOST the same, right? I'm thinking I know why I've had such a time. If I'm modifying a power steering line that is a Japanese line with 14mm inverted flare, I'll bet when I measured it I didn't check carefully enough and it's actually 8mm metric line, instead of 5/16. Explains why my 5/16 tube nut BARELY fits on the line, just that slight difference.
Being that 8mm is .3149, whereas 5/16 is .3125, I think I need to get a metric flaring tool. Fortunately, NAPA has a double set of metric and SAE down at the main store. Looks like I'll be buying that and trying again. I'm betting that was the problem from the get-go.
Devil's in the details!! I still feel so annoyed for having a wasted day yesterday of a bunch of broken crap.
"Self proclaimed most active poster on NWD." - Me
- Laecaon
- Site Admin
- Posts: 4793
- Joined: Wed Jun 26, 2013 7:21 pm
- Cars: '71 510 Wagon, 02 BMW 325i Wagon
- Location: PDX, West side.
- Has thanked: 288 times
- Been thanked: 329 times
Re: Wynona the wagon's resurrection!
That unit has serrations for the smaller sizes, like 5/16. The difference is .0024" A piece of paper is usually .004" thick. That is well within the tolerance of most things. I doubt it has anything to do with SAE vs Metric. I think its more to do with cheap tools trying to work harder materials.
- HRH
- Posts: 2366
- Joined: Sat Jan 18, 2014 8:54 pm
- Cars: Lots
- Location: Near flatcat
- Has thanked: 147 times
- Been thanked: 649 times
Re: Wynona the wagon's resurrection!
Could be, but this is a good SER set from NAPA. And the set I'm looking at getting actually has a separate bar and tooling for metric. As silly as it sounds, that little bit of difference is sometimes a lot. Just like when someone puts 5/16 bolts into an 8 mm head and strips out the threads.
"Self proclaimed most active poster on NWD." - Me