Indy510
Posts: 1084 Joined: Fri Jun 28, 2013 12:14 amLocation: SF, Bay AreaHas thanked: 27 times Been thanked: 132 times
#181
Post
by Indy510 Tue Jan 07, 2020 2:14 pm
While changing the wiper cowl area, I chopped the front of the roof a 1/2" to get rid of the reverse rake roof line. I still hate the c-pillars, but that will get fixed later:
Then I took the body back off:
Indy510
Posts: 1084 Joined: Fri Jun 28, 2013 12:14 amLocation: SF, Bay AreaHas thanked: 27 times Been thanked: 132 times
#183
Post
by Indy510 Tue Jan 07, 2020 2:25 pm
Then I made some wheel tubs that connect the 510 skin to the miata-outline frame:
Indy510
Posts: 1084 Joined: Fri Jun 28, 2013 12:14 amLocation: SF, Bay AreaHas thanked: 27 times Been thanked: 132 times
#184
Post
by Indy510 Tue Jan 07, 2020 2:30 pm
Below the doors is a 1.5x0.75" square tube rocker panel, which helped make the side of the car straight. Then I used an on-sale Eastwood dimple die set to make this filler piece:
Indy510
Posts: 1084 Joined: Fri Jun 28, 2013 12:14 amLocation: SF, Bay AreaHas thanked: 27 times Been thanked: 132 times
#185
Post
by Indy510 Tue Jan 07, 2020 2:35 pm
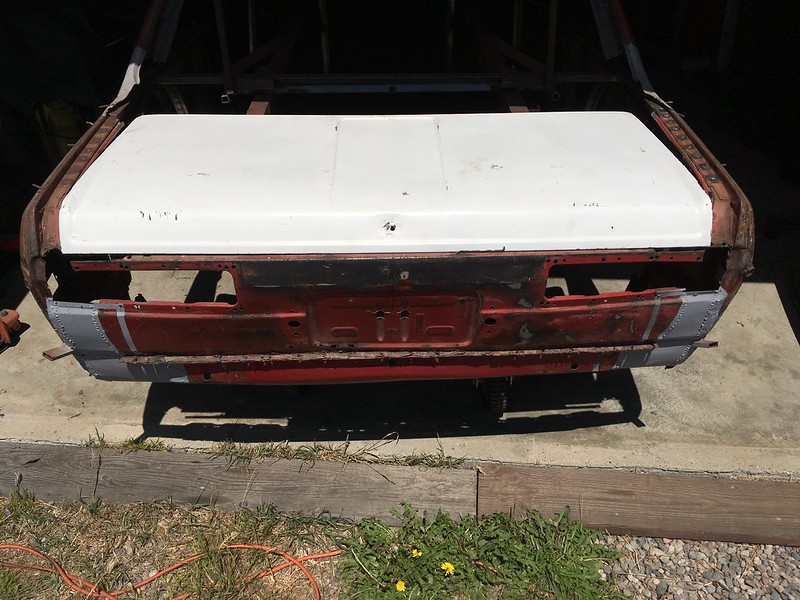
The old trunk lid I made was never going to look right, so I traded some of my last Datsun parts for another trunk lid, with a poorly shaved lock hole:
Indy510
Posts: 1084 Joined: Fri Jun 28, 2013 12:14 amLocation: SF, Bay AreaHas thanked: 27 times Been thanked: 132 times
#186
Post
by Indy510 Tue Jan 07, 2020 2:40 pm
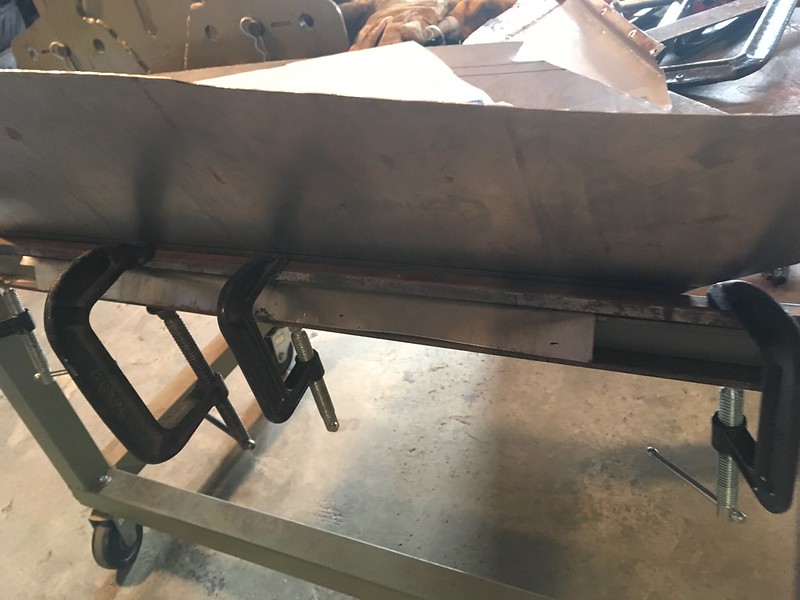
This time, I clamped the trunk to my welding table and made sure everything was flat when I welded it:
Indy510
Posts: 1084 Joined: Fri Jun 28, 2013 12:14 amLocation: SF, Bay AreaHas thanked: 27 times Been thanked: 132 times
#187
Post
by Indy510 Tue Jan 07, 2020 2:43 pm
Now that I had a trunk with the stock shape and curve, I could start building the widened futo-fab window frame:
Indy510
Posts: 1084 Joined: Fri Jun 28, 2013 12:14 amLocation: SF, Bay AreaHas thanked: 27 times Been thanked: 132 times
#188
Post
by Indy510 Tue Jan 07, 2020 2:48 pm
These two pieces started out as a flat angle bend... then I shrunk them both ways until they fit the shape of the window frame:
More dimples... I should have used a smaller hole saw, but all I had was the 1-1/2" one I got for the roll cage:
Last edited by
Indy510 on Tue Jan 07, 2020 3:05 pm, edited 4 times in total.
wayno
Posts: 5320 Joined: Thu Jun 27, 2013 8:44 pmLocation: Vancouver WAHas thanked: 432 times Been thanked: 1302 times
#190
Post
by wayno Tue Jan 07, 2020 4:16 pm
That is the most positive rep I ever gave anyone in my life, talk about customizing, you building a whole new car from scratch almost.
“The difference between genius and stupidly is that genius has its limits” Albert Einstein
DRIVEN
Posts: 7699 Joined: Thu Jun 27, 2013 7:05 pmLocation: I've been everywhereHas thanked: 1210 times Been thanked: 1180 times
#191
Post
by DRIVEN Tue Jan 07, 2020 4:43 pm
This car is still ridiculous and I still really, really like it. Your fab work has really improved over the years. Great work!
When the only tool you have is a hammer every problem starts to look like a hippy.
Indy510
Posts: 1084 Joined: Fri Jun 28, 2013 12:14 amLocation: SF, Bay AreaHas thanked: 27 times Been thanked: 132 times
#193
Post
by Indy510 Thu Feb 06, 2020 11:56 pm
Haha. Thanks everyone.
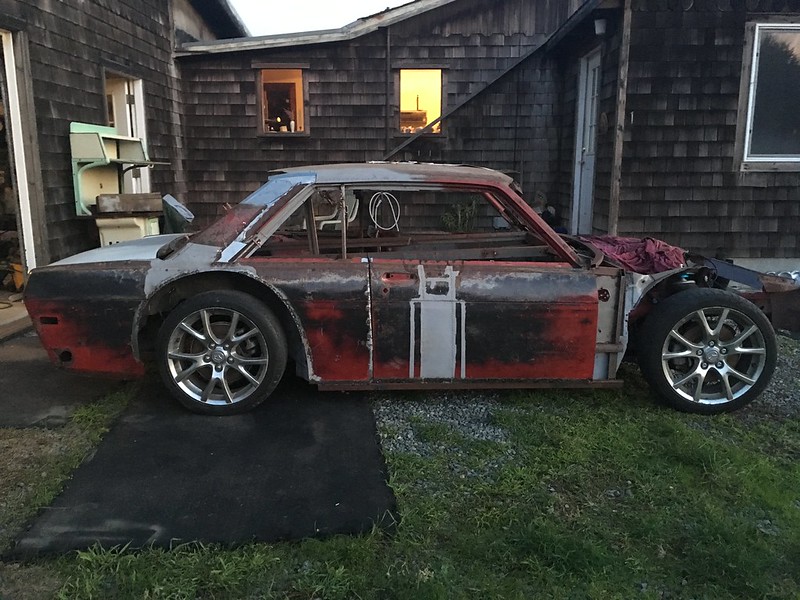
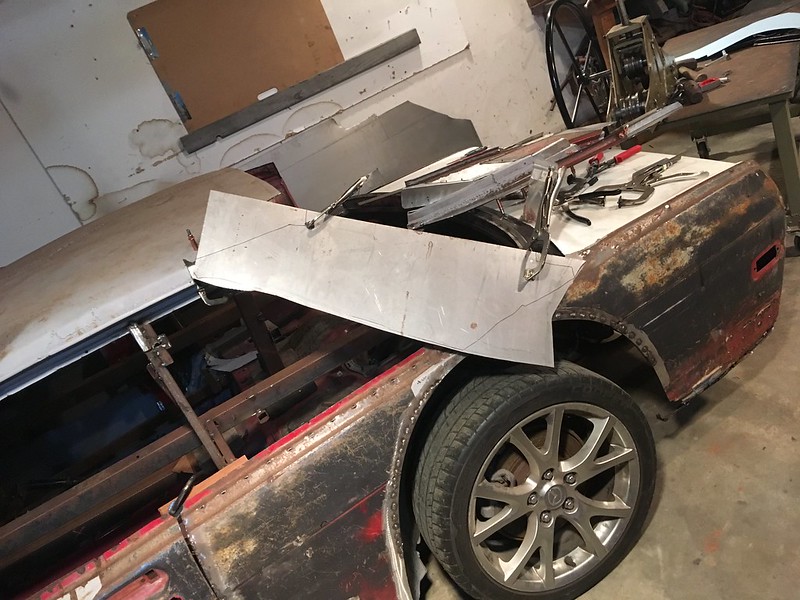
I cut off the c-pillars last month. They were never going to look 'right'. I think my mistake last time was not having all the body panels mocked up. So, this time everything is still on the Miata:
Indy510
Posts: 1084 Joined: Fri Jun 28, 2013 12:14 amLocation: SF, Bay AreaHas thanked: 27 times Been thanked: 132 times
#194
Post
by Indy510 Fri Feb 07, 2020 12:01 am
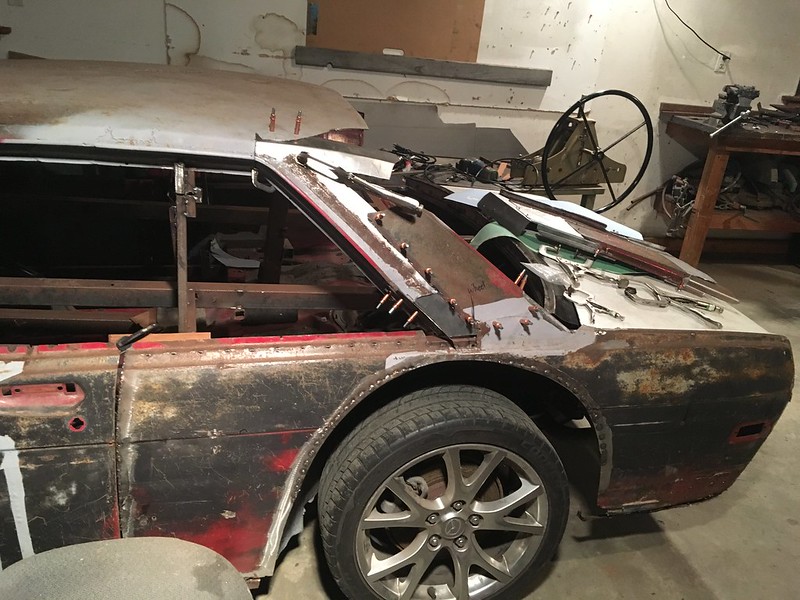
I started with a lightly shrunk 20ag angle at the top, to match the roof's curve:
Indy510
Posts: 1084 Joined: Fri Jun 28, 2013 12:14 amLocation: SF, Bay AreaHas thanked: 27 times Been thanked: 132 times
#195
Post
by Indy510 Fri Feb 07, 2020 12:03 am
It still didn't look 'right', so I leaned the other pillar even farther forward:
Indy510
Posts: 1084 Joined: Fri Jun 28, 2013 12:14 amLocation: SF, Bay AreaHas thanked: 27 times Been thanked: 132 times
#196
Post
by Indy510 Fri Feb 07, 2020 12:10 am
I basically finished both sides, but each pillar was 5 separate pieces of metal and had almost no patina left. So, I made a template off the best one:
Indy510
Posts: 1084 Joined: Fri Jun 28, 2013 12:14 amLocation: SF, Bay AreaHas thanked: 27 times Been thanked: 132 times
#198
Post
by Indy510 Fri Feb 07, 2020 12:17 am
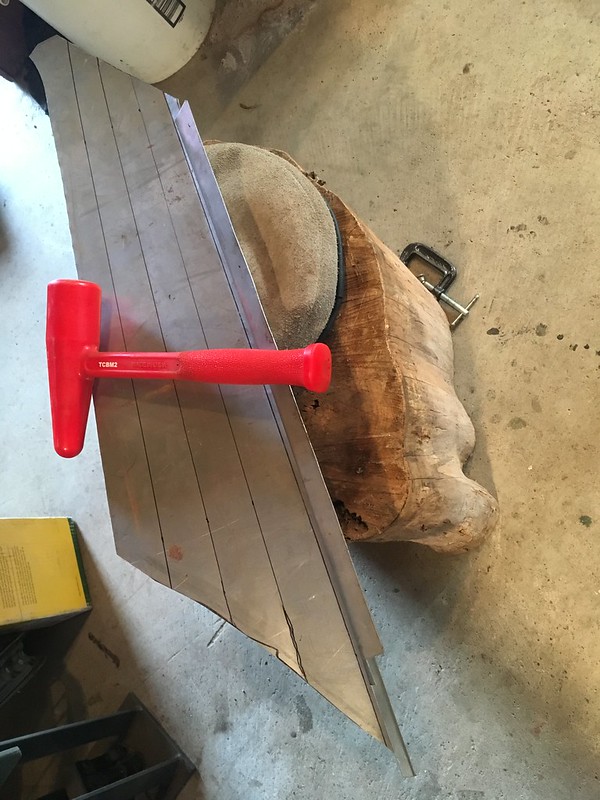
The first two bends were easy on my super cheap folding brake, but the reverse bend was done clamped to a table -- using a soft hammer:
Last edited by
Indy510 on Fri Feb 07, 2020 1:29 am, edited 1 time in total.
Indy510
Posts: 1084 Joined: Fri Jun 28, 2013 12:14 amLocation: SF, Bay AreaHas thanked: 27 times Been thanked: 132 times
#199
Post
by Indy510 Fri Feb 07, 2020 12:20 am
Then I used the same hammer and a sandbag to curve to the flat part:
Indy510
Posts: 1084 Joined: Fri Jun 28, 2013 12:14 amLocation: SF, Bay AreaHas thanked: 27 times Been thanked: 132 times
#200
Post
by Indy510 Fri Feb 07, 2020 12:25 am
But I got carried away English wheeling the hammer marks and made a compound curve where there shouldn't be one: