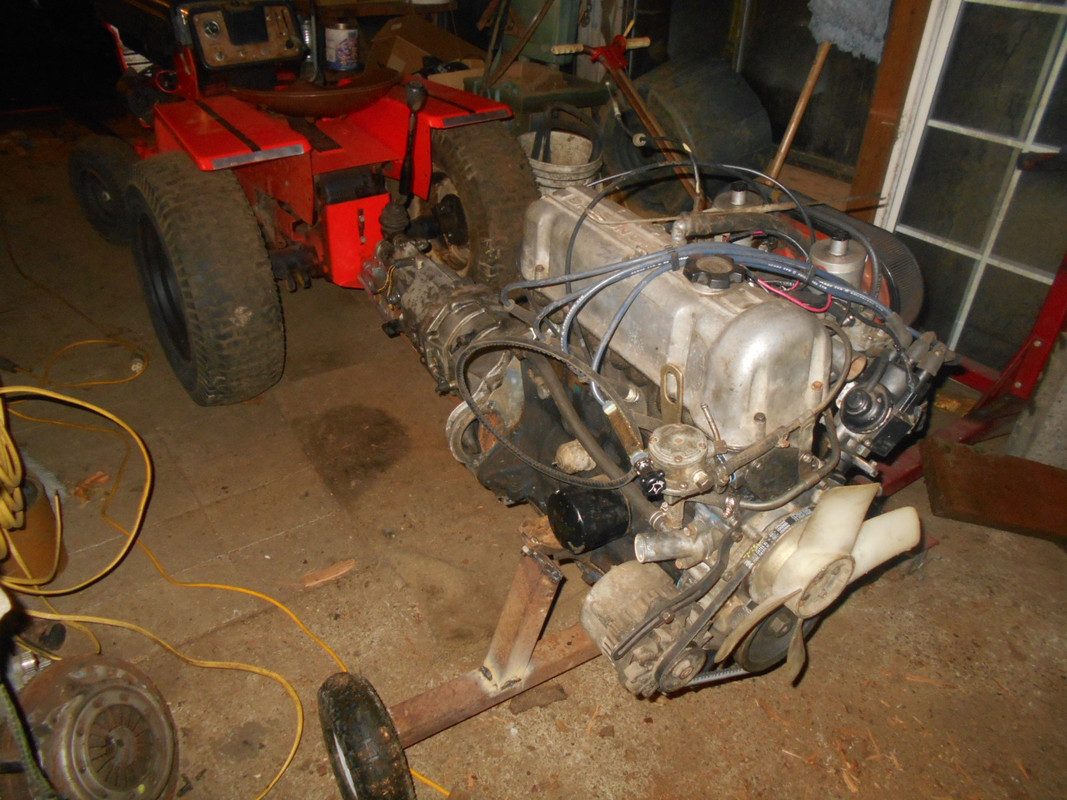
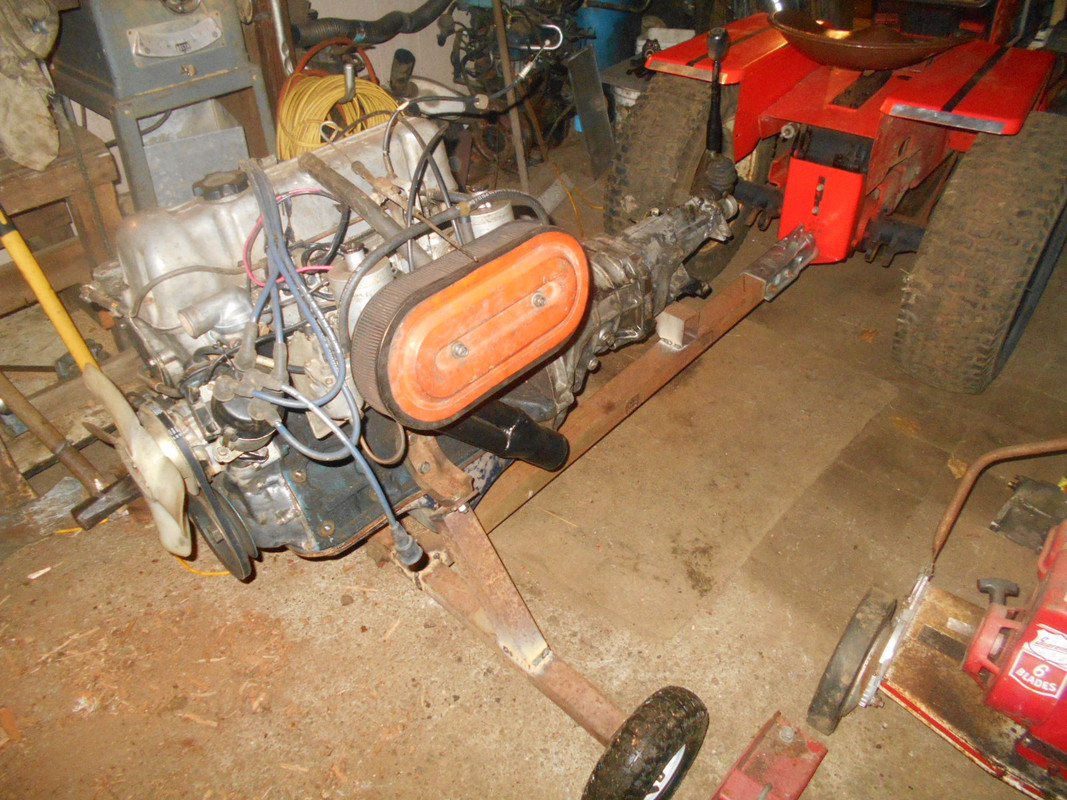
LZ20 engine build
- wayno
- Posts: 5320
- Joined: Thu Jun 27, 2013 8:44 pm
- Location: Vancouver WA
- Has thanked: 432 times
- Been thanked: 1302 times
Re: LZ20 engine build
I have the bearings for the counter/cluster gear shaft now, I may work on the transmission tomorrow if it is raining, or I might make a universal engine test/run stand with wheels that I can tow around behind the tractor.
I would be much easier to move engines around with a engine stand like that, as this winter I have a couple engines to get running and sell as I have decided that I will never use them for what I planned to use them for.
I would be much easier to move engines around with a engine stand like that, as this winter I have a couple engines to get running and sell as I have decided that I will never use them for what I planned to use them for.
“The difference between genius and stupidly is that genius has its limits” Albert Einstein
- wayno
- Posts: 5320
- Joined: Thu Jun 27, 2013 8:44 pm
- Location: Vancouver WA
- Has thanked: 432 times
- Been thanked: 1302 times
Re: LZ20 engine build
OK, I had no idea what I was going to do today, I got up and made breakfast which I don't do that often and watched a little Price is Right. 
First thing I did was figure out the oil dipstick tube, I knocked out a plug in the driver side rear and I took the tube that came with this engine, I then slowly bent the tube to fit this engine the way it is with the L head, it comes up just behind the SUs, I don't think I will have an issue with the firewall.
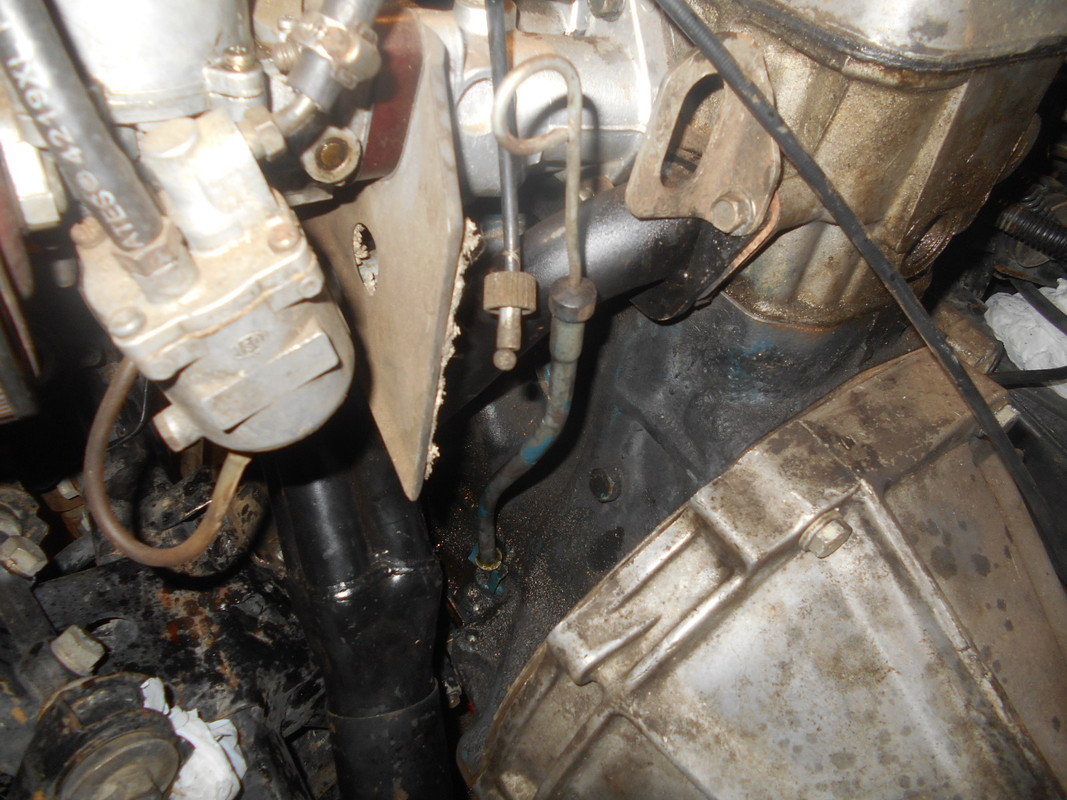
I then decided to put the oil pan on so I lifted the engine out of the frame and cleaned everything up, I bought some high tack and some normal gasket sealer, when I got back home I put the oil pick up tube on, then I put the high tack on the oil pan, I put the regular stuff on the other side and mounted the pan, things went good and I hope it don't leak.
Next I dropped the engine back in the frame, I could not modify the driver side mount to make it easier to drop the engine in as the angle is wrong, so I put the mount bracket on the motor mount and then dropped the engine into position then ran the bracket mount bolts into the block, I let the engine settle and the tightened the motor mount nut on both sides, it is tight but everything clears.
Next I stood there and looked at it, I then decided to get it ready to start, so first I set up a radiator, I used the radiator hoses to hold it in position, I put a 2X2 under it to hold it up, I then used a couple clamps to hold that there and used zip ties to stabilize the whole thing.
Next I put a normal drain plug in the oil pan, I then filled both the engine and transmission with fluids, I found a oil filter and mounted that, then I found an electric fuel pump and piped the fuel out of a gas can(92 octane, ethanol free), and I pushed fuel thru the mechanical fuel pump.
I then found a coil and wired that in and I bolted it to one of the radiator mount holes, then tested for spark, I had spark.
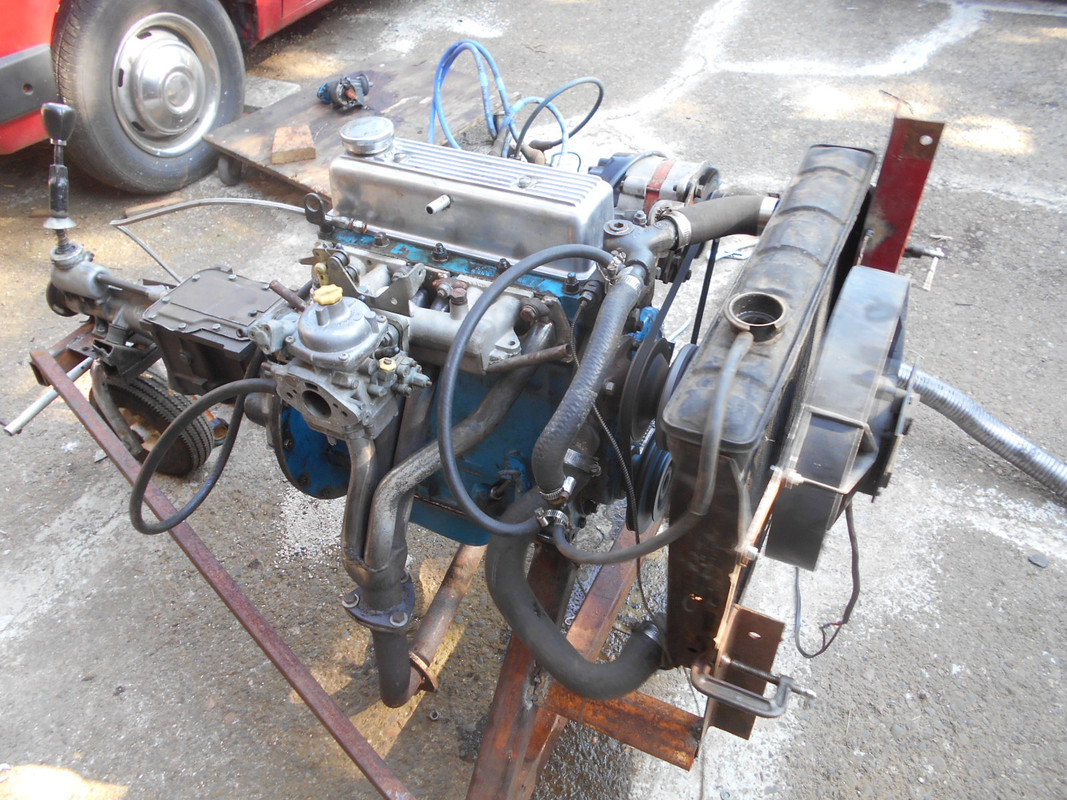
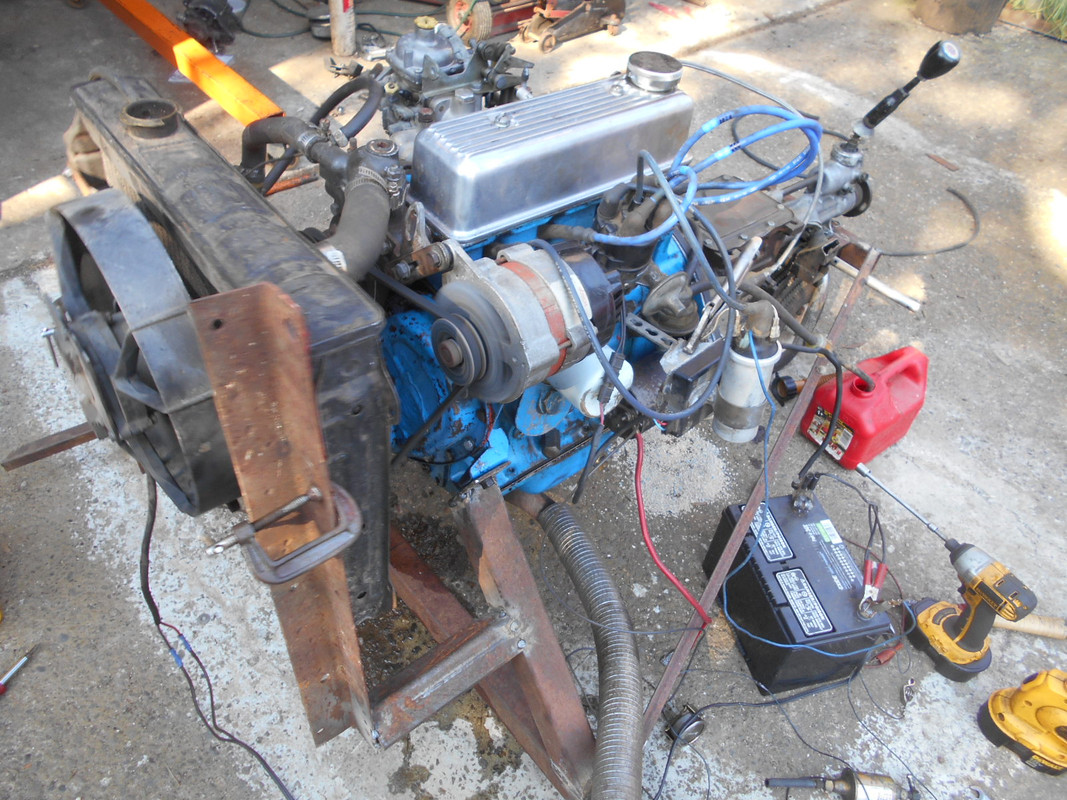
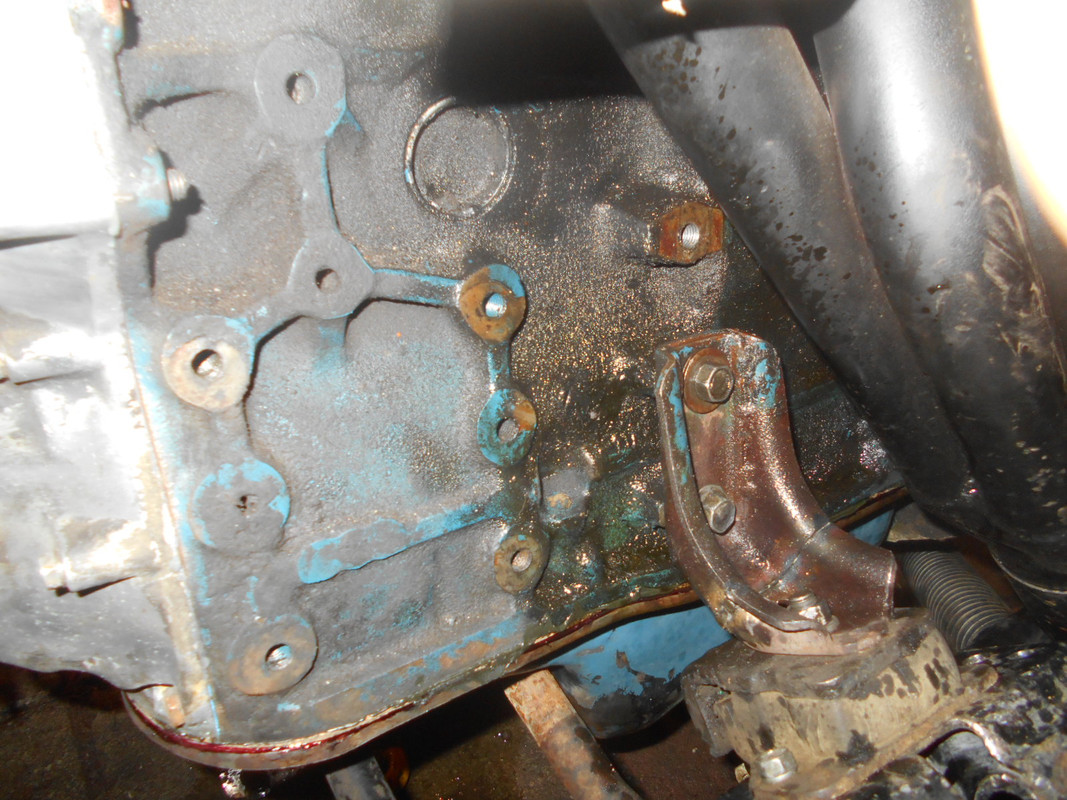
I have a trigger for the starter, I tested it and it turned over, I then connected everything to power, pulled the choke lever on all the way and hit the trigger and got nothing, so I squirted a little fuel into both SUs, tried again and it hit but would not start, after a couple more hits I turned the distributor all the way retarded and got nothing, so I turned it all the way advanced and it started and wound up to likely 3000rpms, I shut it down, adjusted both carbs for less RPMs and then ran it for a couple minutes then shut it down, added water to the radiator, adjusted the carbs again for less RPMs, and started it up again, I started looking for leaks and found one, it turns out there was another dip stick hole that was open and squirting oil up the side of the block, I put the plug I removed from the rear into the front hole, you can see where the oil splashed up the side of the block in front of the engine mount bracket in the photo below.
I next found the timing light and hooked it up, then I started it and timed it to 5/6 degrees BTDC(it started at 20 degrees BTDC), I adjusted the carbs and got it running pretty good, it's kinda noisy as I just put some flex pipe between the head pipe and muffler, the flex pipe was to big, but it was way better than straight pipe, I warmed the engine up and ran it for likely half an hour or more, it runs good.
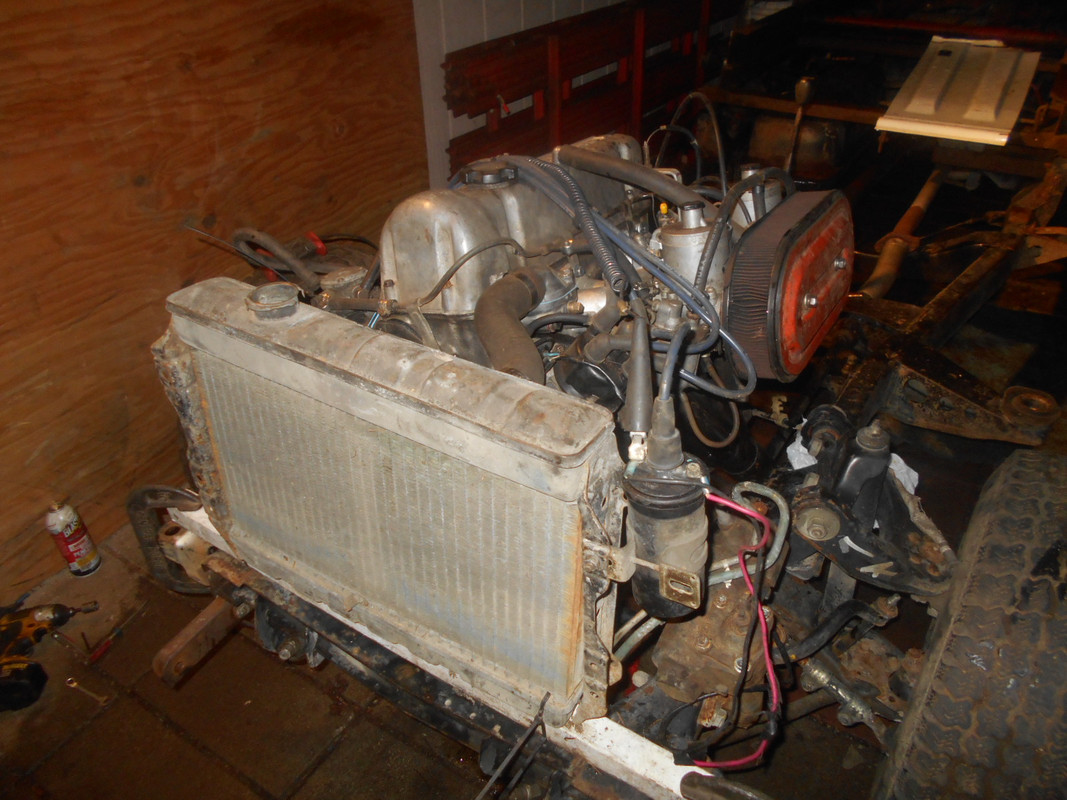
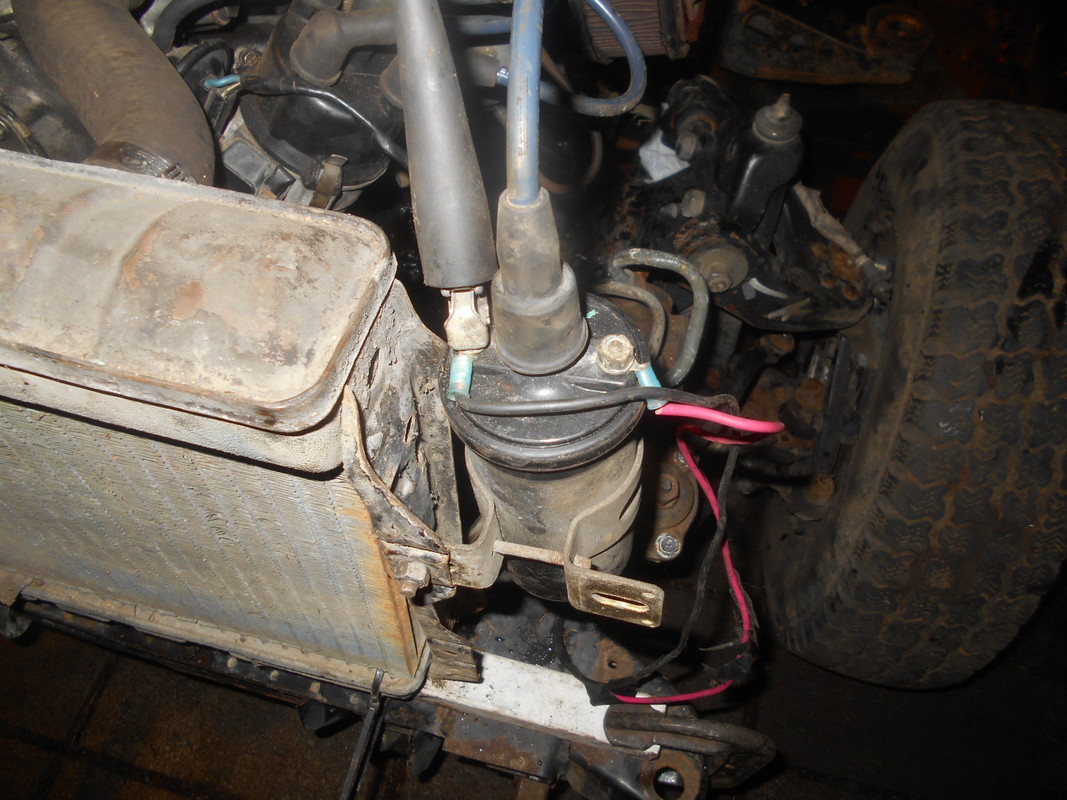
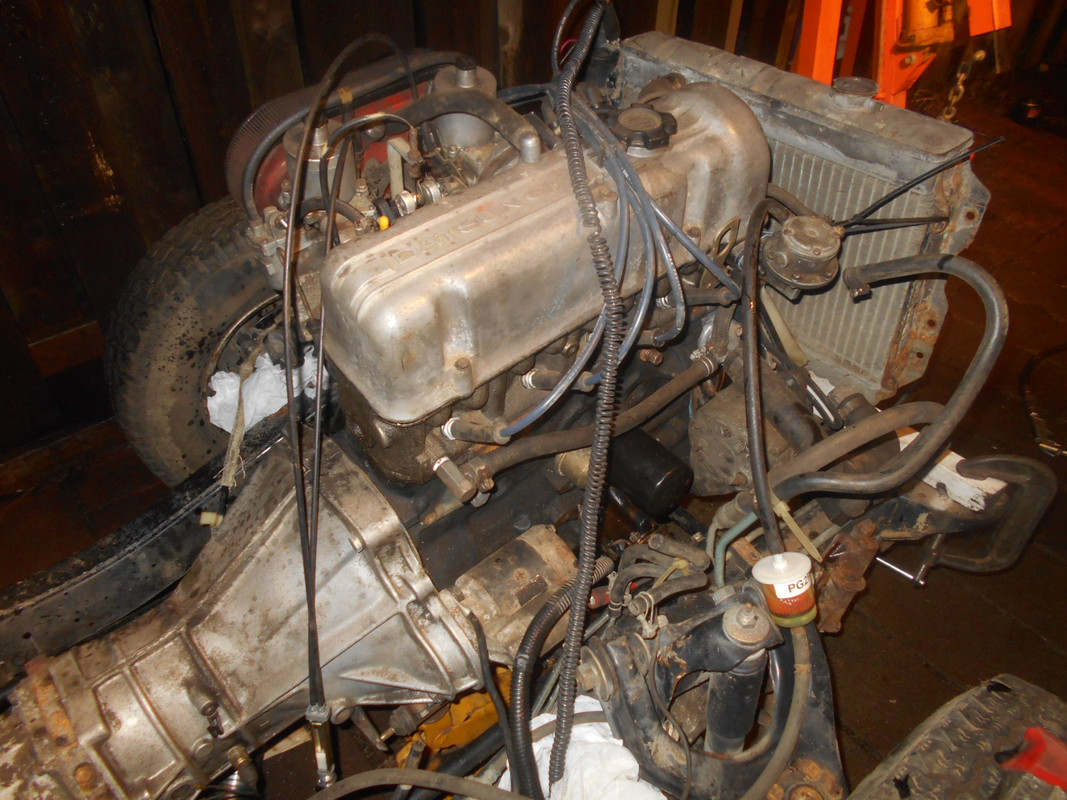
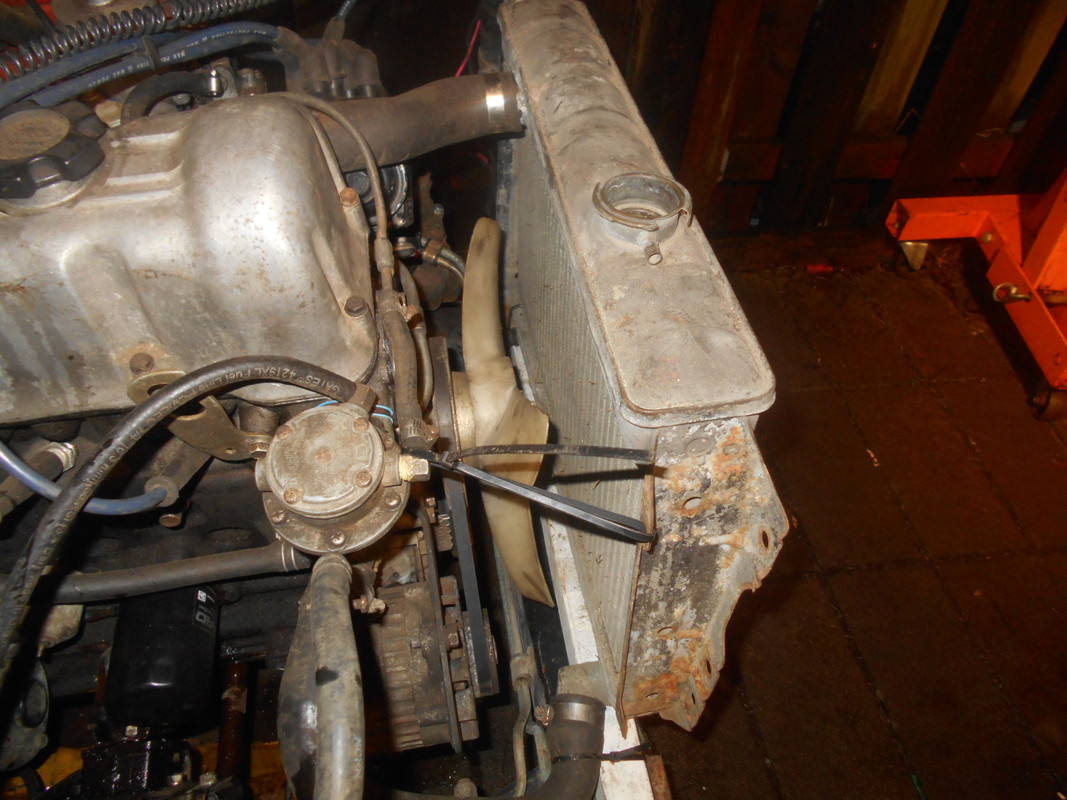
This did not go off without problems, the first oil filter had a hole in it, next I ruined a radiator as the 2X2 fell out and the rad moved into the fan before I had put water into the system, when I added water to the radiator it started pouring out of the bottom of the rad, and I replace that one with another and then water started pouring out of the dual SU intake where a manifold plug was forgotten, I got all this stuff fixed as it appeared/I found it including the dipstick hole.
I removed the electric fuel pump and ran it another 10 minutes to make sure the mechanical pump was working and it was.
This engine didn't turn over like it was a very high compression engine, it is a Z24 starter though, I expected it to act different, the Dual SUs have been sitting around for years in a bucket, they worked pretty good also, I hope it starts easy tomorrow.
First thing I did was figure out the oil dipstick tube, I knocked out a plug in the driver side rear and I took the tube that came with this engine, I then slowly bent the tube to fit this engine the way it is with the L head, it comes up just behind the SUs, I don't think I will have an issue with the firewall.

I then decided to put the oil pan on so I lifted the engine out of the frame and cleaned everything up, I bought some high tack and some normal gasket sealer, when I got back home I put the oil pick up tube on, then I put the high tack on the oil pan, I put the regular stuff on the other side and mounted the pan, things went good and I hope it don't leak.
Next I dropped the engine back in the frame, I could not modify the driver side mount to make it easier to drop the engine in as the angle is wrong, so I put the mount bracket on the motor mount and then dropped the engine into position then ran the bracket mount bolts into the block, I let the engine settle and the tightened the motor mount nut on both sides, it is tight but everything clears.
Next I stood there and looked at it, I then decided to get it ready to start, so first I set up a radiator, I used the radiator hoses to hold it in position, I put a 2X2 under it to hold it up, I then used a couple clamps to hold that there and used zip ties to stabilize the whole thing.
Next I put a normal drain plug in the oil pan, I then filled both the engine and transmission with fluids, I found a oil filter and mounted that, then I found an electric fuel pump and piped the fuel out of a gas can(92 octane, ethanol free), and I pushed fuel thru the mechanical fuel pump.
I then found a coil and wired that in and I bolted it to one of the radiator mount holes, then tested for spark, I had spark.
I have a trigger for the starter, I tested it and it turned over, I then connected everything to power, pulled the choke lever on all the way and hit the trigger and got nothing, so I squirted a little fuel into both SUs, tried again and it hit but would not start, after a couple more hits I turned the distributor all the way retarded and got nothing, so I turned it all the way advanced and it started and wound up to likely 3000rpms, I shut it down, adjusted both carbs for less RPMs and then ran it for a couple minutes then shut it down, added water to the radiator, adjusted the carbs again for less RPMs, and started it up again, I started looking for leaks and found one, it turns out there was another dip stick hole that was open and squirting oil up the side of the block, I put the plug I removed from the rear into the front hole, you can see where the oil splashed up the side of the block in front of the engine mount bracket in the photo below.

I next found the timing light and hooked it up, then I started it and timed it to 5/6 degrees BTDC(it started at 20 degrees BTDC), I adjusted the carbs and got it running pretty good, it's kinda noisy as I just put some flex pipe between the head pipe and muffler, the flex pipe was to big, but it was way better than straight pipe, I warmed the engine up and ran it for likely half an hour or more, it runs good.


This did not go off without problems, the first oil filter had a hole in it, next I ruined a radiator as the 2X2 fell out and the rad moved into the fan before I had put water into the system, when I added water to the radiator it started pouring out of the bottom of the rad, and I replace that one with another and then water started pouring out of the dual SU intake where a manifold plug was forgotten, I got all this stuff fixed as it appeared/I found it including the dipstick hole.
I removed the electric fuel pump and ran it another 10 minutes to make sure the mechanical pump was working and it was.
This engine didn't turn over like it was a very high compression engine, it is a Z24 starter though, I expected it to act different, the Dual SUs have been sitting around for years in a bucket, they worked pretty good also, I hope it starts easy tomorrow.
“The difference between genius and stupidly is that genius has its limits” Albert Einstein
- DRIVEN
- Posts: 7699
- Joined: Thu Jun 27, 2013 7:05 pm
- Location: I've been everywhere
- Has thanked: 1210 times
- Been thanked: 1180 times
Re: LZ20 engine build
Busy day.
When the only tool you have is a hammer every problem starts to look like a hippy.
- wayno
- Posts: 5320
- Joined: Thu Jun 27, 2013 8:44 pm
- Location: Vancouver WA
- Has thanked: 432 times
- Been thanked: 1302 times
Re: LZ20 engine build
If you were looking over my shoulder you would realize I don't really get that much done anymore, someone with a plan could have done all I did in 3 hours or less, it took me over 6 hours, I take my time and try not to make mistakes, well I try not to make as many mistakes.
I actually had to replace parts I removed trying to make a front sump work, I do a lot of extra things like that I don't mention.
I actually had to replace parts I removed trying to make a front sump work, I do a lot of extra things like that I don't mention.
“The difference between genius and stupidly is that genius has its limits” Albert Einstein
- wayno
- Posts: 5320
- Joined: Thu Jun 27, 2013 8:44 pm
- Location: Vancouver WA
- Has thanked: 432 times
- Been thanked: 1302 times
Re: LZ20 engine build
I started this engine again this evening after I checked the oil level and it was good although I was hoping it would start sooner as it turned over for at least 5 seconds before hitting/starting.
One thing I didn't think would work out worked out anyway, I am using a Z20 block with a L head, so it is tilted differently than it was meant to be when stock, yet I used one of the stock locations for the Z block oil dipstick, keep in mind that the oil pan is also an L block type, after adding the 5 quarts of oil I checked and it appeared to be a quart too full but I had not started it yet as the oil filter was empty, so in the end I thought I would have to make a new line on the dipstick to show where full was and I don't have to as it works the way it is, this actually baffles me.
In my head I see the driver side of the block being lower when tilted this way compared to where it was mounted as a Z block, as in my head I see the crank being the center and when the block is tilted to one side or the other I see the dipstick height changing on both sides, maybe I just got lucky, but when I added the oil I checked the dipstick before doing anything else.
I cannot actually say where this dipstick I used came from, I believe it came from this block but it was in the 521 stuff/tub, the oil dipstick tube was sitting near where the Z20 block was disassembled on top of a tub, but I could not find the dipstick, and since the dip stick tube has bends in it the L20b type of dipstick could not be used in this tube as it is not flexible, so again I got lucky I found what I needed, it helps when I keep anything that looks good, but that is bad as all these parts take room to store.
“The difference between genius and stupidly is that genius has its limits” Albert Einstein
- HRH
- Posts: 2366
- Joined: Sat Jan 18, 2014 8:54 pm
- Cars: Lots
- Location: Near flatcat
- Has thanked: 147 times
- Been thanked: 649 times
Re: LZ20 engine build
You just gave me a great idea of cutting off a front frame section off a pickup and making an engine running stand out of it Wayno! 
"Self proclaimed most active poster on NWD." - Me
- wayno
- Posts: 5320
- Joined: Thu Jun 27, 2013 8:44 pm
- Location: Vancouver WA
- Has thanked: 432 times
- Been thanked: 1302 times
Re: LZ20 engine build
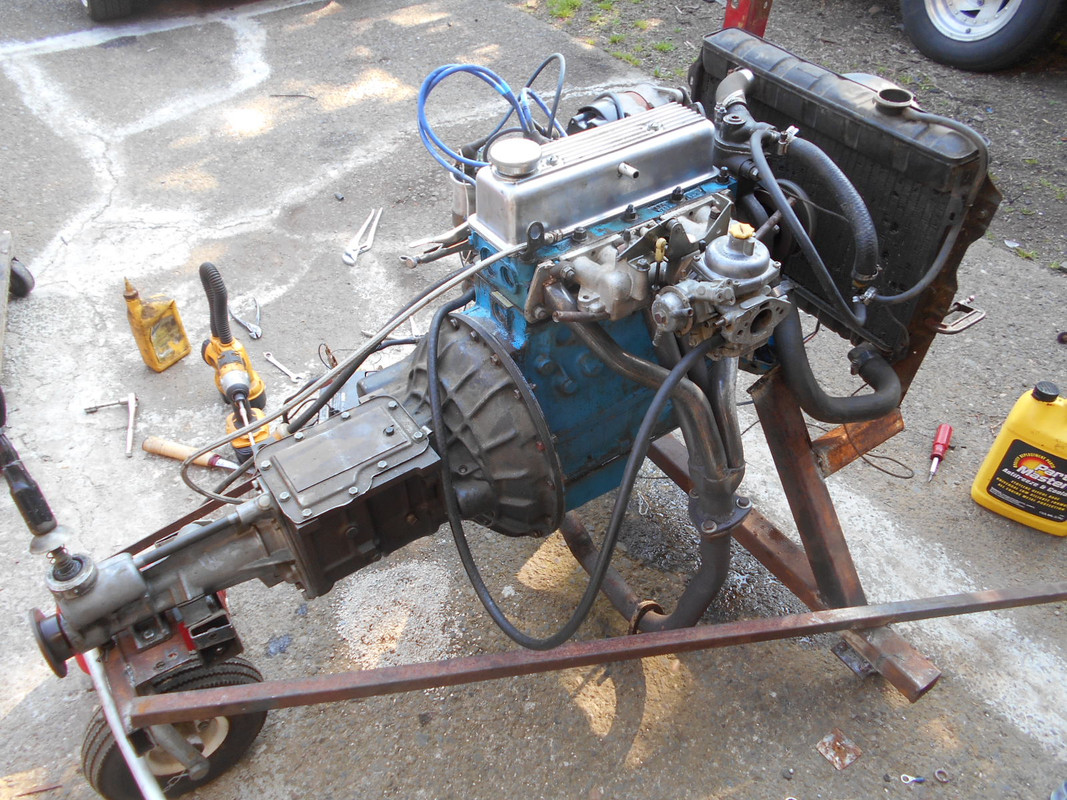
There are better stands to have that take less room, this one I can haul around behind my small tractor.
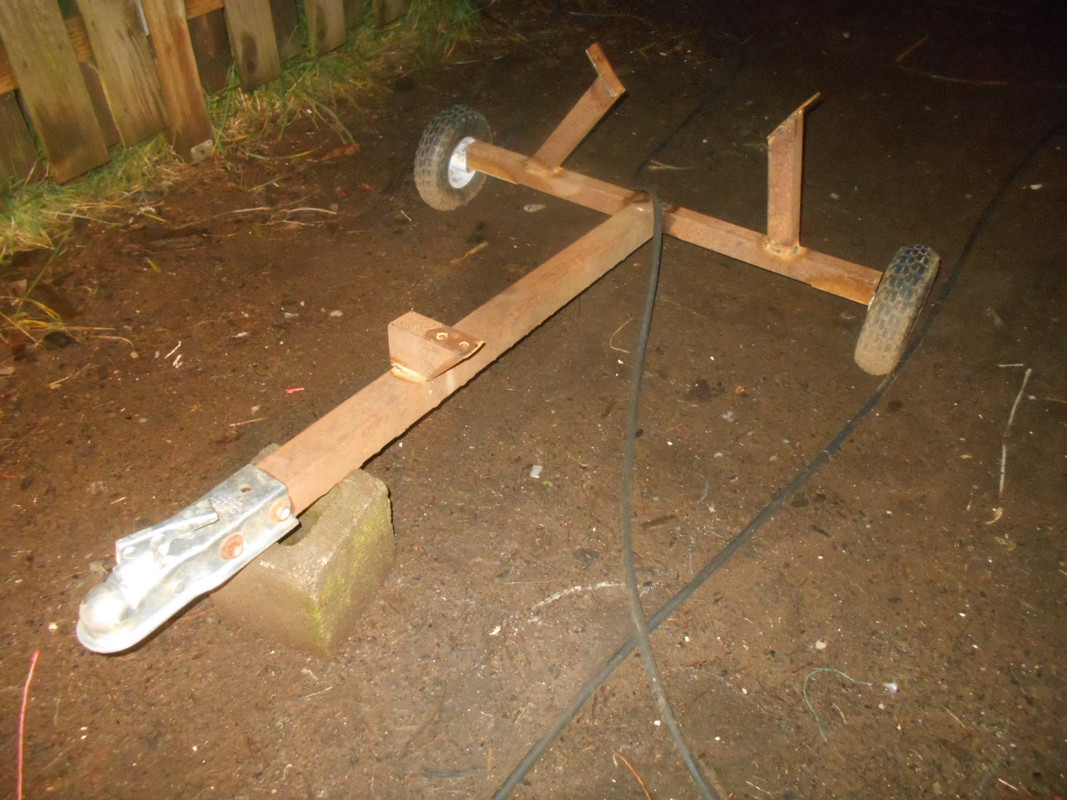
If I want to I can make a couple brackets that hold a radiator like my diesel engine stand, that one has two wheels under the mounts and a turning wheel under the tail of the transmission, I have around 4 stands now, but I like the one above as I can haul the engine around behind my tractor.
If I wasn't in such a hurry when I made the one above I could have made everything adjustable, I still can as the hard part is done.
“The difference between genius and stupidly is that genius has its limits” Albert Einstein
- DRIVEN
- Posts: 7699
- Joined: Thu Jun 27, 2013 7:05 pm
- Location: I've been everywhere
- Has thanked: 1210 times
- Been thanked: 1180 times
Re: LZ20 engine build
That looks pretty useful.
When the only tool you have is a hammer every problem starts to look like a hippy.
- HRH
- Posts: 2366
- Joined: Sat Jan 18, 2014 8:54 pm
- Cars: Lots
- Location: Near flatcat
- Has thanked: 147 times
- Been thanked: 649 times
Re: LZ20 engine build
I'm thinking of building a test running stand though, a square frame would be ideal for connecting the back half for a box, then mounting a radiator in the front, coil, etc. Would only be 2 feet square or so. Although I really don't want to build any more motors currently. Just want all my shit to run for a while.
"Self proclaimed most active poster on NWD." - Me
- wayno
- Posts: 5320
- Joined: Thu Jun 27, 2013 8:44 pm
- Location: Vancouver WA
- Has thanked: 432 times
- Been thanked: 1302 times
Re: LZ20 engine build
“The difference between genius and stupidly is that genius has its limits” Albert Einstein
- wayno
- Posts: 5320
- Joined: Thu Jun 27, 2013 8:44 pm
- Location: Vancouver WA
- Has thanked: 432 times
- Been thanked: 1302 times
Re: LZ20 engine build
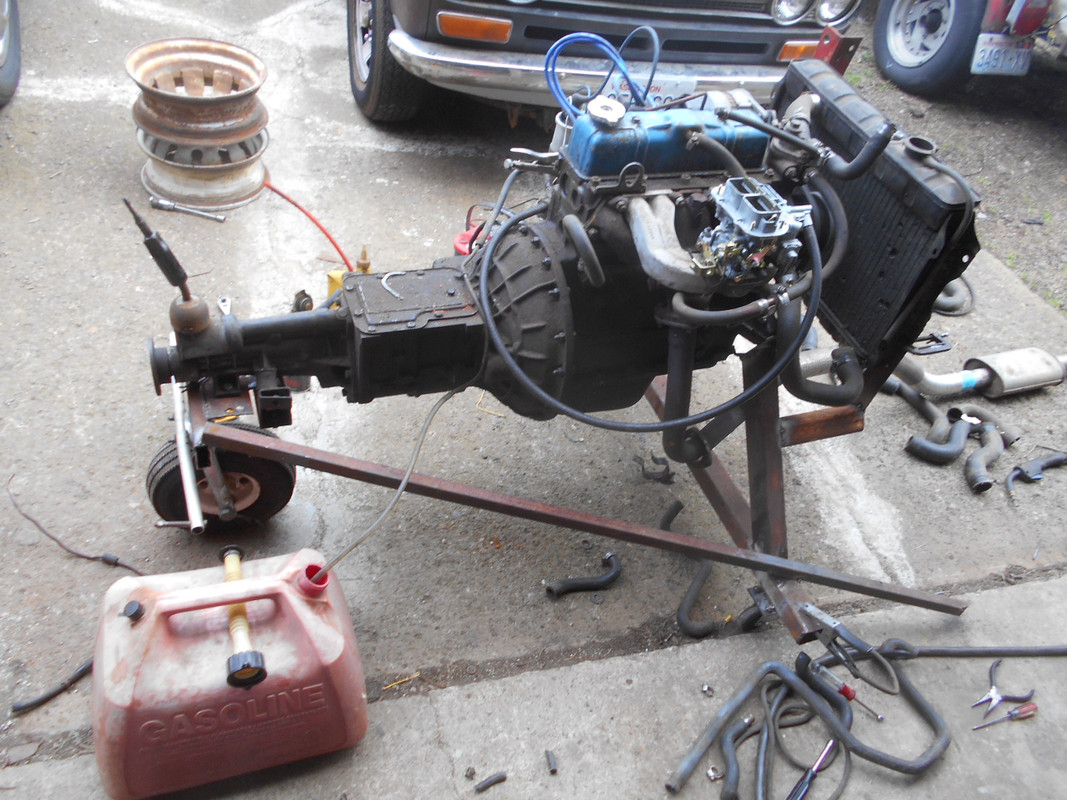
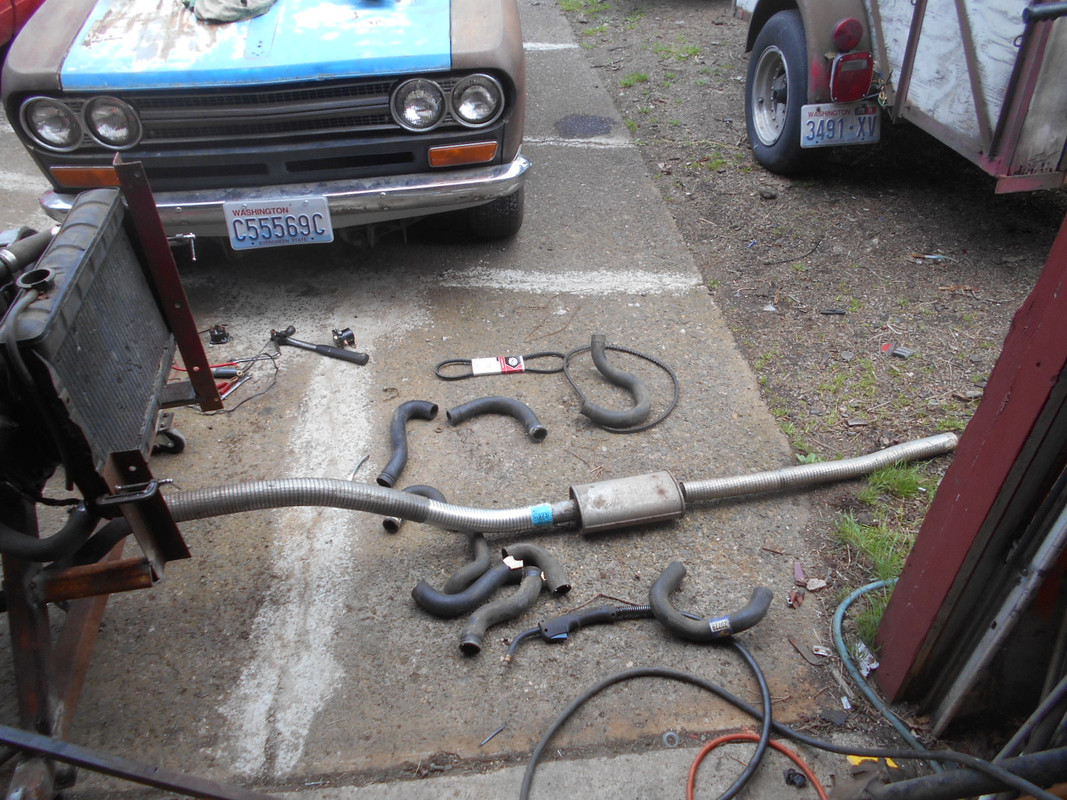
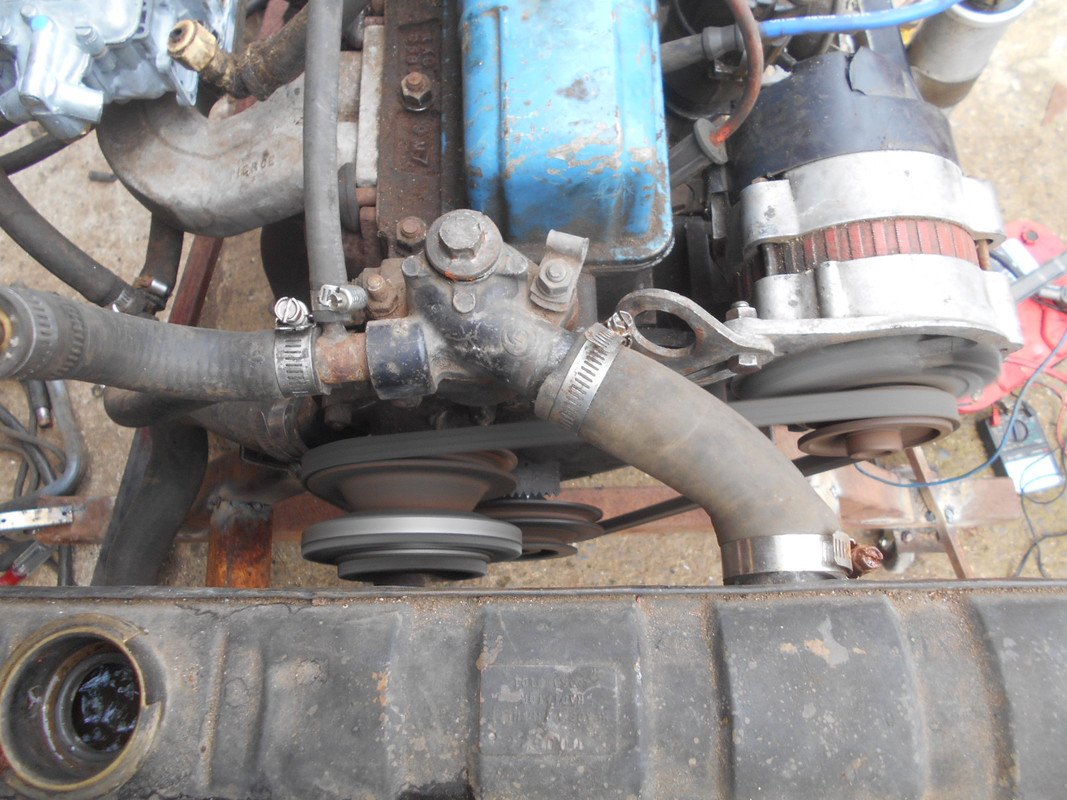
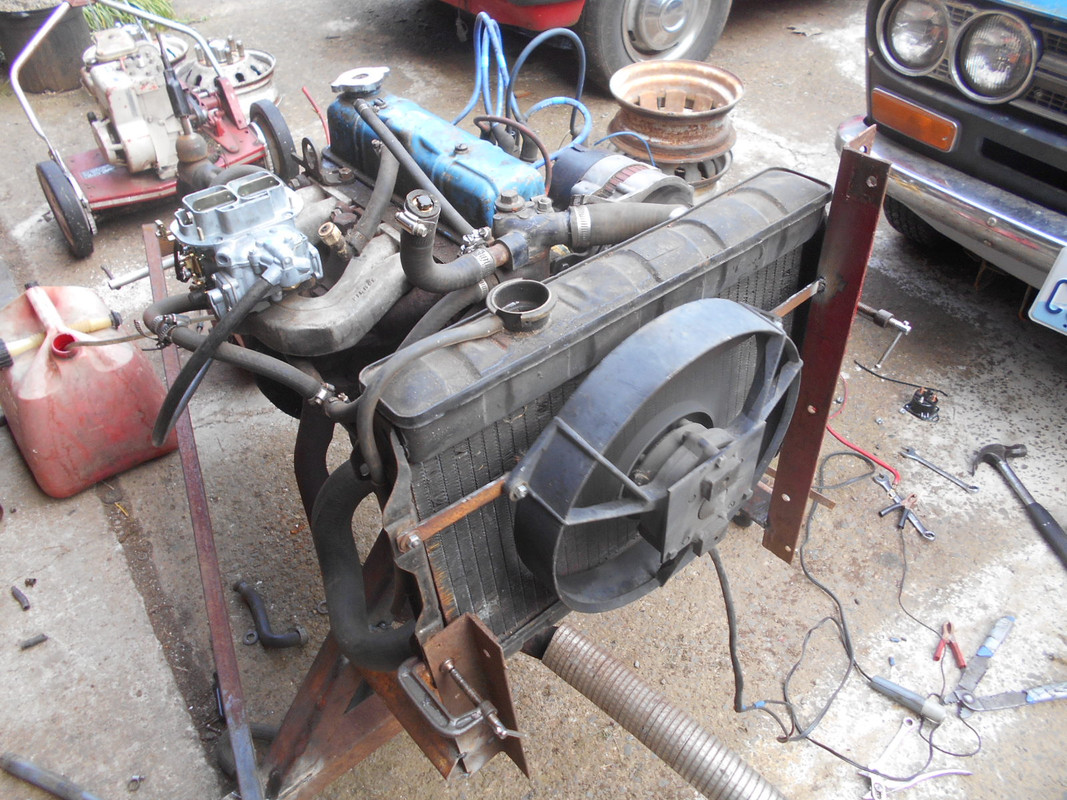
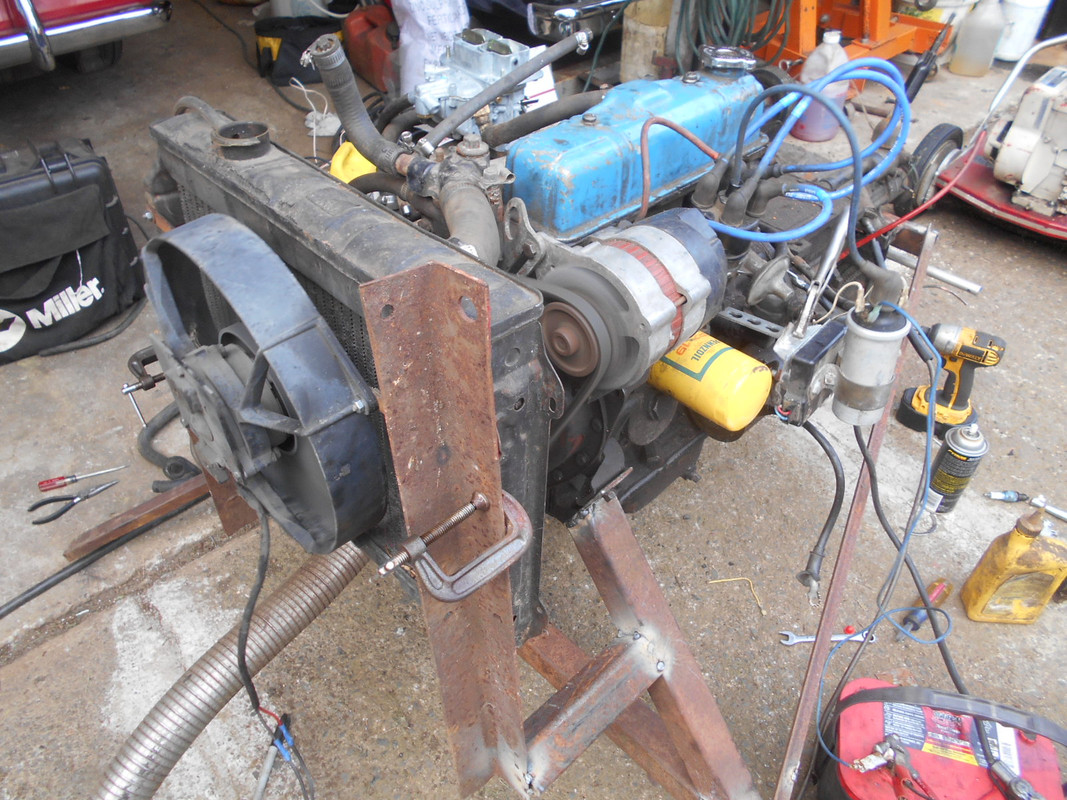
Here is another MG engine, it also is running, you can barely see the front castor wheel in the first photo.


“The difference between genius and stupidly is that genius has its limits” Albert Einstein
- wayno
- Posts: 5320
- Joined: Thu Jun 27, 2013 8:44 pm
- Location: Vancouver WA
- Has thanked: 432 times
- Been thanked: 1302 times
Re: LZ20 engine build
“The difference between genius and stupidly is that genius has its limits” Albert Einstein
- wayno
- Posts: 5320
- Joined: Thu Jun 27, 2013 8:44 pm
- Location: Vancouver WA
- Has thanked: 432 times
- Been thanked: 1302 times
Re: LZ20 engine build
When I built this one I planned to have the engine mount uprights adjustable(fold up for storeage) but I got in a hurry and welded them on, I originally planned on the transmission mount being adjustable also by sliding a piece of metal over the rear shaft and welding the mount to that, I can still do that stuff if I want, but I will have to cut all the existing mounts off to do that and right now that is not on the top 10 list.


“The difference between genius and stupidly is that genius has its limits” Albert Einstein
- DRIVEN
- Posts: 7699
- Joined: Thu Jun 27, 2013 7:05 pm
- Location: I've been everywhere
- Has thanked: 1210 times
- Been thanked: 1180 times
Re: LZ20 engine build
Now just attach a wood splitter and you'll really have something.
When the only tool you have is a hammer every problem starts to look like a hippy.
- Ni10
- Posts: 2132
- Joined: Thu Jun 27, 2013 4:43 pm
- Cars: 68 510 wagon, 71 521, 78 620 KC
- Location: South of West Canada
- Has thanked: 119 times
- Been thanked: 24 times
Re: LZ20 engine build
^^^^^^^ muti tasking equipment, Thats thinking outside the box.

just need a saddle to hold the rounds.
if you decide to make a log splitter. I got rams. just saying.

just need a saddle to hold the rounds.
if you decide to make a log splitter. I got rams. just saying.
DRIVEN » Tue Aug 20, 2013 7:01 am wrote: Datsuns don't break down. They just get unscheduled upgrades.
- izzo
- Site Admin
- Posts: 5651
- Joined: Wed Jun 26, 2013 6:32 pm
- Title: Save a pimp, Rent a bitch.
- Cars: Too many
- Location: Astoria, OR
- Contact:
Re: LZ20 engine build
I can't believe I am just now seeing this. That's awesome man. Makes me wanna go build one
8========D ~~~ ( o Y o )
jayden71: titty ponk
devilsbullet wrote: 1400 obo. and best offer doesn't mean 300 bucks you cheap bastards
- wayno
- Posts: 5320
- Joined: Thu Jun 27, 2013 8:44 pm
- Location: Vancouver WA
- Has thanked: 432 times
- Been thanked: 1302 times
Re: LZ20 engine build
I had it running in the 720 chassis, but getting the work truck put on that chassis took priority, so it is sitting mounted in that cart I made, it never made it to a vehicle.
At one point I thought about putting it in 520, but I put that 219 head on that block and I am happy with it the way it is right now, so I do not have a vehicle to put this in right now and I do not need another project either.
I have no idea how it runs in a real situation(driven) as it never made it to a vehicle, it likely would knock even with 92 rated gas being it has around a 10.8 to 1 compression ratio, some day I will put it in something.
“The difference between genius and stupidly is that genius has its limits” Albert Einstein
