Page 11 of 11
Re: Really Ratty Rusty Ruby 510/miata
Posted: Fri Feb 07, 2020 12:33 am
by Indy510
The ruined c-pillar looked good from a distance, but it wasn't fixable.

Re: Really Ratty Rusty Ruby 510/miata
Posted: Fri Feb 07, 2020 12:36 am
by Indy510
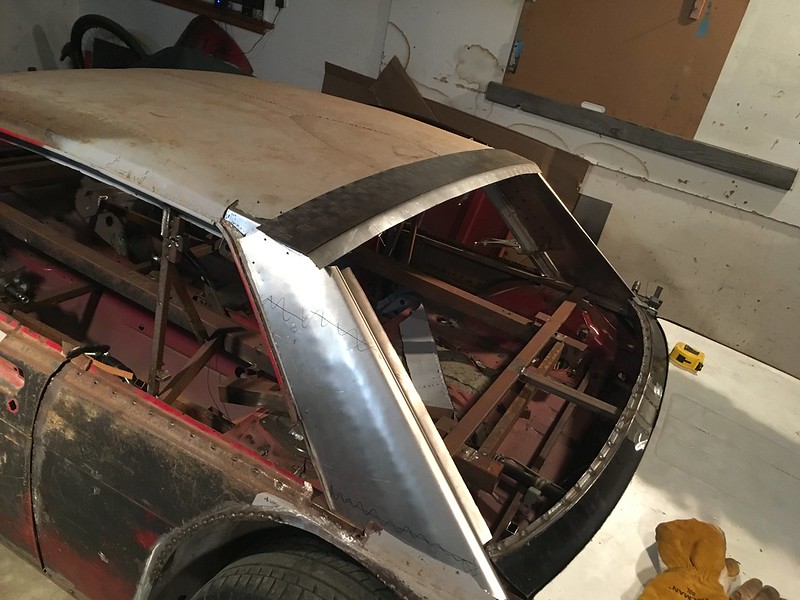
The next 2 pillars were 18ag instead of 20ag, and I left the hammer marks in them. Then I started building the back window frame:


Re: Really Ratty Rusty Ruby 510/miata
Posted: Fri Feb 07, 2020 12:40 am
by Indy510
Re: Really Ratty Rusty Ruby 510/miata
Posted: Fri Feb 07, 2020 12:41 am
by Indy510
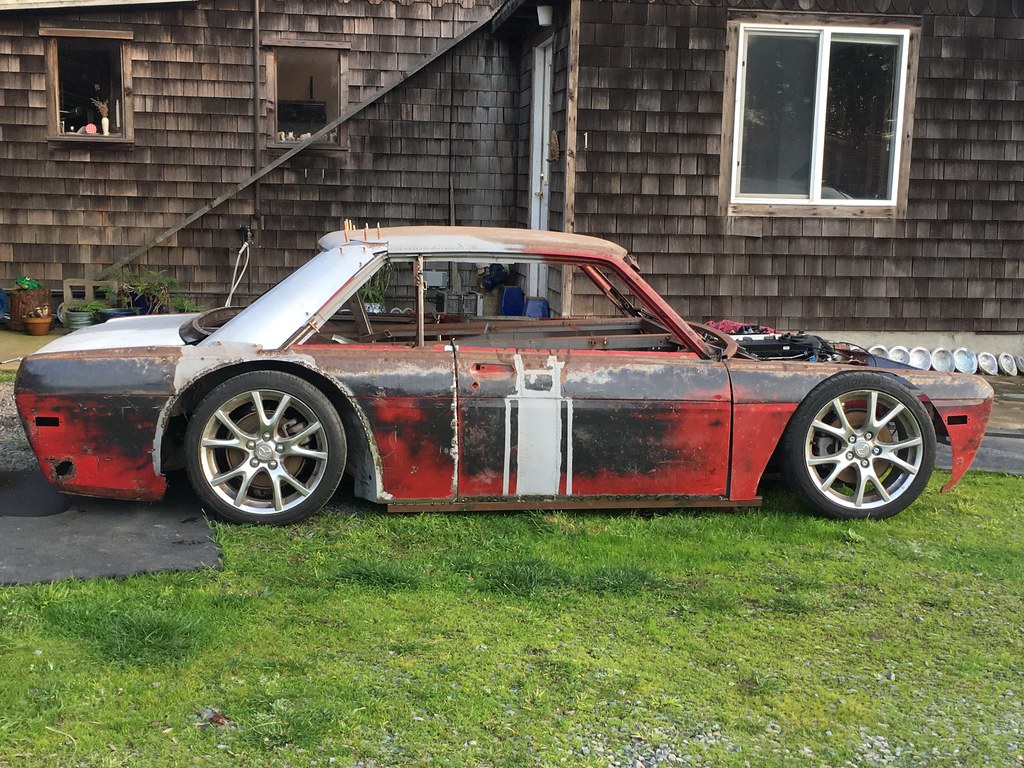
I couldn't shrink the bigger side enough. So, the next attempt started with a plywood curve, but it looked weird too. The problem is a sedan window frame is more curved at the top than a coupe and it sticks out too far on a profile view.
I tried mocking up the sedan frame farther forward, and it looked good here:

Re: Really Ratty Rusty Ruby 510/miata
Posted: Fri Feb 07, 2020 12:57 am
by Indy510
Re: Really Ratty Rusty Ruby 510/miata
Posted: Fri Feb 07, 2020 1:15 am
by Indy510
Re: Really Ratty Rusty Ruby 510/miata
Posted: Fri Feb 07, 2020 1:22 am
by Indy510
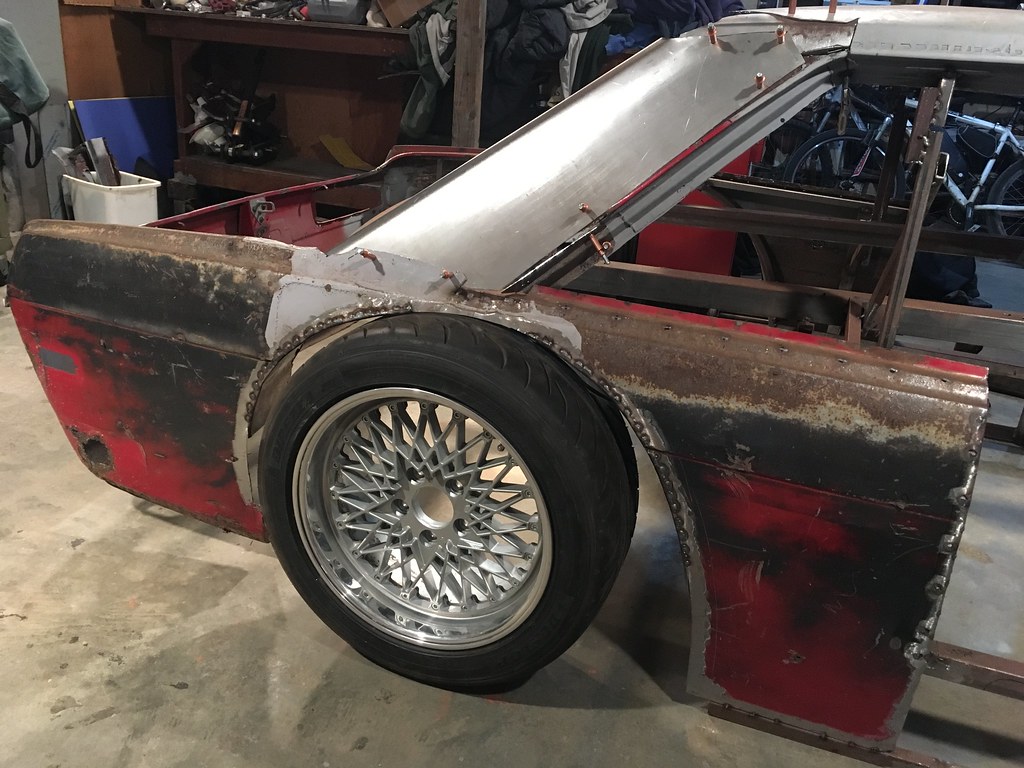
I think it looks way better now. Real coupe pillars are angled forward more, but I don't want the roof to get any shorter. A flat lower anvil for my English wheel smoothed out the pillars, and she's back off the Miata again:

Re: Really Ratty Rusty Ruby 510/miata
Posted: Fri Feb 07, 2020 7:14 am
by DRIVEN
Just needs a big whip antenna and 4-corner gigantic hold down pins.
Impressive work, as usual.
Re: Really Ratty Rusty Ruby 510/miata
Posted: Fri Feb 07, 2020 9:19 am
by Laecaon
I think you nailed the rear window opening. Your fabrication skills seem to be improving with every update.
I like seeing it laid out on the miata frame.
Re: Really Ratty Rusty Ruby 510/miata
Posted: Tue Apr 07, 2020 5:18 pm
by HRH
Looks good to me!! Keep it up!
Re: Really Ratty Rusty Ruby 510/miata
Posted: Wed Apr 08, 2020 5:40 pm
by Indy510
Thanks! … I'm working on another update. Hopefully the Miata tub will be running and driving in 2 weeks.
In the meantime, do you guys think this will be safe? I need to extend this brake master push-rod about 15mm. The nut is where a10mmx1.25 stud connects to the already cut down push rod (so there's still 30mm of adjustability). I will weld both sides of the nut, or is there a better way to do this? I'm trying to use a 1999 Miata master/booster to delete this 2006 Miata's ABS.

Re: Really Ratty Rusty Ruby 510/miata
Posted: Wed Apr 08, 2020 6:09 pm
by wayno
If your saying that nut is holding an extension on I would say no don't do it that way, get a long nut at the hardware store.

I am not saying get a nut this long, but one longer than that, here is a small version of what I am talking about.

Re: Really Ratty Rusty Ruby 510/miata
Posted: Wed Apr 08, 2020 6:27 pm
by Indy510
Oh... good idea. That's why I asked. I was obviously going to weld the nut, but I will see what I can find online (can't leave the house for non-essential car building). I think a longer extension and shorter push-rod with one of those nuts would be good.
Re: Really Ratty Rusty Ruby 510/miata
Posted: Wed Apr 08, 2020 6:47 pm
by jtinluvr
As that is probably a metric thread, you may need to look at a place like Mcmaster Carr for the rod coupling.
Re: Really Ratty Rusty Ruby 510/miata
Posted: Wed Apr 08, 2020 6:56 pm
by Laecaon
A longer nut for sure. Green locktite would not come apart either.
Re: Really Ratty Rusty Ruby 510/miata
Posted: Wed Apr 08, 2020 7:23 pm
by wayno
I have made several power brake booster setups for my 520 and 521 trucks, I make the booster rod setup to the pedestal height/length, here is what is on my 521 work truck.
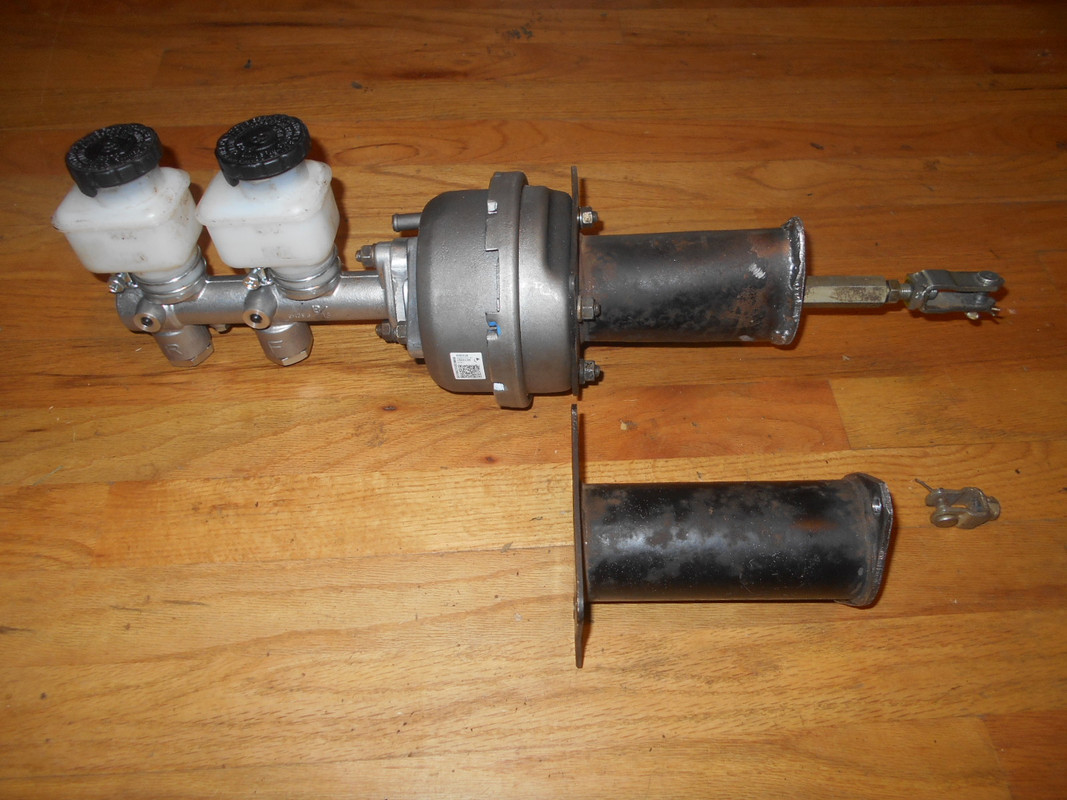
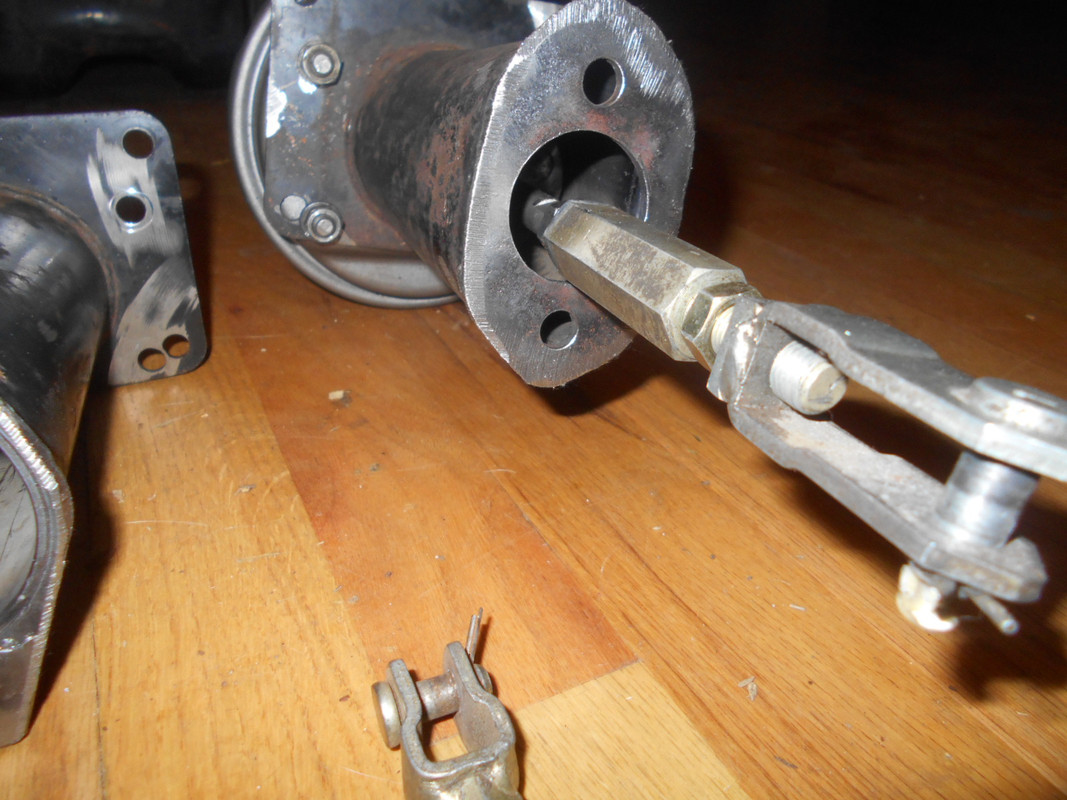
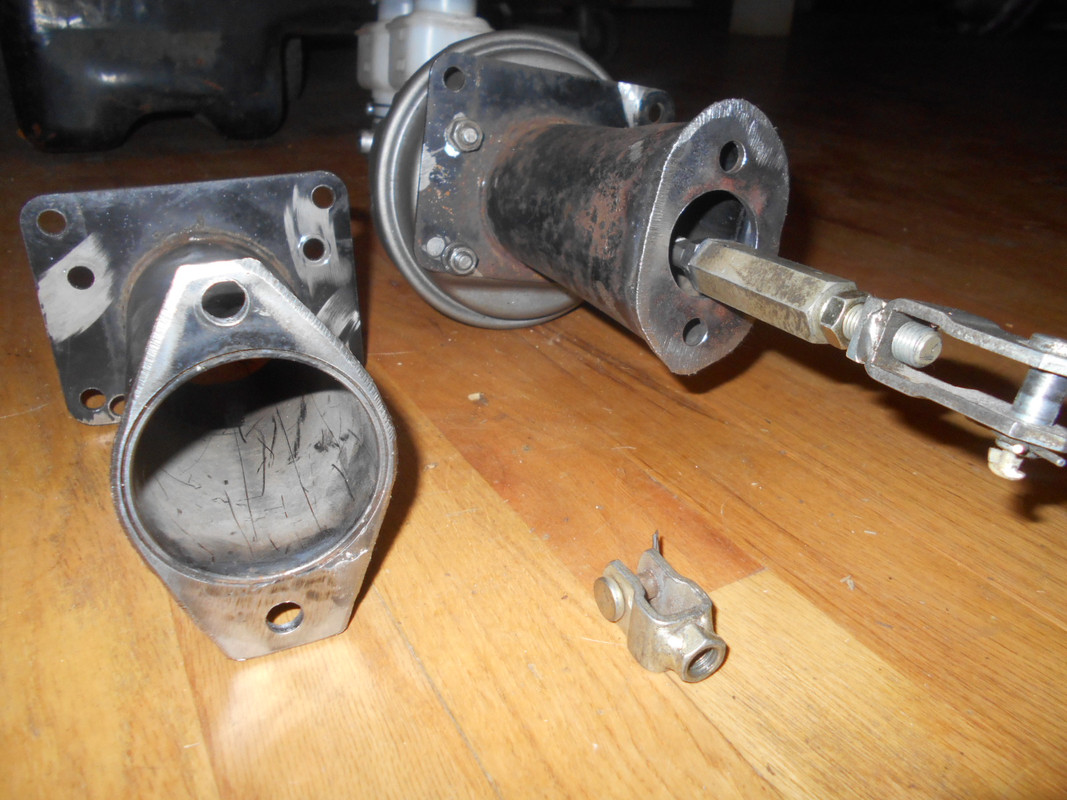
I understand you need a shorter setup, that is why I suggested what I did, yes my stuff is metric, also I have shortened that long nut before, I cut the end off an inch before all the threads were gone on the inside, then I drilled the hole deeper and threaded it deeper, then cut it the length I needed.
You can see I crushed the pedestal end and made a flange and welded it on the end so I could use the stock 521 SAE studs to mount it on the inside of the pedestal, of all the ways I have done it I like this way the best


