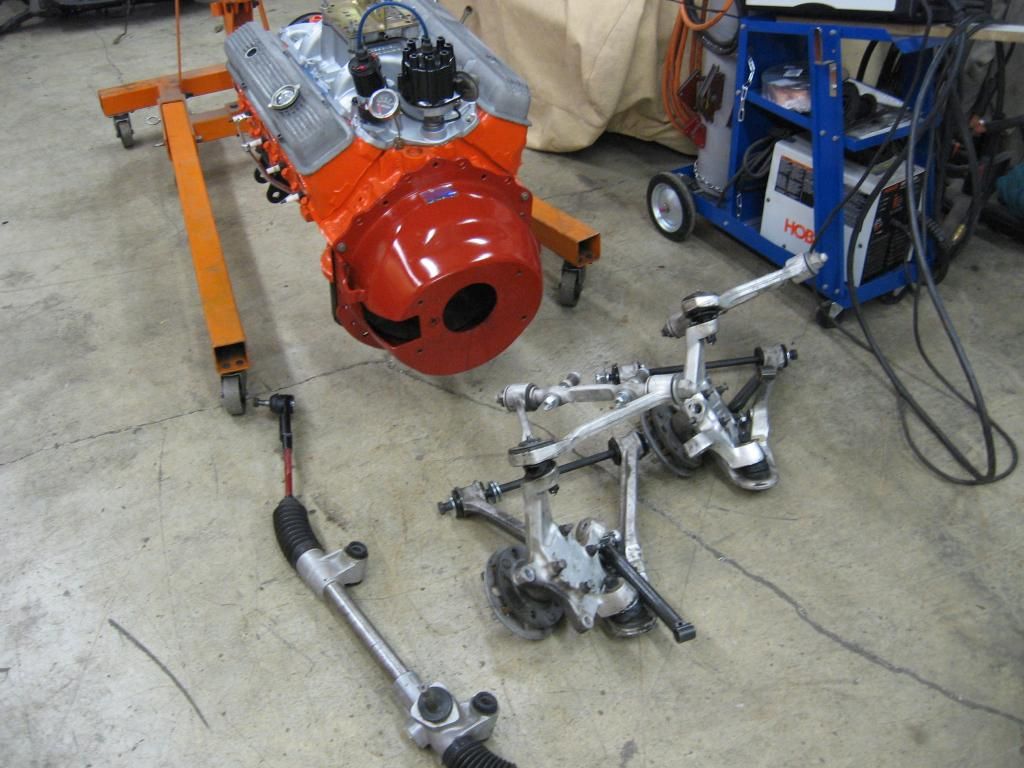
A couple positives and a negative to update. No pics yet though. The good news is that I got my tie rod ends figured out. '89 T-bird solved the problem of how to connect an aftermarket manual rack to C4 spindles in an early Ford frame. I'll take that as a win. Then I rolled the frame over to the paint shop where we set the cab on the frame -- no problems. Then we set the bed on the frame -- slight interference with one of the cross braces. Not really a problem since I'll be ordering a new bed anyway. Then we mocked up the rear fender. Wheels fit the opening PERFECTLY -- no problem. Set the running board in place -- slight clearance issue with trailing arm bracket but easily fixed so, no problem. The last piece to test fit was the front fender and that's where things got disappointing. First, the wheel appears to be a bit forward in the opening. Maybe 1/2" to 3/4" and it actually looks okay like that but I was shooting for centered. The really bad thing is that the front of the upper control arm hits the inner edge of the fender. NO BUENO! So what I think I might do is move the front cross member down and back around 1/2". Before I don anything I need to call the kit manufacturer and see what he says.
To sum up, everything from the firewall back looks good. The front needs some adjustment. Glad I only tacked it in place. Kind of ironic that the front "kit" that came pre-fabbed and with detailed install instructions complete with exact measurements is being problematic while my homemade rearend install seems to be dead-on.
Pics and more progress next weekend.
Fuck The Reaper
-
DRIVEN

- Posts: 7645
- Joined: Thu Jun 27, 2013 7:05 pm
- Location: I've been everywhere
- Has thanked: 1176 times
- Been thanked: 1152 times
Re: Fuck The Reaper
When the only tool you have is a hammer every problem starts to look like a hippy.
-
DRIVEN
- Posts: 7645
- Joined: Thu Jun 27, 2013 7:05 pm
- Location: I've been everywhere
- Has thanked: 1176 times
- Been thanked: 1152 times
Re: Fuck The Reaper
Observing a moment of silence.
4:57 11-15-99.
Fifteen fucking years ago I beat the reaper.
4:57 11-15-99.
Fifteen fucking years ago I beat the reaper.

When the only tool you have is a hammer every problem starts to look like a hippy.
-
izzo

- Site Admin
- Posts: 5651
- Joined: Wed Jun 26, 2013 6:32 pm
- Title: Save a pimp, Rent a bitch.
- Cars: Too many
- Location: Astoria, OR
- Contact:
Re: Fuck The Reaper
Glad you're still around man.
Bet your family is even more. Neat to see this thing come back to life, even after all these years.
Bet your family is even more. Neat to see this thing come back to life, even after all these years.
8========D ~~~ ( o Y o )
jayden71: titty ponk
devilsbullet wrote: 1400 obo. and best offer doesn't mean 300 bucks you cheap bastards
-
DRIVEN
- Posts: 7645
- Joined: Thu Jun 27, 2013 7:05 pm
- Location: I've been everywhere
- Has thanked: 1176 times
- Been thanked: 1152 times
Re: Fuck The Reaper
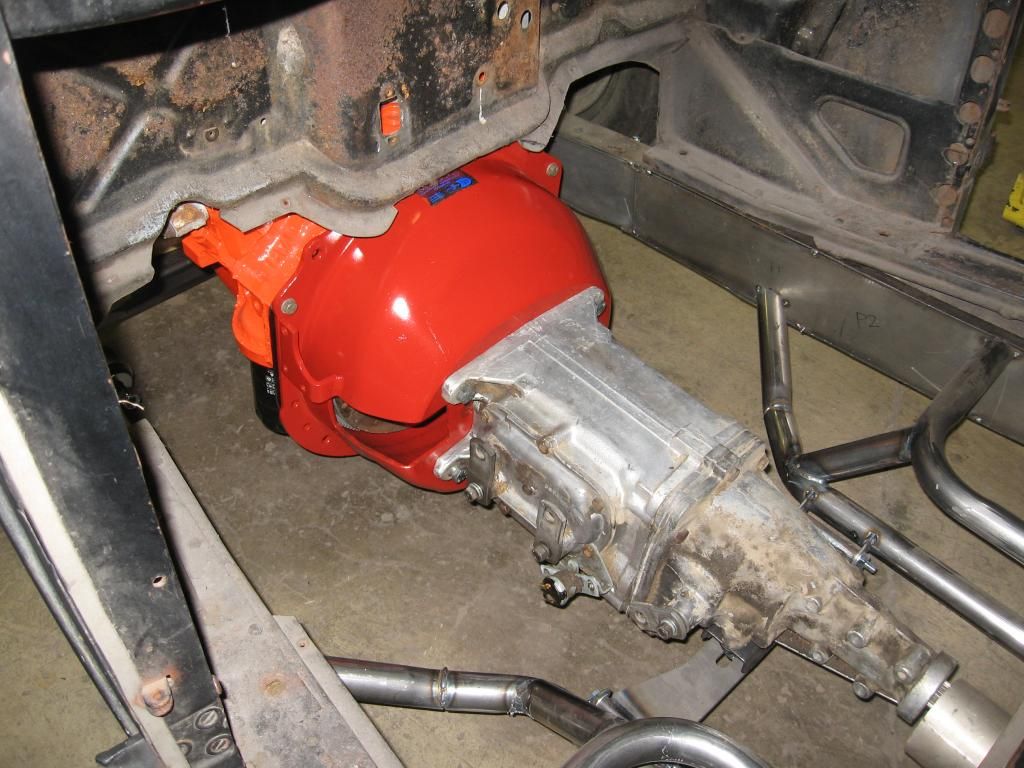
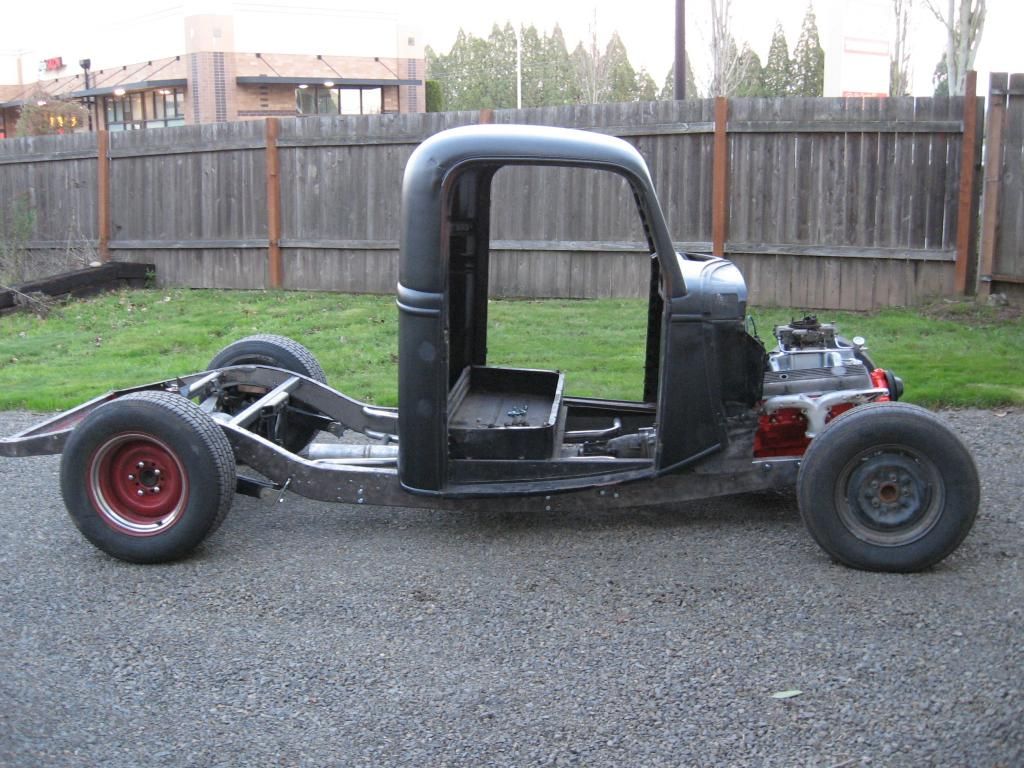
I put in about 8 hours yesterday but don't feel like I got much done. Like I posted earlier, we test fit the body and found that the crossmember needs to be slightly relocated. That hasn't been done yet. Since the cab was still sitting there I wanted to test fit the drivetrain. Bench tested the pile-o-distributors. Did a bunch of painting parts and temporary assembly of the engine/transmission. Then I slid it into place. Trimmed the frame side of the motor mounts and for a friction fit and blocked up the front of the pan. Then I trimmed the transmission mount and tacked it in place. I kept it on the low side since I can always space it up but can't really drop it down. Dropped it on the ground and rolled it outside to settle the suspension. Looks like I'll be raising the engine about an inch from where it presently sits. At that point I was just tired of it so I poured a drink and spent some time cleaning up the shop.


When the only tool you have is a hammer every problem starts to look like a hippy.
-
DRIVEN
- Posts: 7645
- Joined: Thu Jun 27, 2013 7:05 pm
- Location: I've been everywhere
- Has thanked: 1176 times
- Been thanked: 1152 times
Re: Fuck The Reaper
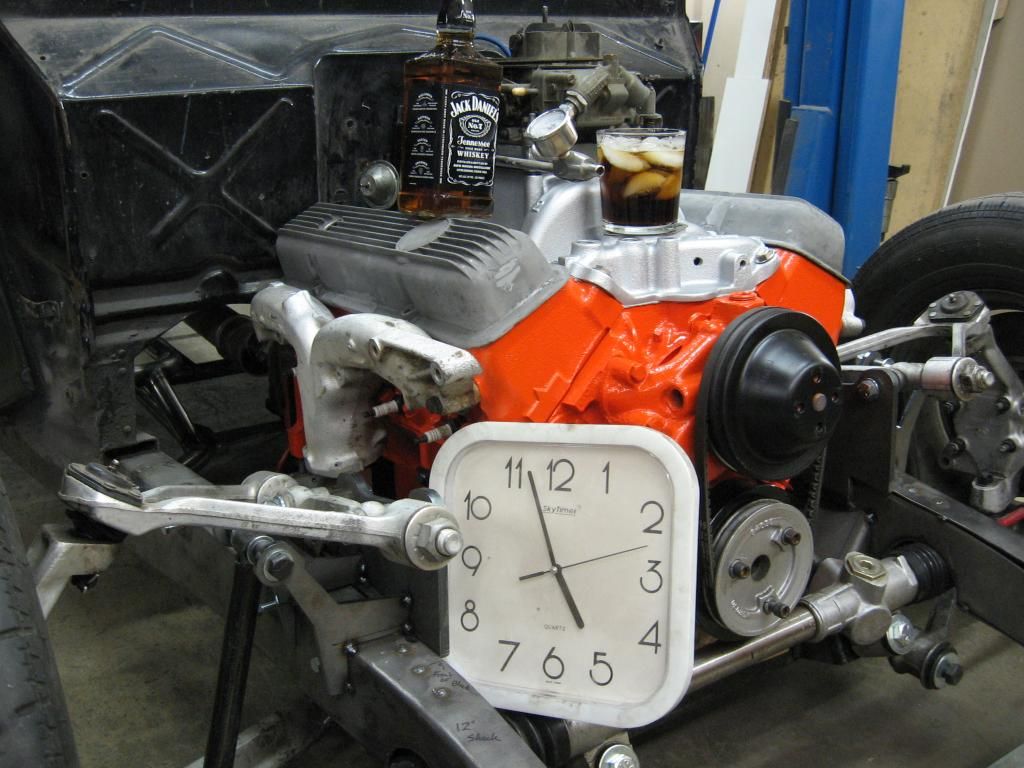
Update coming. Won't look like much though. Tonight I'm getting a little assistance from Jose Cuervo. Stay tuned.
When the only tool you have is a hammer every problem starts to look like a hippy.
-
DRIVEN
- Posts: 7645
- Joined: Thu Jun 27, 2013 7:05 pm
- Location: I've been everywhere
- Has thanked: 1176 times
- Been thanked: 1152 times
Re: Fuck The Reaper
Let me just drop this here...
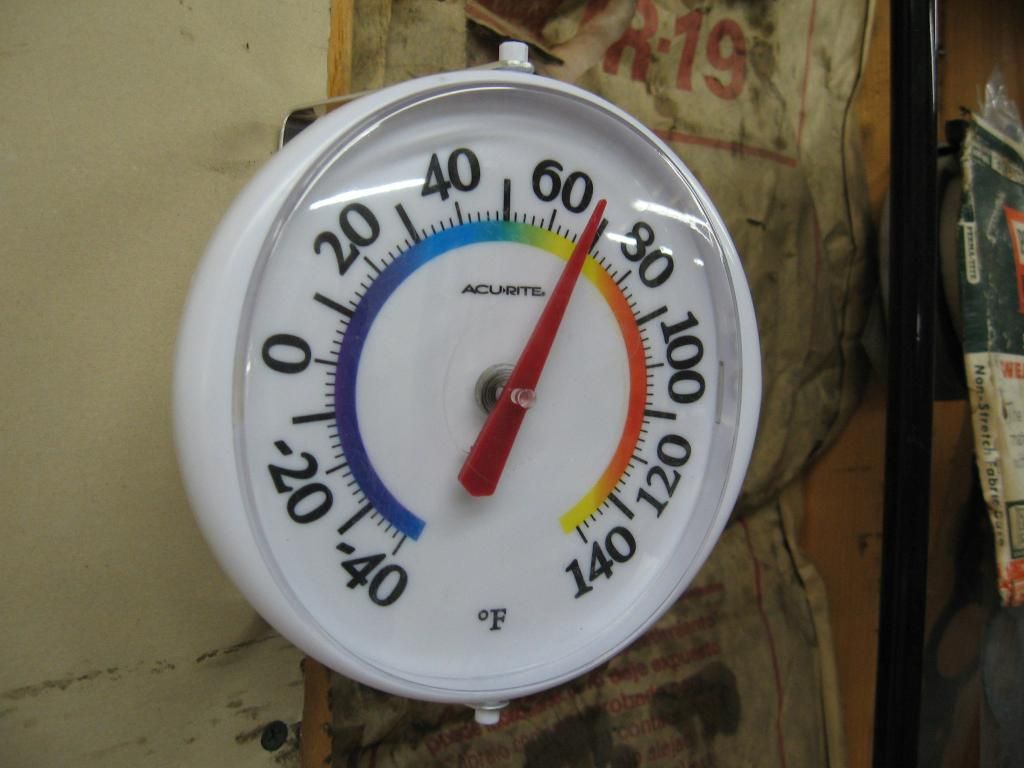
Even when it's in the 30's outside. It does take a couple hours to get there though. Shop needs the insulation finished.
Anyway, when we left off I had it mocked up but needed to move the crossmember.
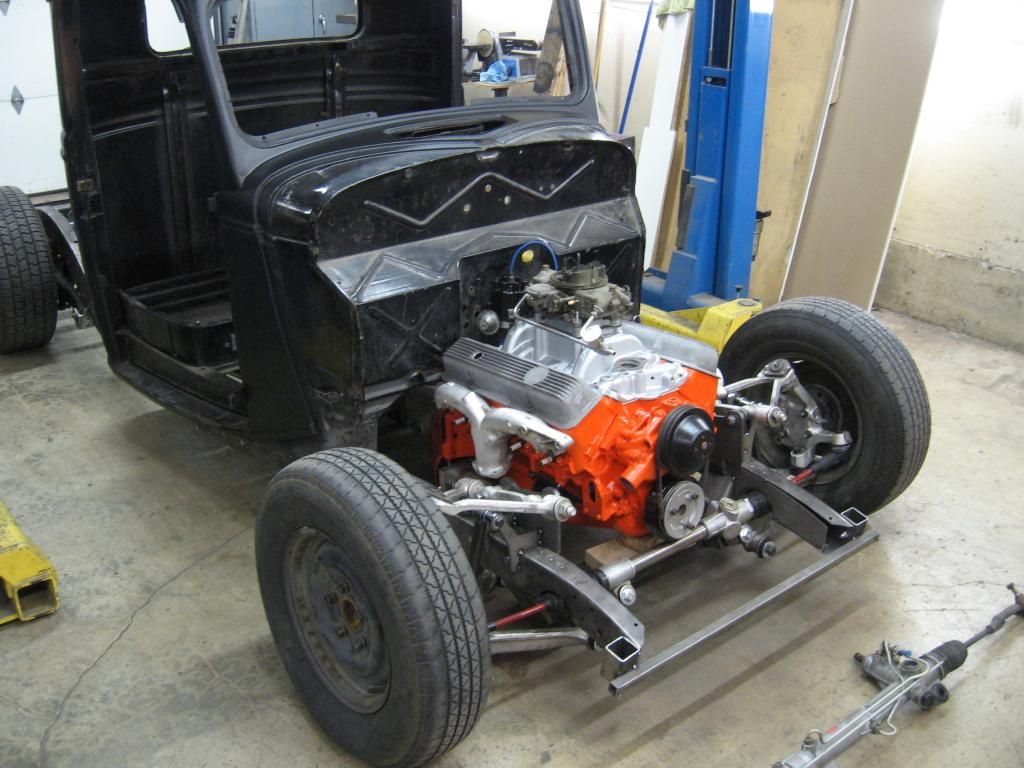
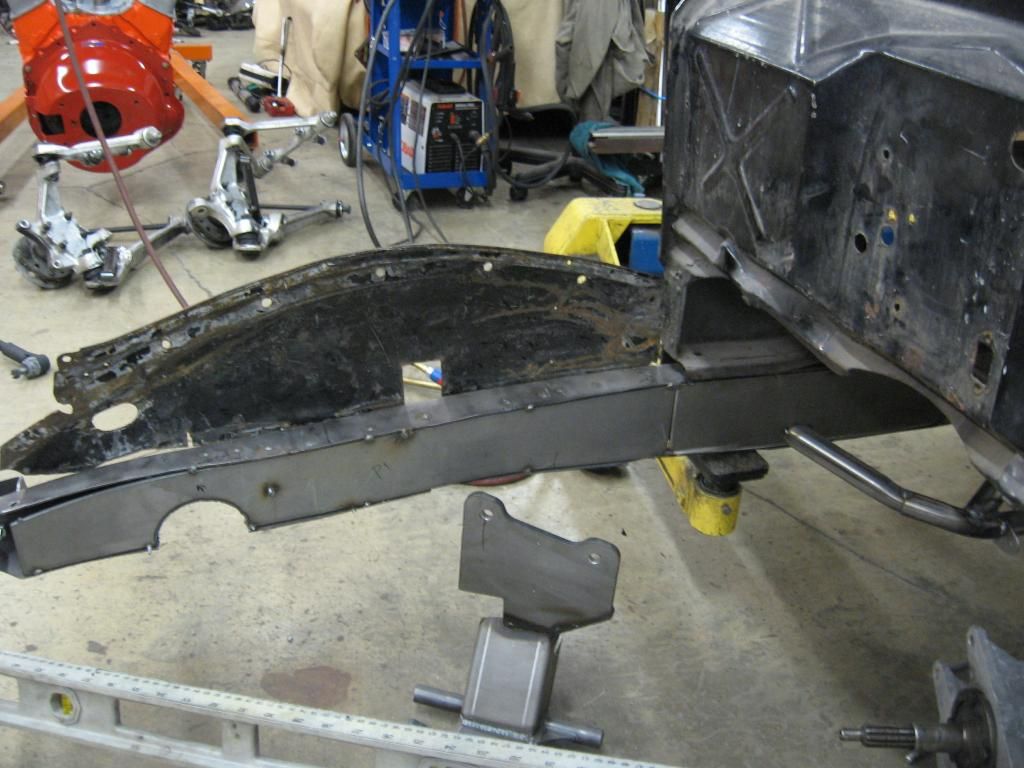
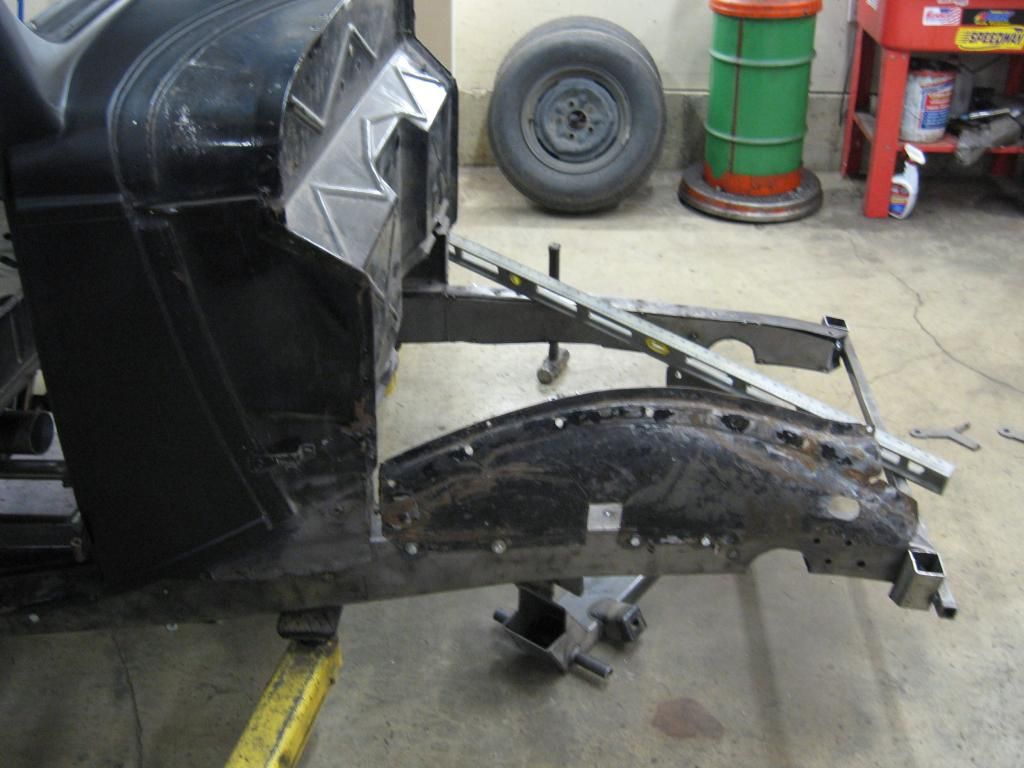
Pulled the engine and stripped the frame...
...disposed of a few tack welds and dropped the crossmember out.

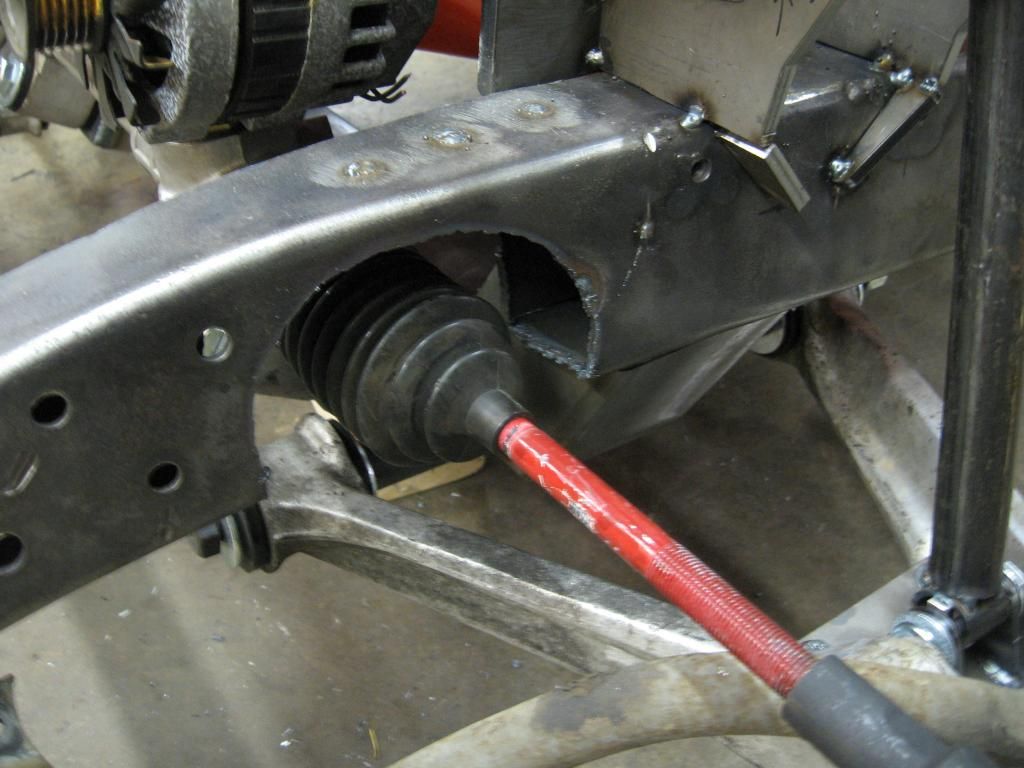
This shows how the inner fender fits. I'll need to trim access holes for the upper control arms.

Even when it's in the 30's outside. It does take a couple hours to get there though. Shop needs the insulation finished.
Anyway, when we left off I had it mocked up but needed to move the crossmember.

Pulled the engine and stripped the frame...

...disposed of a few tack welds and dropped the crossmember out.

This shows how the inner fender fits. I'll need to trim access holes for the upper control arms.


When the only tool you have is a hammer every problem starts to look like a hippy.
-
DRIVEN
- Posts: 7645
- Joined: Thu Jun 27, 2013 7:05 pm
- Location: I've been everywhere
- Has thanked: 1176 times
- Been thanked: 1152 times
Re: Fuck The Reaper
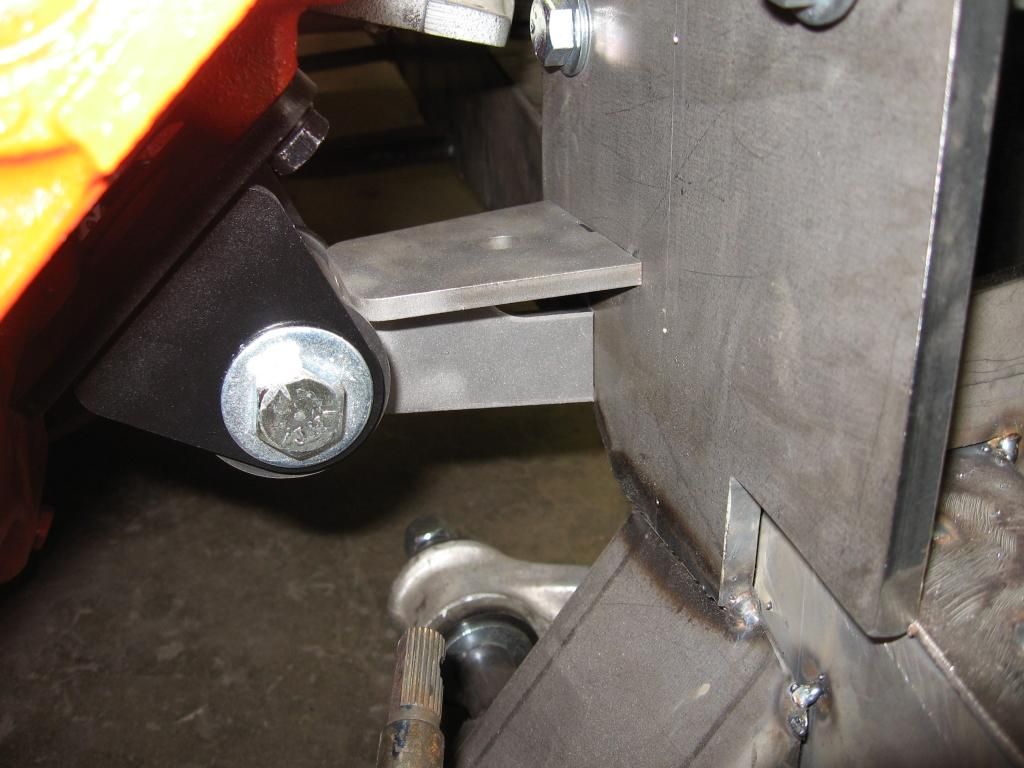
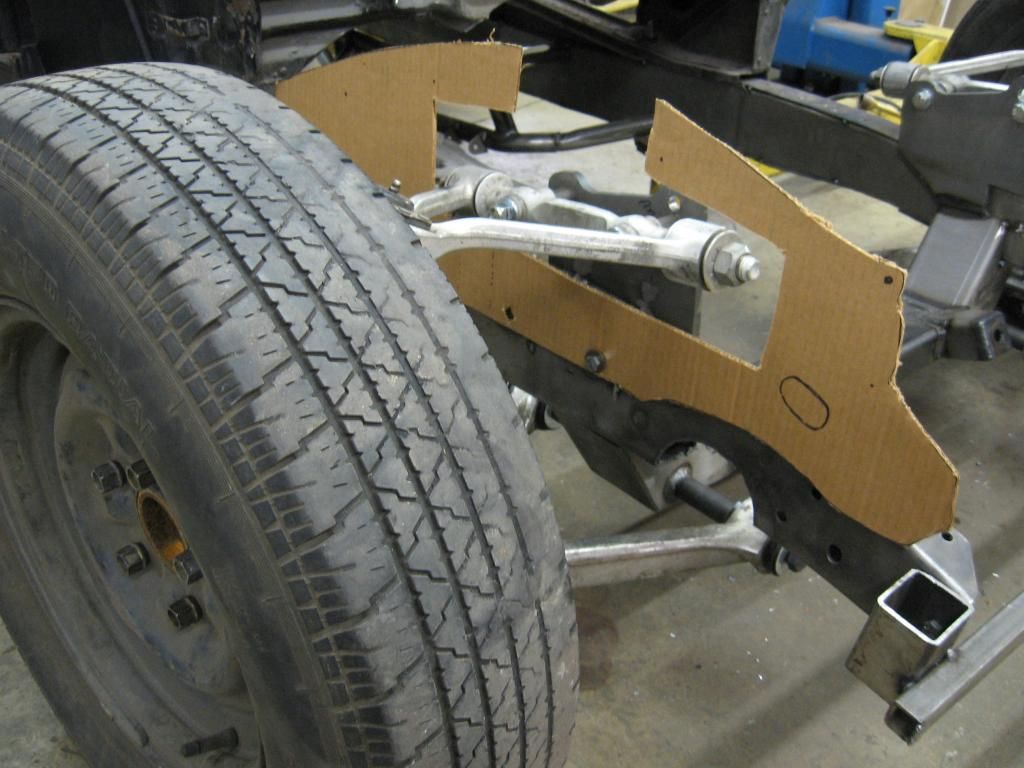
Tacked the crossmember back in about 3/4" back. Decided not to drop it. Note the added hole in the forward upper control arm mount that gave me a bit more clearance for the fender. Made a cardboard dummy so I could reference the fender to the wheel.

Trimmed out my C-notches for the rack. This area isn't even close to done yet.
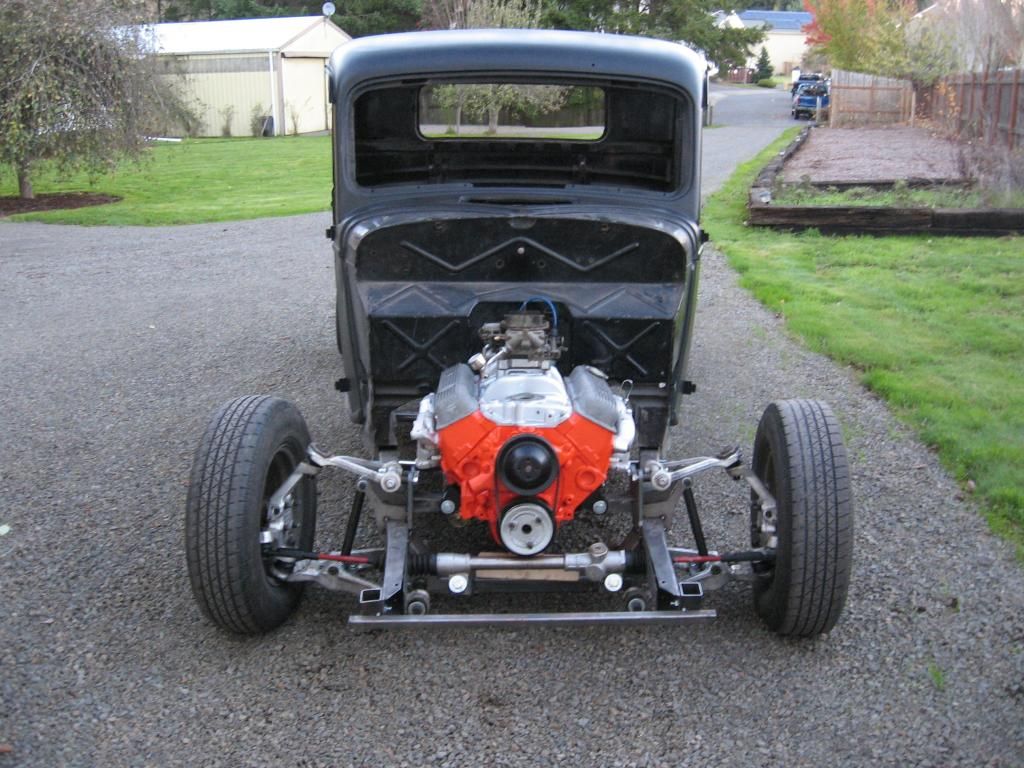
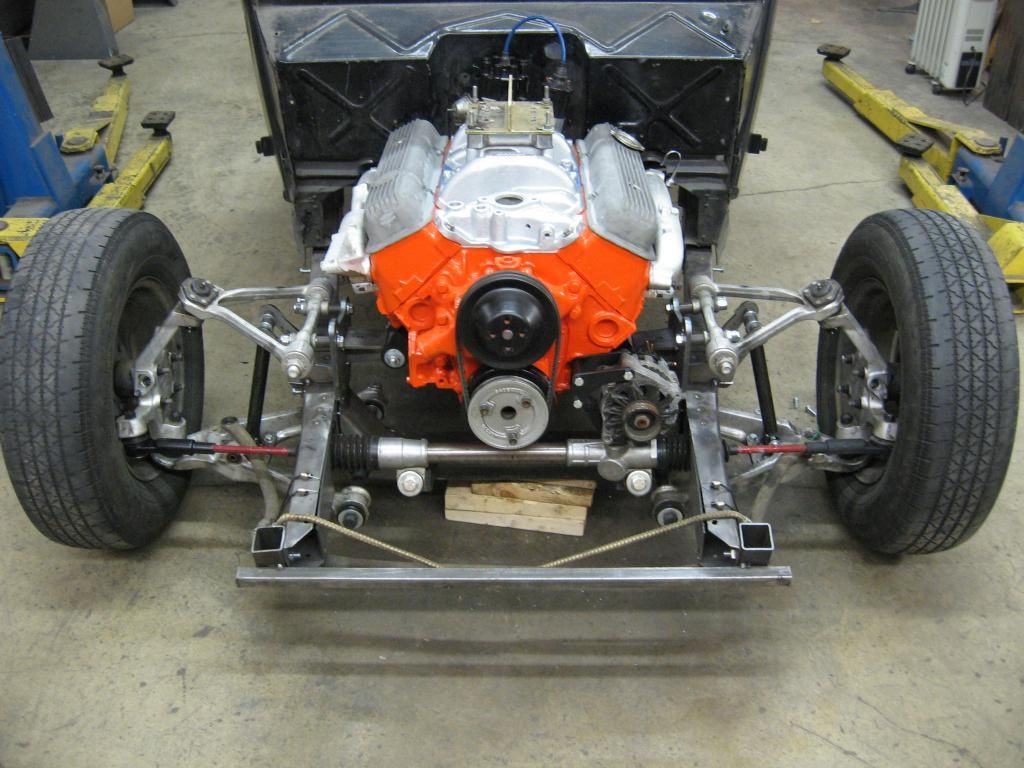
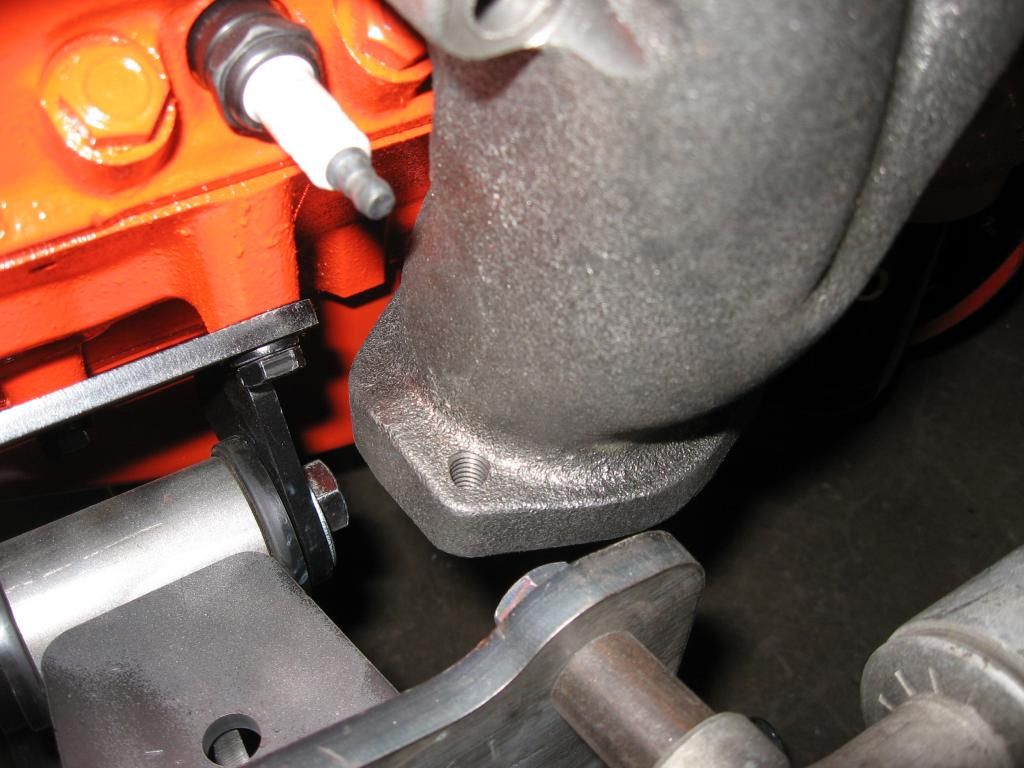
Set the engine in place and installed the Alternator and brackets. The engine is placed high enough that the bottom of the scatter shield is even with the front crossmember and transmission crossmember. The carb flange is leveled and there is driveline clearance under the cab floor. There's really just enough room in the sweet spot.
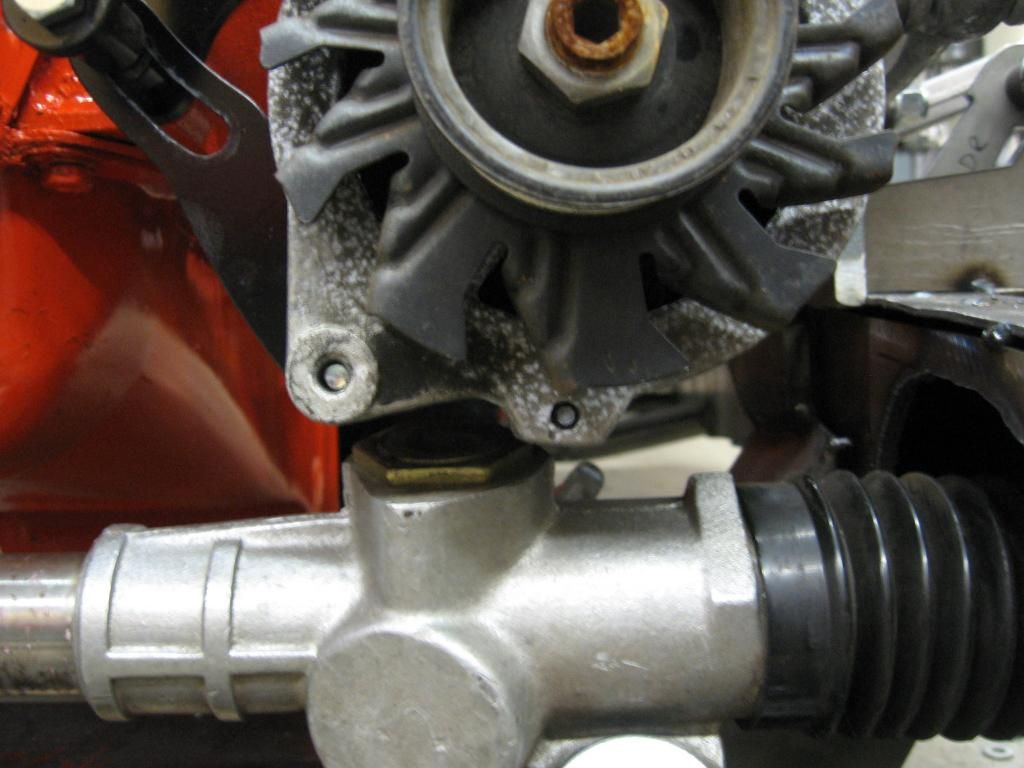
A little tough to see here but there isn't quite enough room between the alternator and the rack. It technically fits but there isn't full range of adjustment so I'll be dropping the rack just a shade.
At this point I'm working on the pedals. I'll post pics when the task is completed.


Trimmed out my C-notches for the rack. This area isn't even close to done yet.

Set the engine in place and installed the Alternator and brackets. The engine is placed high enough that the bottom of the scatter shield is even with the front crossmember and transmission crossmember. The carb flange is leveled and there is driveline clearance under the cab floor. There's really just enough room in the sweet spot.

A little tough to see here but there isn't quite enough room between the alternator and the rack. It technically fits but there isn't full range of adjustment so I'll be dropping the rack just a shade.

At this point I'm working on the pedals. I'll post pics when the task is completed.
When the only tool you have is a hammer every problem starts to look like a hippy.
-
510freak

- Global Moderator
- Posts: 9706
- Joined: Wed Jun 26, 2013 6:44 pm
- Title: DJ Jazzy Lou
- Cars: Boo no 510 lol
- Location: Van Isle
- Has thanked: 6 times
- Been thanked: 7 times
- Contact:
Re: Fuck The Reaper
Coming along nice,you make it look easy Jess
Taterhead » Tue Dec 08, 2015 6:35 am wrote:[quote="Taterhead » Mon Dec 07, 2015 2:41 pm
Sorry, I was channeling my inner flatcat.
-
Taterhead

- Posts: 2465
- Joined: Thu Jul 11, 2013 4:18 am
- Cars: '71 510 - Mine
'72 510 - Sons - Location: Central Alabama
- Has thanked: 1320 times
- Been thanked: 222 times
-
DRIVEN
- Posts: 7645
- Joined: Thu Jun 27, 2013 7:05 pm
- Location: I've been everywhere
- Has thanked: 1176 times
- Been thanked: 1152 times
Re: Fuck The Reaper
Thanks guys. I put in almost 10 hours yesterday just working on the pedals and I'm neither satisfied nor finished. Pics when I get it done.
When the only tool you have is a hammer every problem starts to look like a hippy.
-
DRIVEN
- Posts: 7645
- Joined: Thu Jun 27, 2013 7:05 pm
- Location: I've been everywhere
- Has thanked: 1176 times
- Been thanked: 1152 times
Re: Fuck The Reaper
Didn't feel like working tonight so I just ordered a buttload of parts instead.
When the only tool you have is a hammer every problem starts to look like a hippy.
-
wayno

- Posts: 5223
- Joined: Thu Jun 27, 2013 8:44 pm
- Location: Vancouver WA
- Has thanked: 408 times
- Been thanked: 1253 times
Re: Fuck The Reaper
That's a lot, 100X bigger than a shitload, but it won't fill up a truck. 
DRIVEN » Mon Dec 15, 2014 10:28 pm wrote:Didn't feel like working tonight so I just ordered a buttload of parts instead.
“The difference between genius and stupidly is that genius has its limits” Albert Einstein
-
DRIVEN
- Posts: 7645
- Joined: Thu Jun 27, 2013 7:05 pm
- Location: I've been everywhere
- Has thanked: 1176 times
- Been thanked: 1152 times
Re: Fuck The Reaper
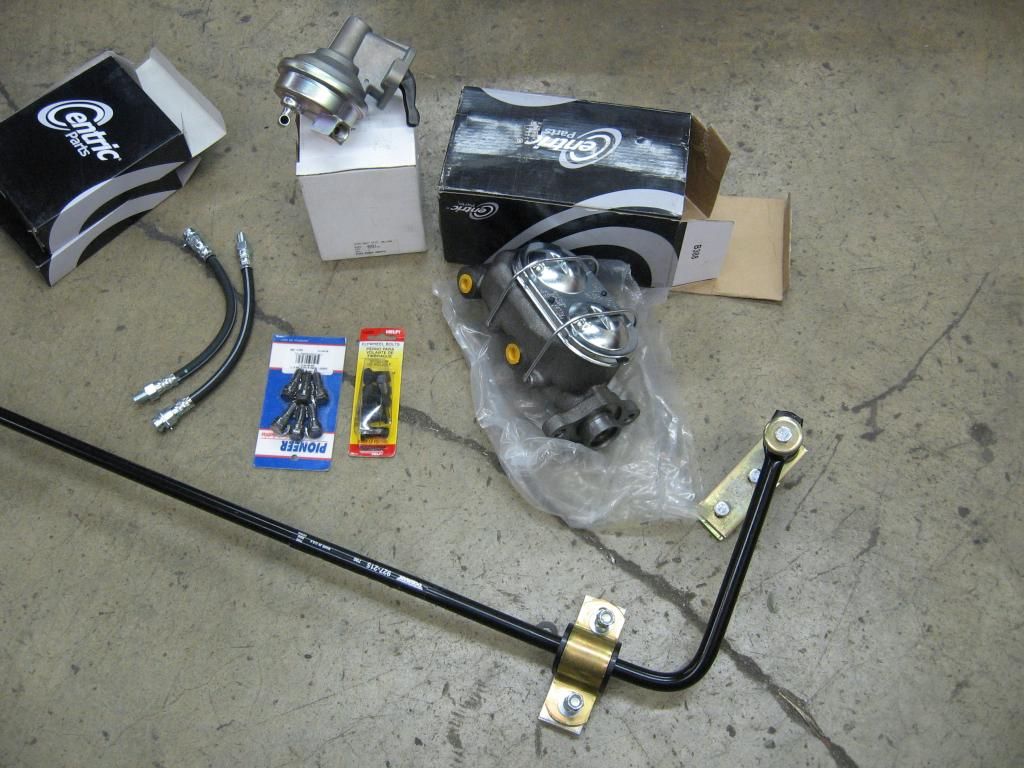
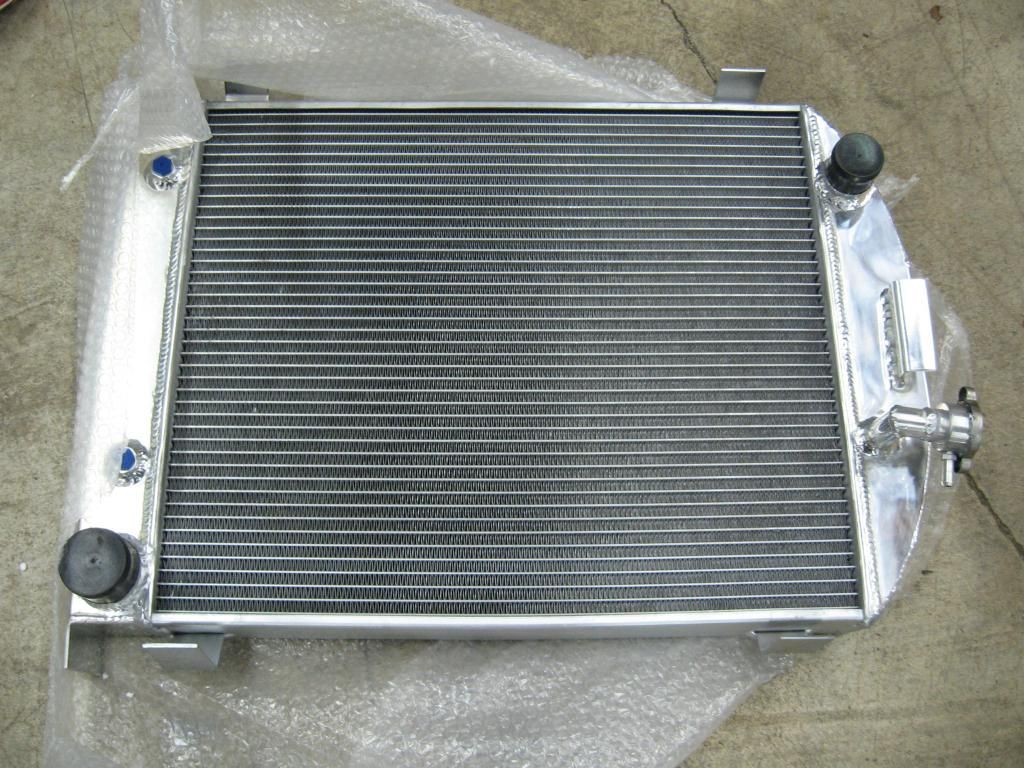
Parts started to show up...


When the only tool you have is a hammer every problem starts to look like a hippy.
-
DRIVEN
- Posts: 7645
- Joined: Thu Jun 27, 2013 7:05 pm
- Location: I've been everywhere
- Has thanked: 1176 times
- Been thanked: 1152 times
Re: Fuck The Reaper
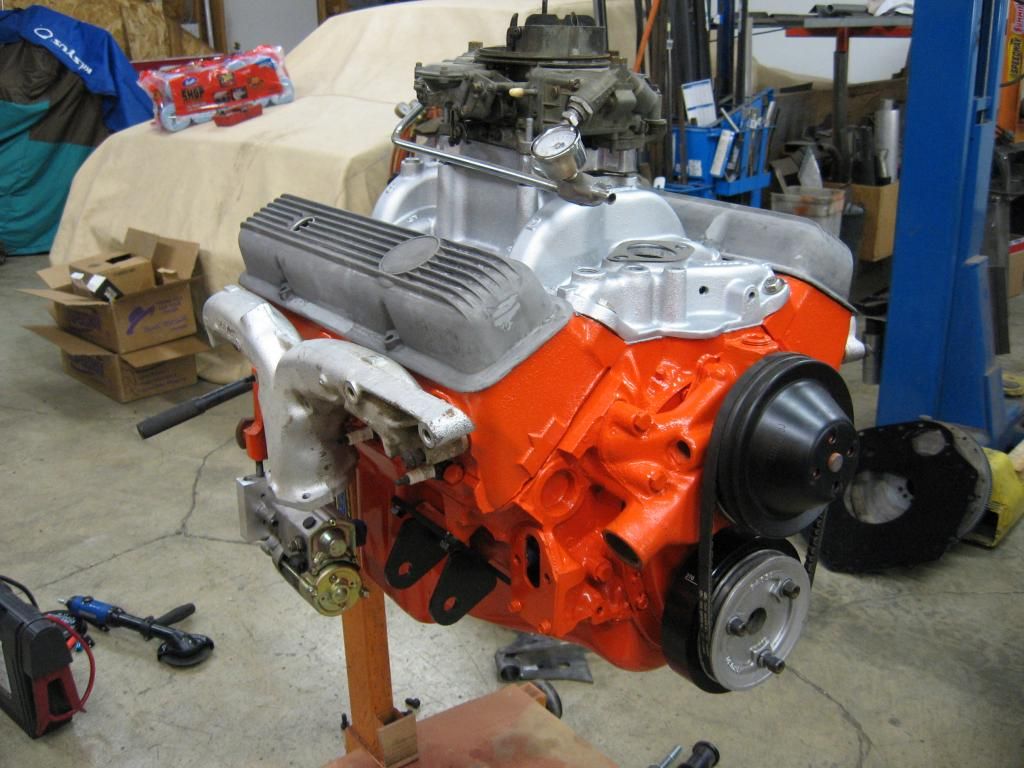
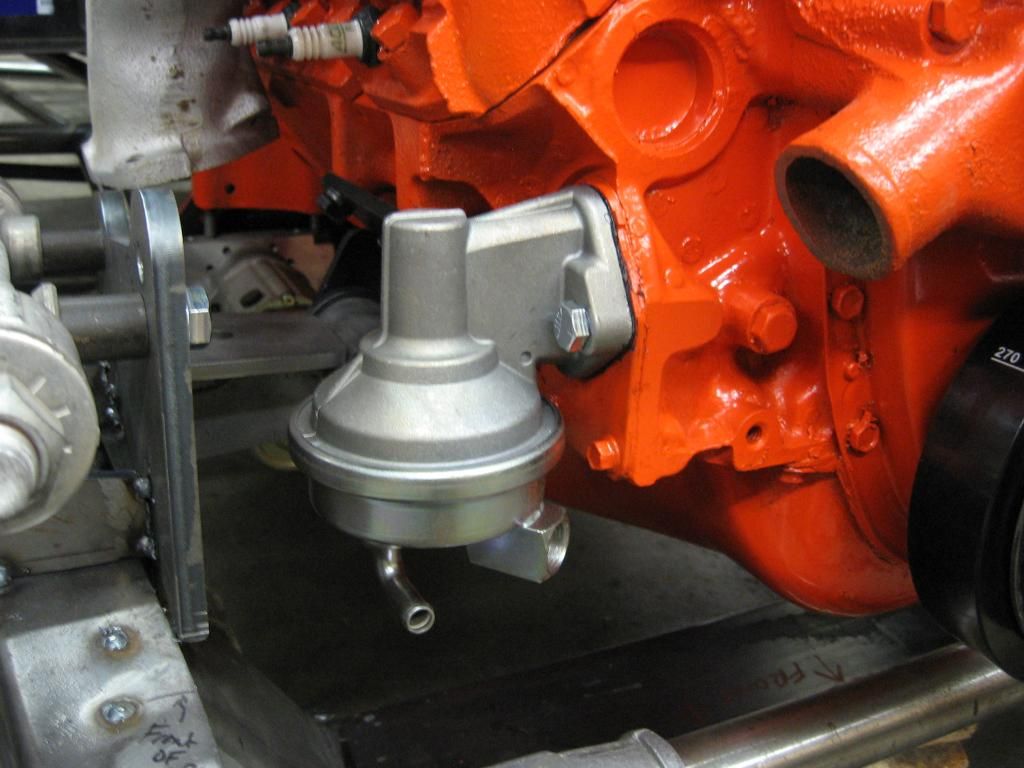
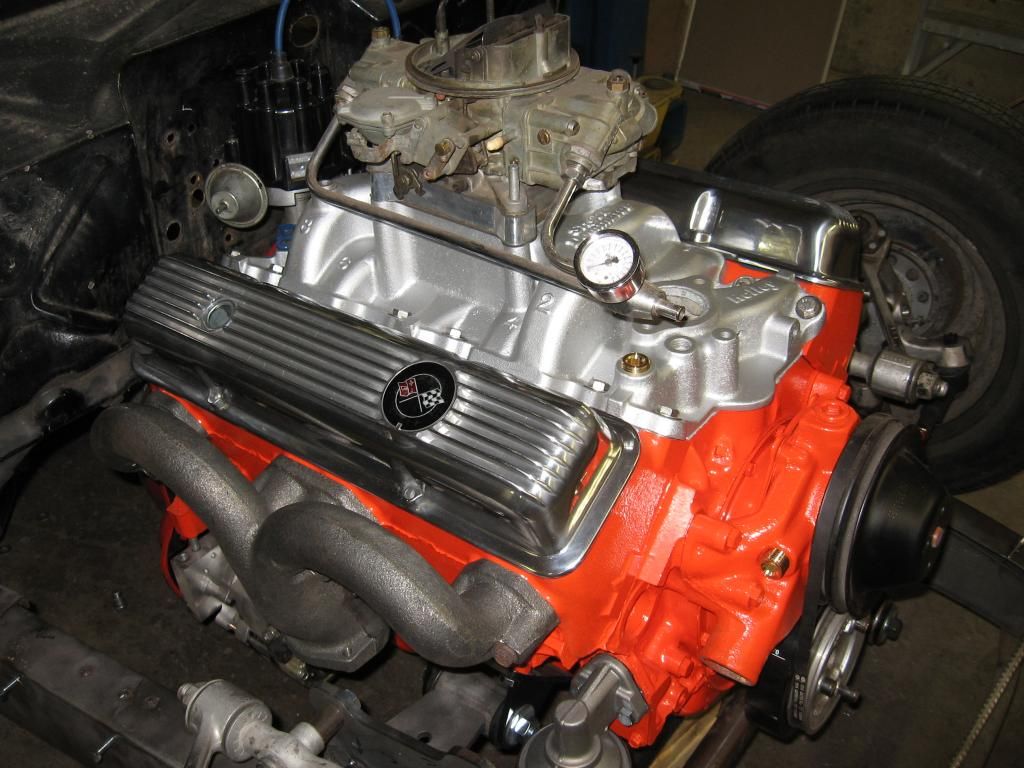
Couldn't resist seeing how some of them looked in place. Installed the fuel pump (OE AC Delco).
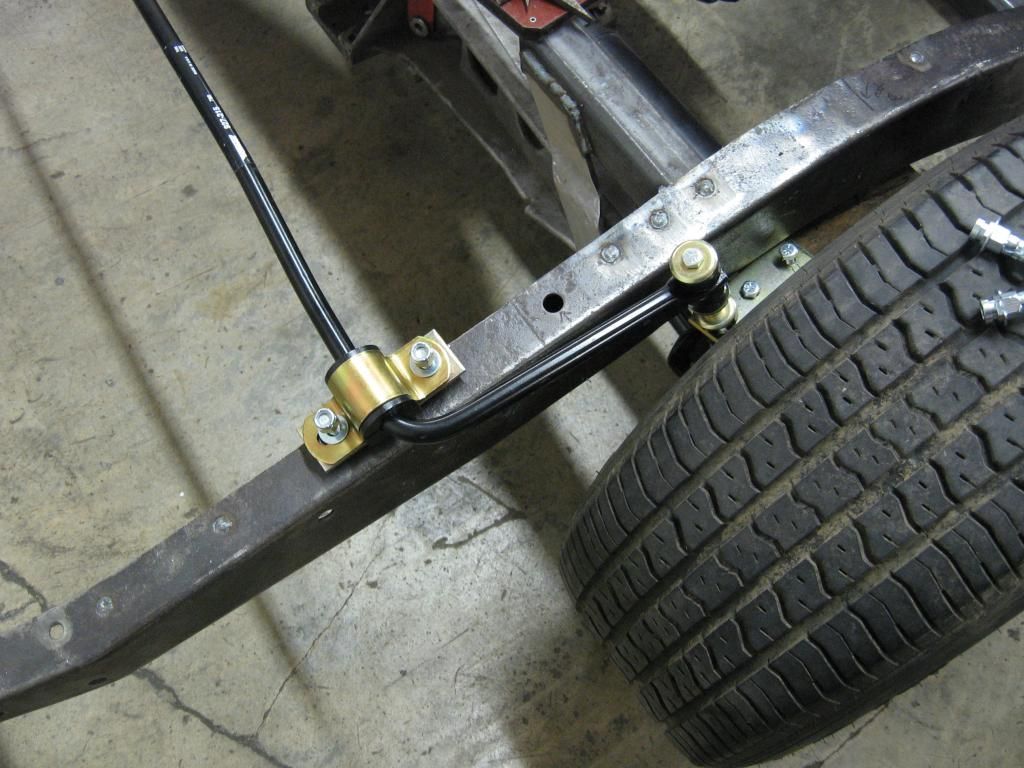
Set the rear swaybar roughly in place. I'm considering notching the frame and installing it from the bottom.
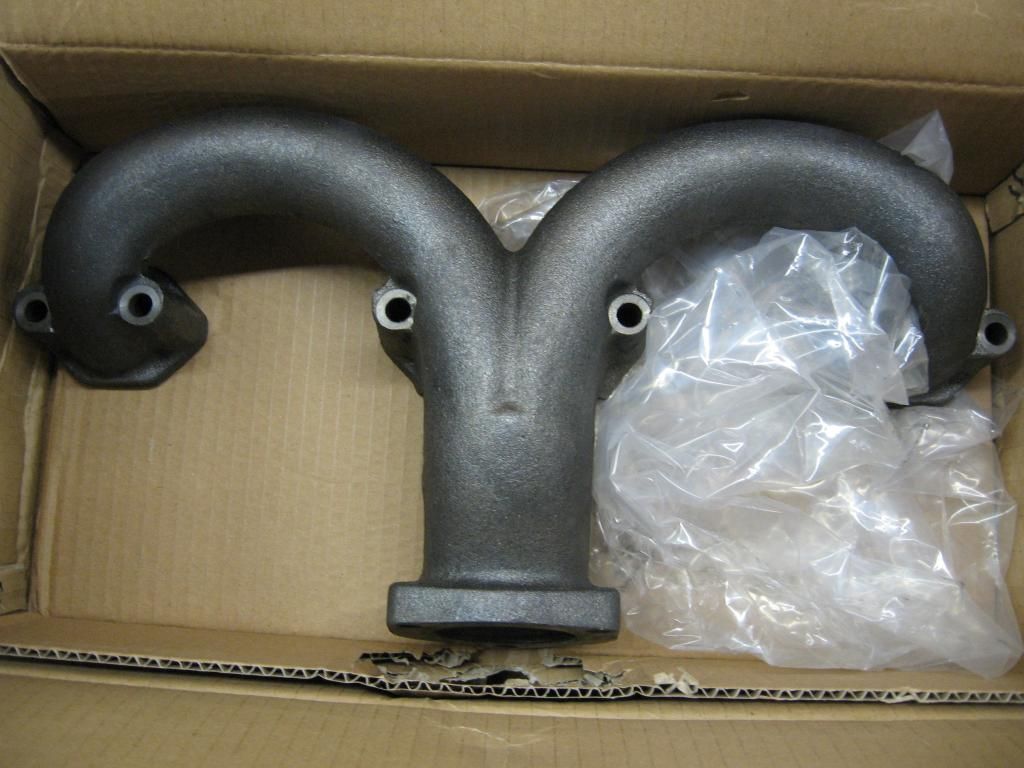
Set the new polished valve covers on and bolted up the Tru-Ram manifolds I got from Speedway. They fit perfectly like they were made to fit my application.

Set the rear swaybar roughly in place. I'm considering notching the frame and installing it from the bottom.

Set the new polished valve covers on and bolted up the Tru-Ram manifolds I got from Speedway. They fit perfectly like they were made to fit my application.


When the only tool you have is a hammer every problem starts to look like a hippy.

-
DRIVEN
- Posts: 7645
- Joined: Thu Jun 27, 2013 7:05 pm
- Location: I've been everywhere
- Has thanked: 1176 times
- Been thanked: 1152 times
Re: Fuck The Reaper
Christmas doesn't suck so bad when you're Santa.
The perspective on the pics came out weird. They actually fit my application great. Way more clearance for plug wires than OE ram horns. I'm pretty impressed with the castings. Thicker and heavier than OE. Supposed to flow better than the "Corvette" 2.5 collector version too.
The perspective on the pics came out weird. They actually fit my application great. Way more clearance for plug wires than OE ram horns. I'm pretty impressed with the castings. Thicker and heavier than OE. Supposed to flow better than the "Corvette" 2.5 collector version too.
When the only tool you have is a hammer every problem starts to look like a hippy.
-
510freak
- Global Moderator
- Posts: 9706
- Joined: Wed Jun 26, 2013 6:44 pm
- Title: DJ Jazzy Lou
- Cars: Boo no 510 lol
- Location: Van Isle
- Has thanked: 6 times
- Been thanked: 7 times
- Contact:
Re: Fuck The Reaper
Sweet manifolds!
Mmm new parts
Mmm new parts
Taterhead » Tue Dec 08, 2015 6:35 am wrote:[quote="Taterhead » Mon Dec 07, 2015 2:41 pm
Sorry, I was channeling my inner flatcat.
-
DRIVEN
- Posts: 7645
- Joined: Thu Jun 27, 2013 7:05 pm
- Location: I've been everywhere
- Has thanked: 1176 times
- Been thanked: 1152 times
Re: Fuck The Reaper
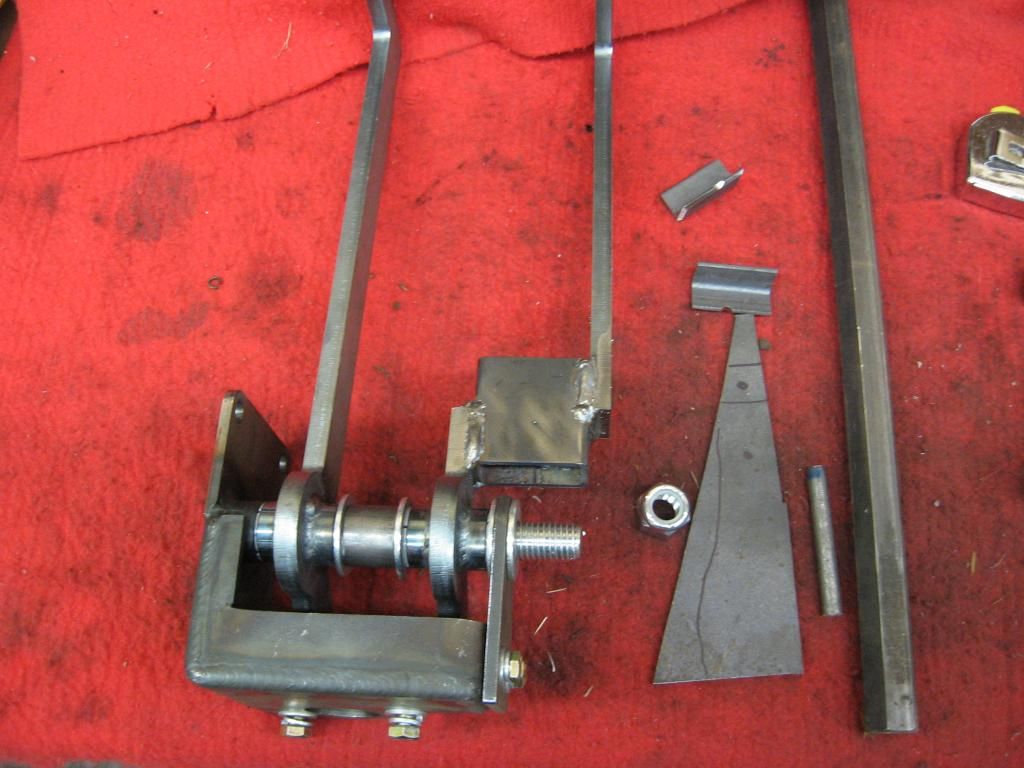
Finally! Done with the pedals. Let me start by saying that if I had any idea how much work was involved in making these fit I never would have bought them. They were really expensive to begin with but I figured it would be worth it since they were made by the same company that made the crossmember and X-rails and theoretically were supposed to be a perfect match. I should have made my own. Too late now. Anyway, this is how it went down...
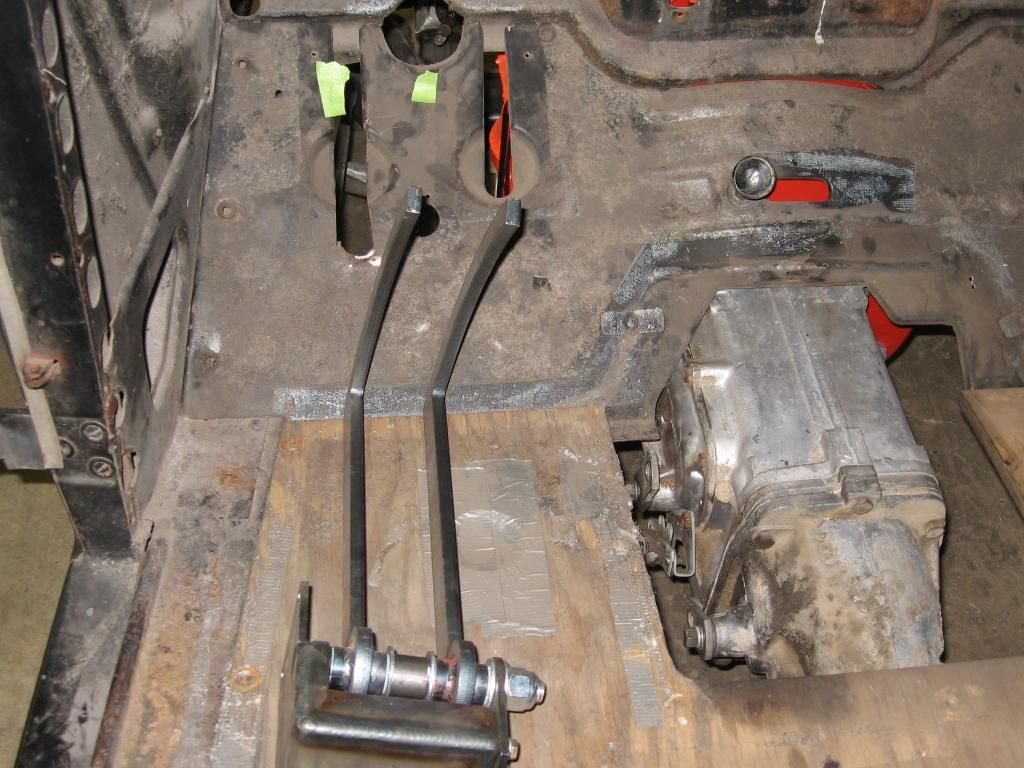
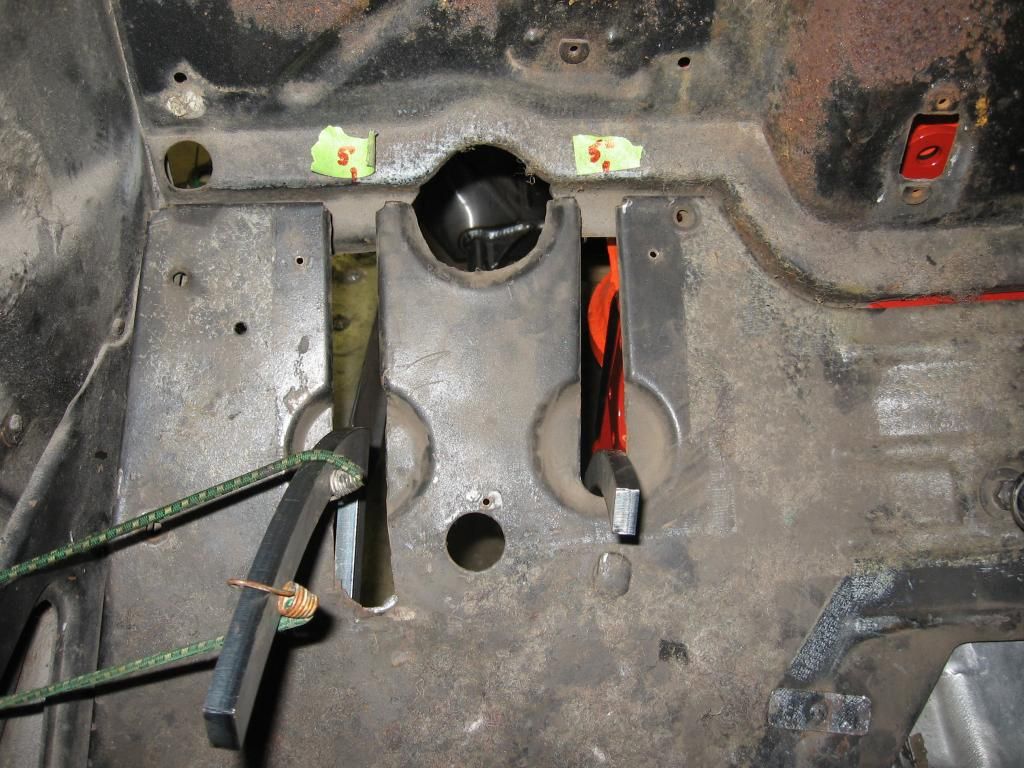
^^The green tape indicates where the pedals would come through the toeboard if I just installed as directed. Too close together. No problem, I'll just zig the brake pedal over. Started by disassembling.
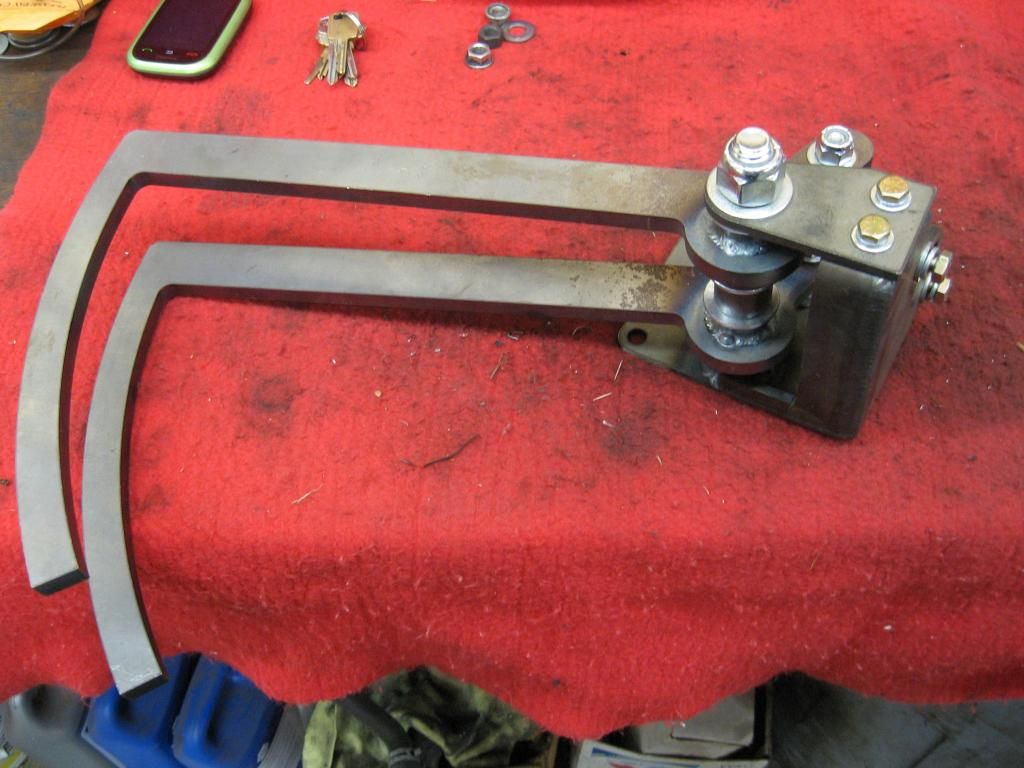
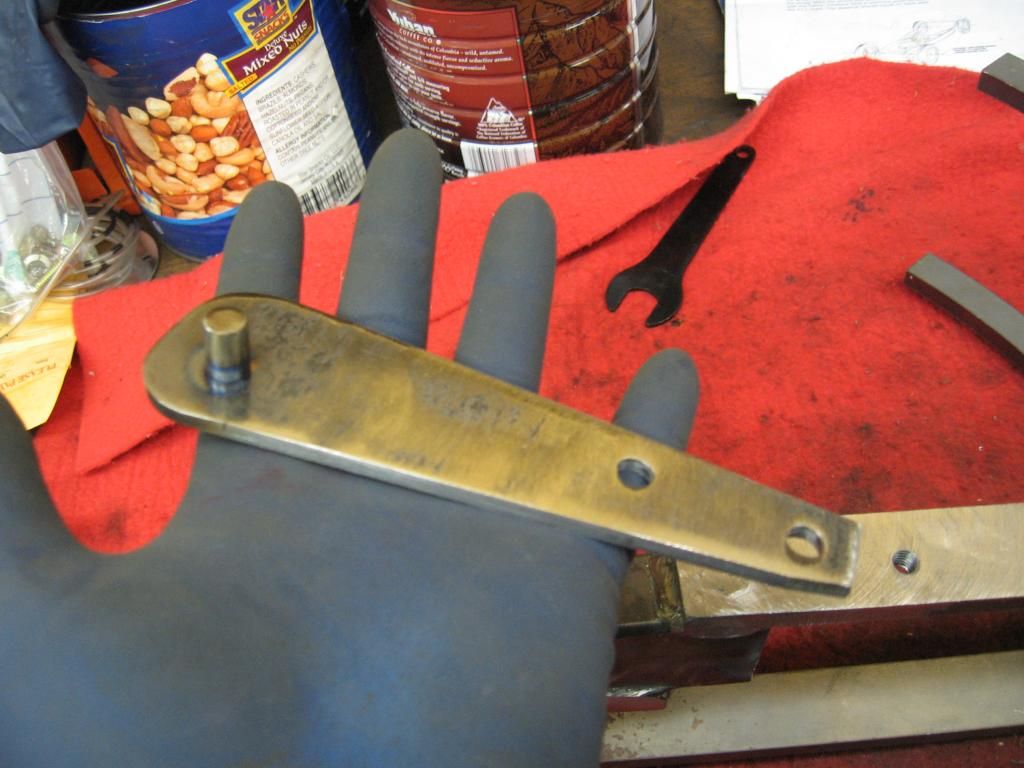
Cut the pedal in half and add a section of box tubing. You can't see but there are pins welded through all 3 parts of the pedal. The small angle parts were used as end caps to the filler piece. So it was plenty strong but I didn't like the sideload (twist) that I figured would wear out the bushings prematurely.
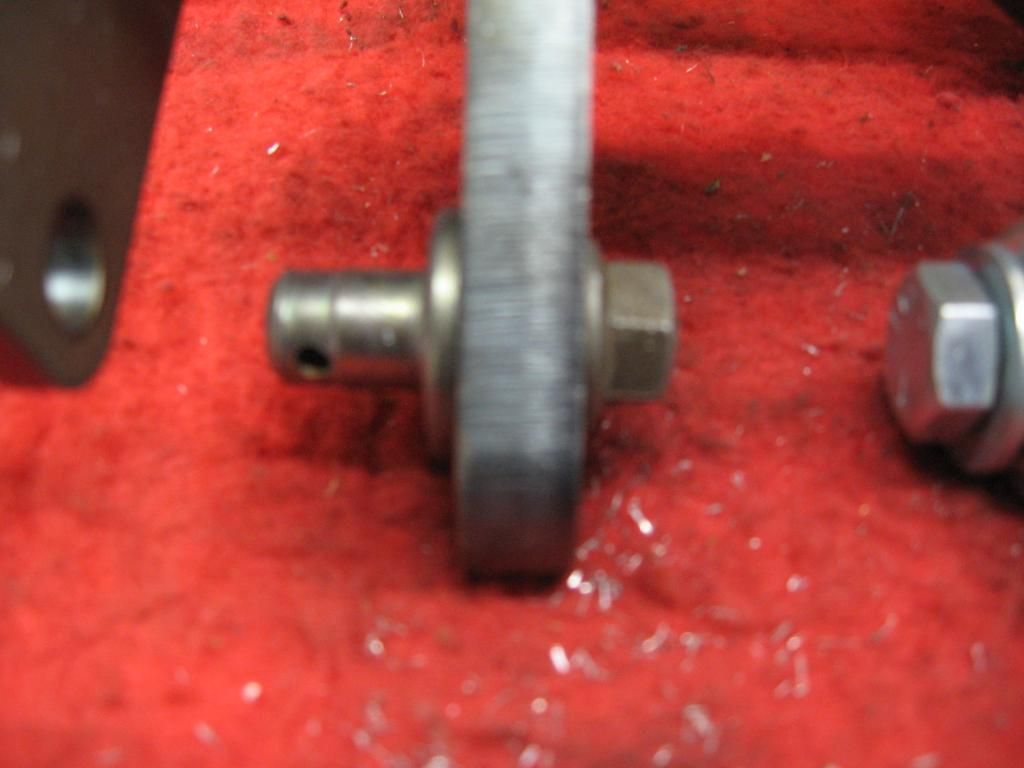
My solution was to add an outer brace to the tip of the pivot. Drilled and tapped the pedal. Then made a bushing and welded a pin to the extension plate.
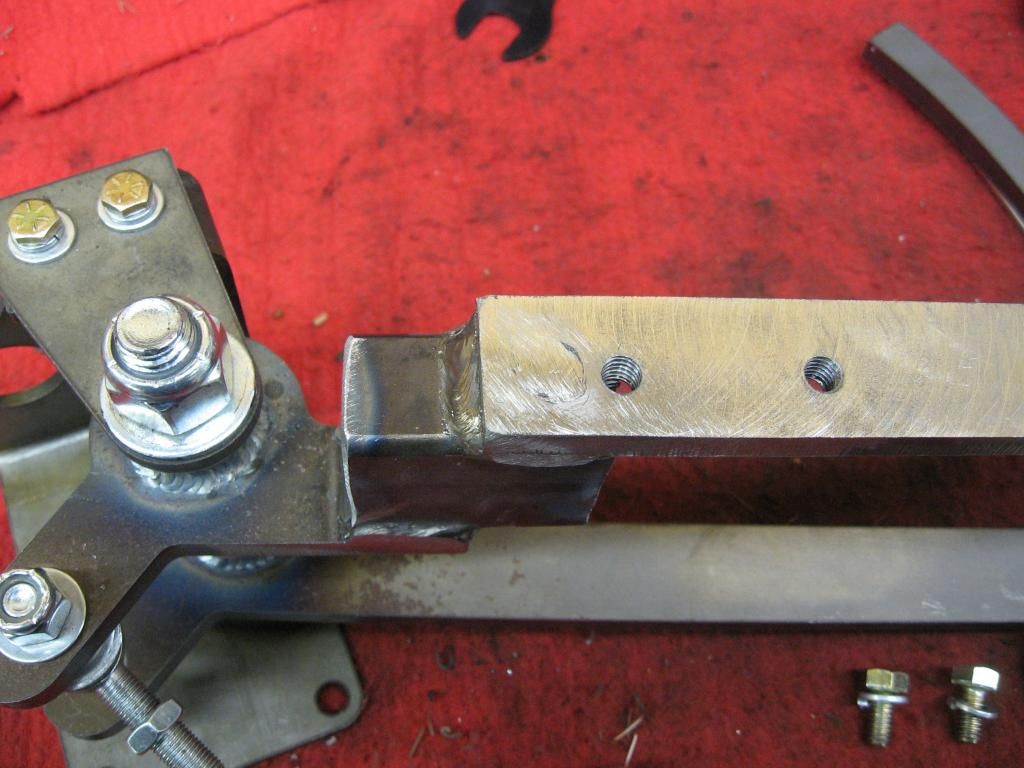
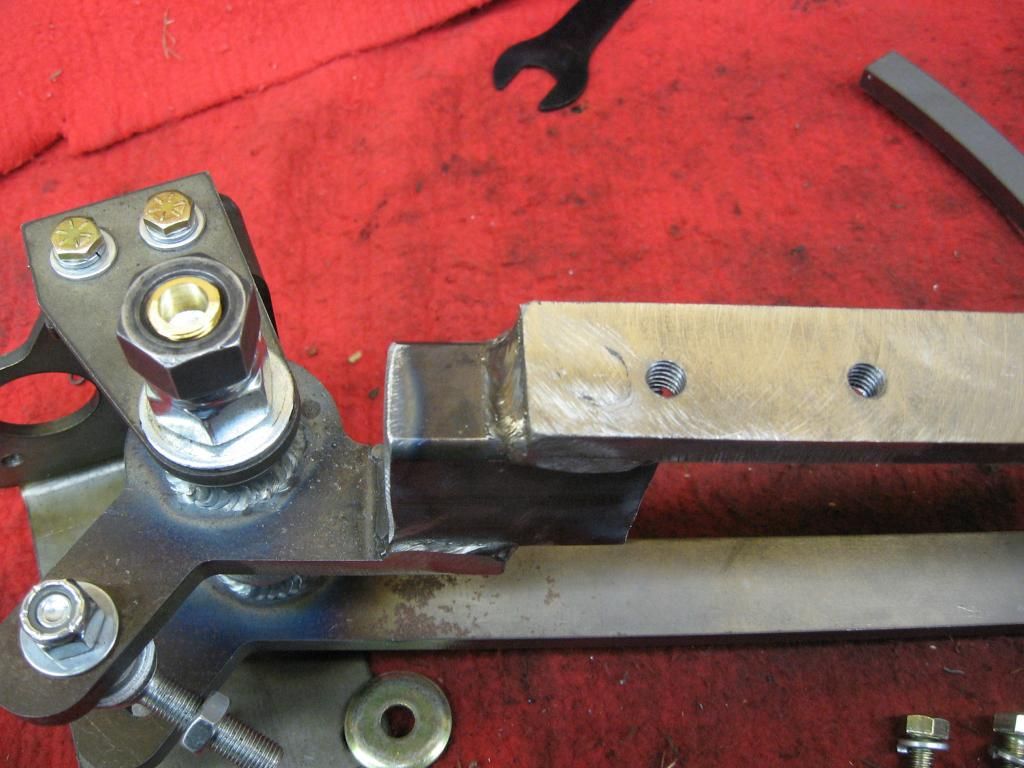
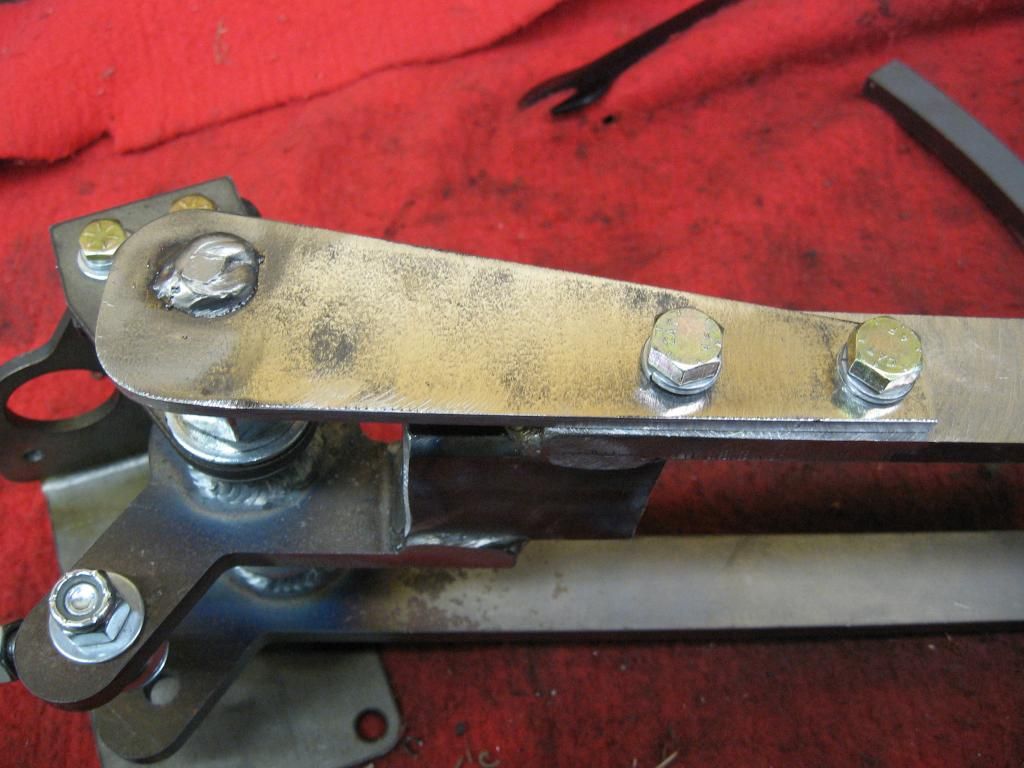
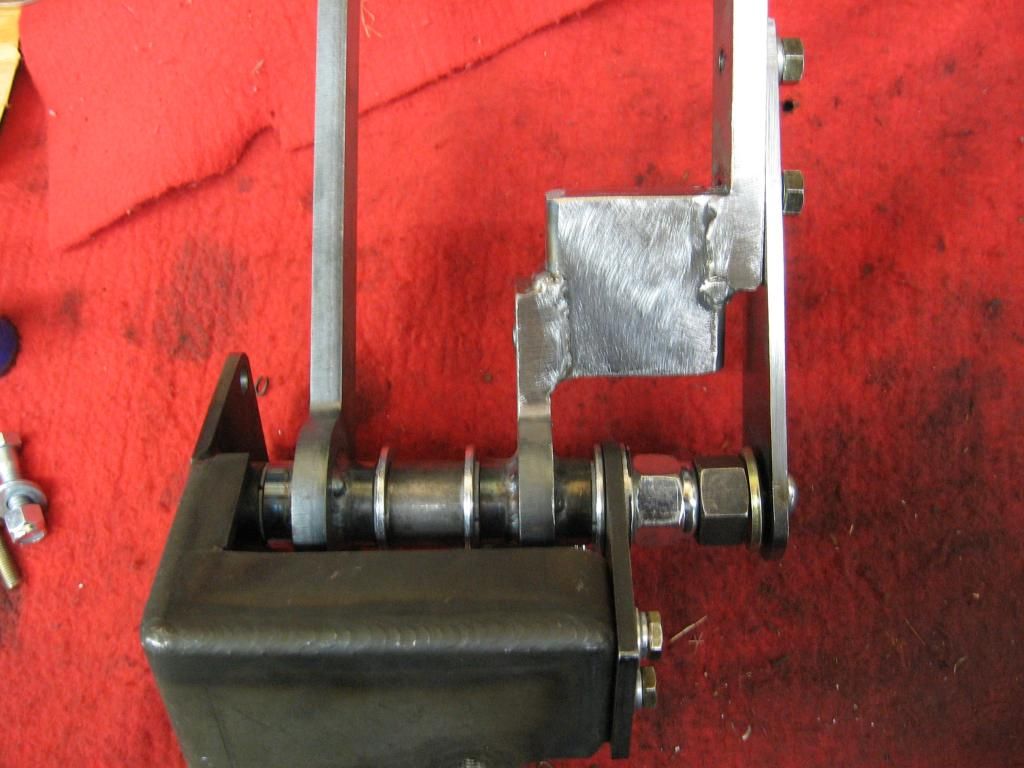
It looks a little Rube Goldberg-y but it's functional and out of sight.
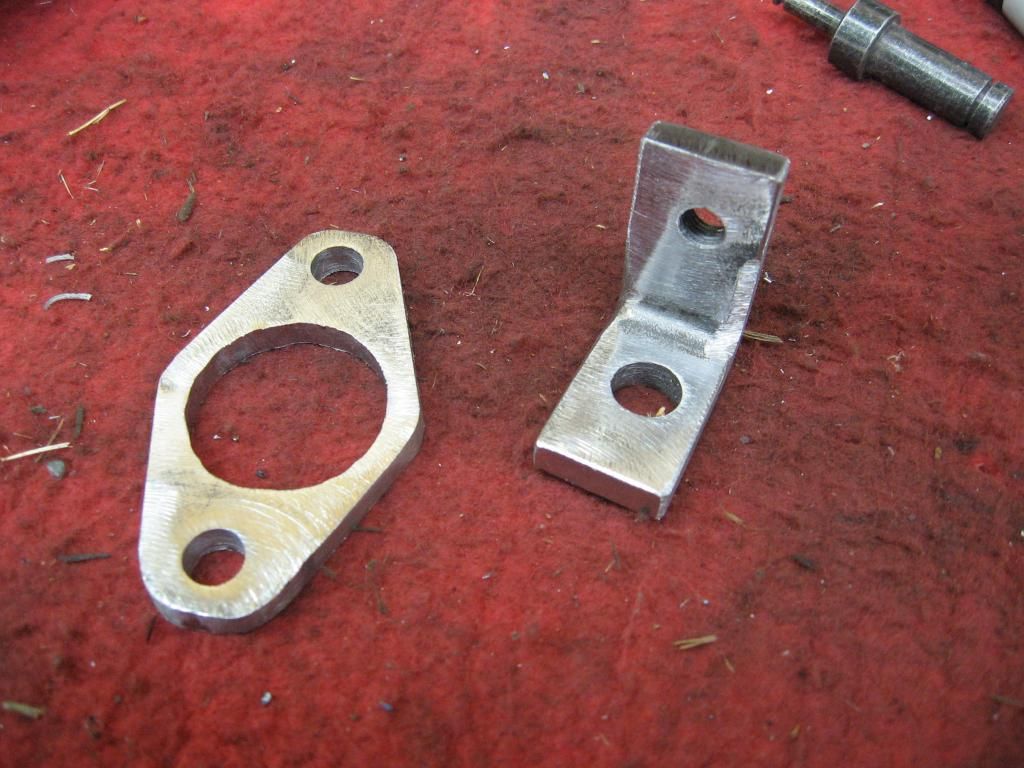
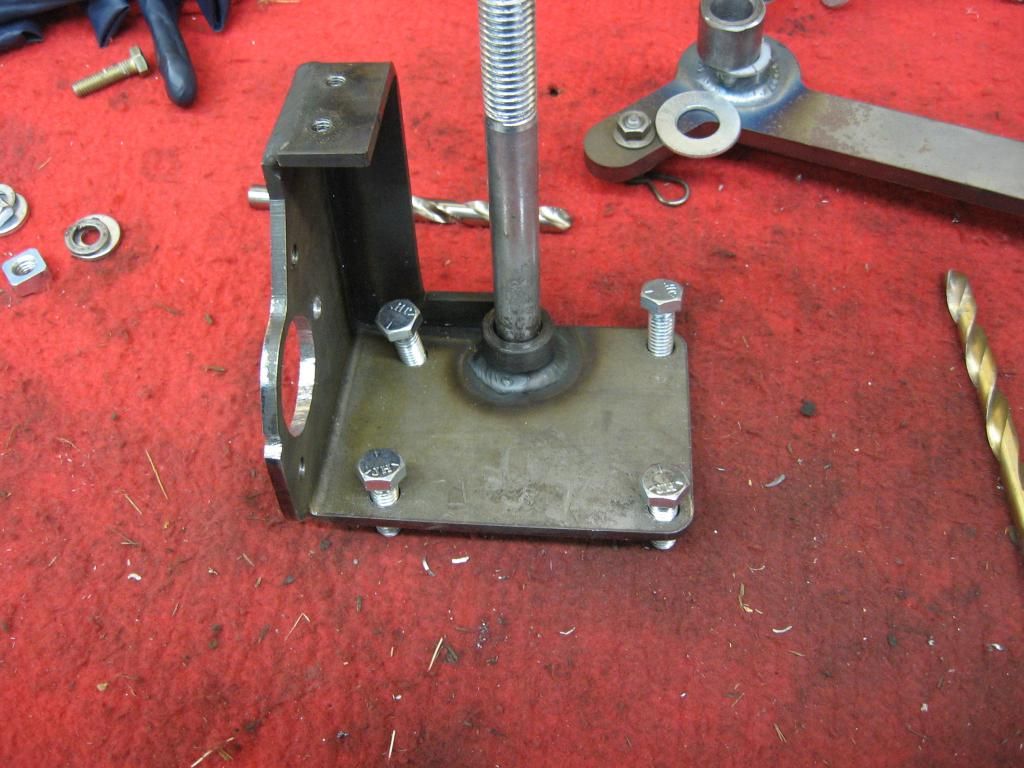
But wait, there's more. They also use a specific (no part # listed) master cylinder which I didn't order due to the ridiculously high price. Instead, I went with a Speedway (mfg by Afco) unit. That made it necessary to enlarge the center hole, redrill the upper hole, and fabricate a backer plate so that the lower hole would have not just be an imaginary point in outer space. Also made an L-bracket and found a pin for the clutch pedal.
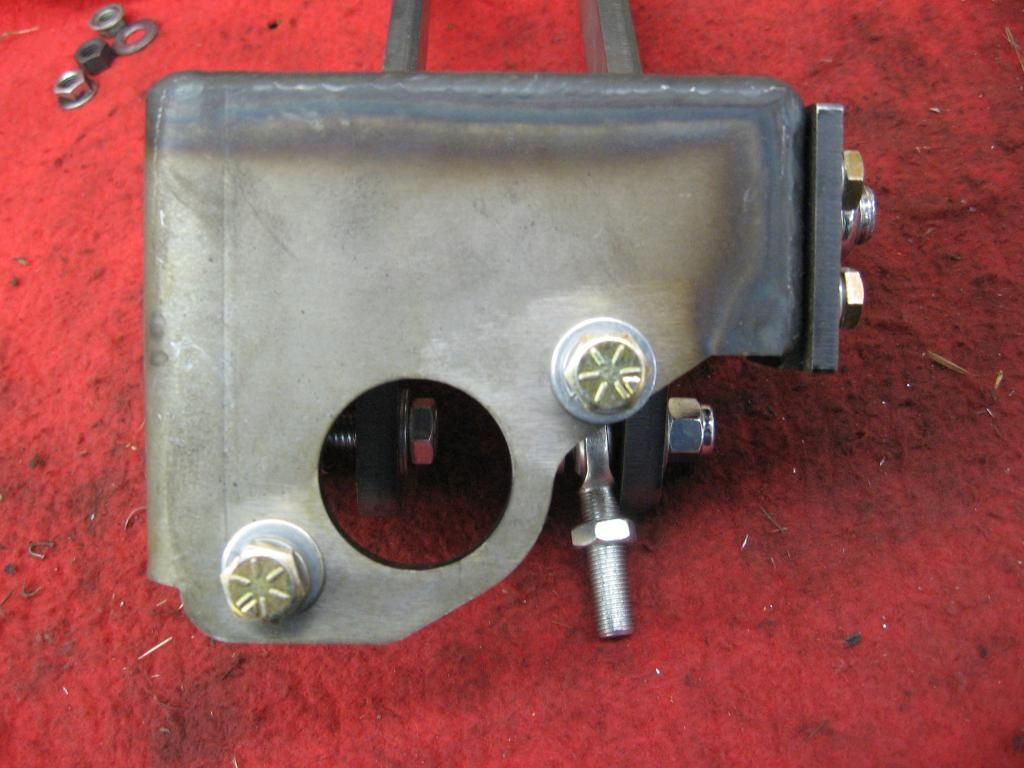
At least now the pedals come up through the floor where they're supposed to.

^^The green tape indicates where the pedals would come through the toeboard if I just installed as directed. Too close together. No problem, I'll just zig the brake pedal over. Started by disassembling.

Cut the pedal in half and add a section of box tubing. You can't see but there are pins welded through all 3 parts of the pedal. The small angle parts were used as end caps to the filler piece. So it was plenty strong but I didn't like the sideload (twist) that I figured would wear out the bushings prematurely.

My solution was to add an outer brace to the tip of the pivot. Drilled and tapped the pedal. Then made a bushing and welded a pin to the extension plate.


It looks a little Rube Goldberg-y but it's functional and out of sight.
But wait, there's more. They also use a specific (no part # listed) master cylinder which I didn't order due to the ridiculously high price. Instead, I went with a Speedway (mfg by Afco) unit. That made it necessary to enlarge the center hole, redrill the upper hole, and fabricate a backer plate so that the lower hole would have not just be an imaginary point in outer space. Also made an L-bracket and found a pin for the clutch pedal.


At least now the pedals come up through the floor where they're supposed to.
When the only tool you have is a hammer every problem starts to look like a hippy.
-
DRIVEN
- Posts: 7645
- Joined: Thu Jun 27, 2013 7:05 pm
- Location: I've been everywhere
- Has thanked: 1176 times
- Been thanked: 1152 times
Re: Fuck The Reaper
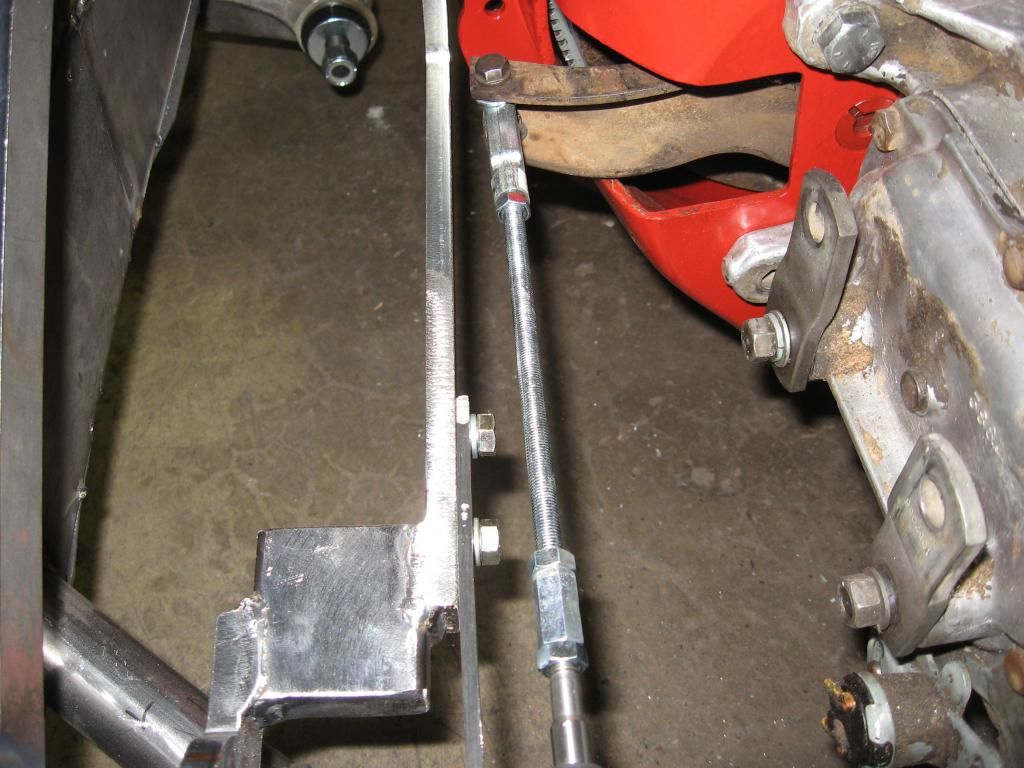
Next up was mounting the pedal assy. It was intended to be welded to the frame rail but I wanted to be able to remove it if I ever wanted to change things up. Drilled some holes in the bracket, then the rail, then larger access holes on the outside of the frame.
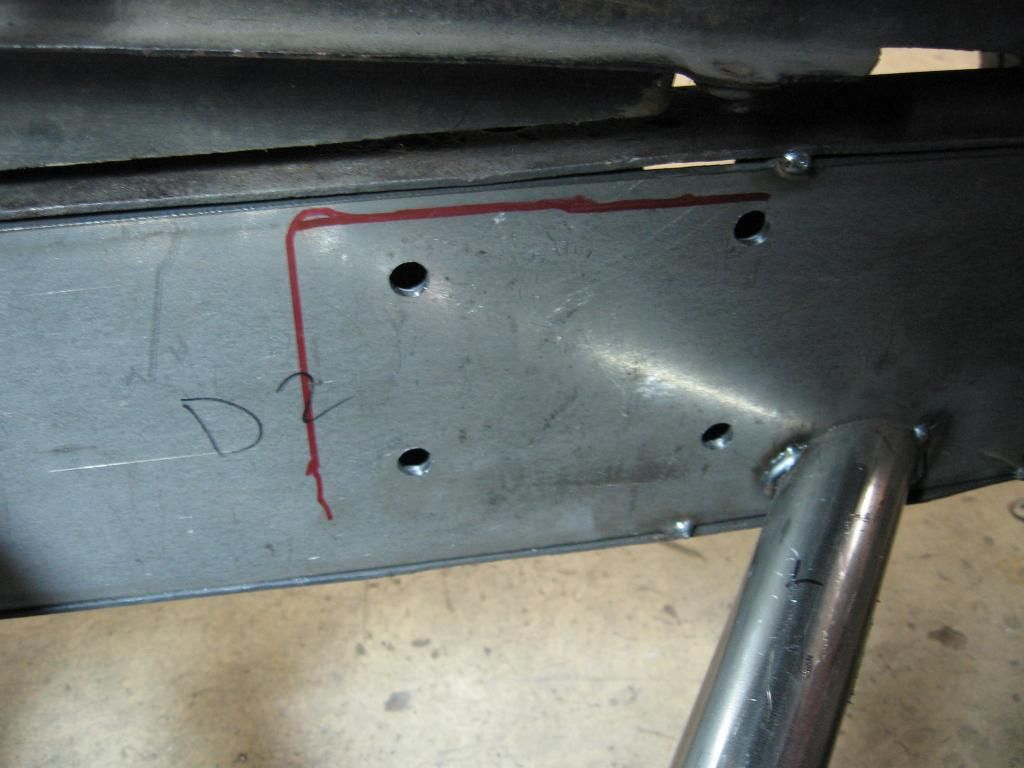

It was also necessary to remove a 2" support tube and replace it with a smaller one so that I'd have room for exhaust.
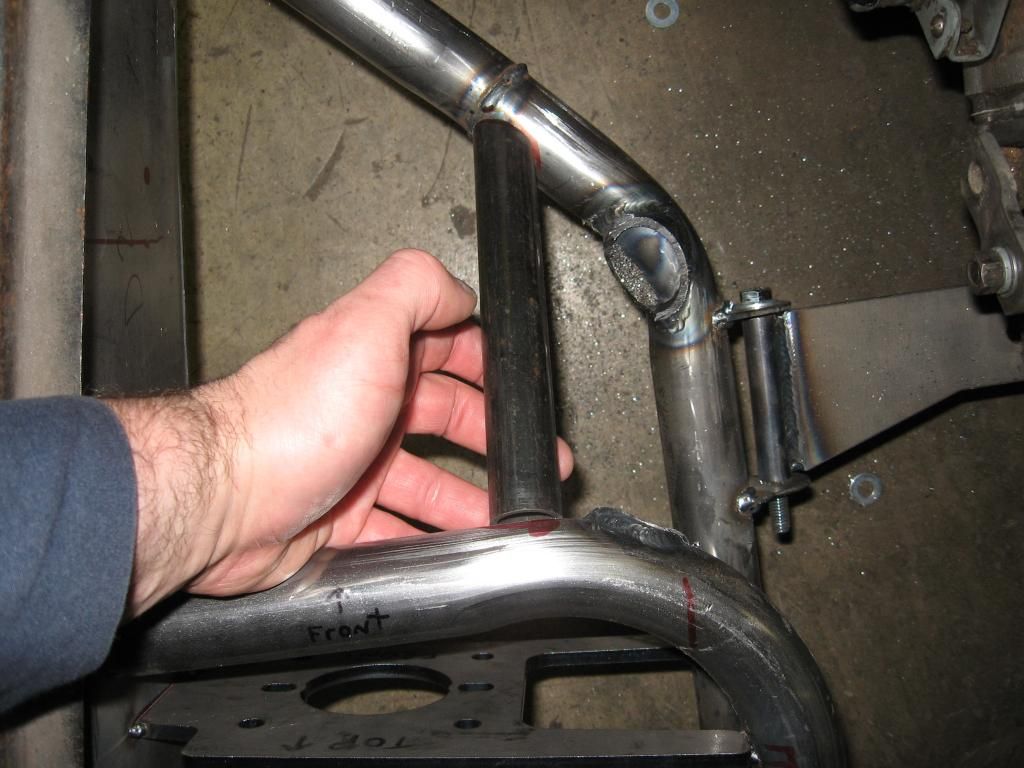
^^Also visible is the master cylinder mounting plate. Note the holes for optional brake booster. I'm really glad I decided not to go that route.
How's this for tight quarters? Still need to leave room for the shifter and linkage.
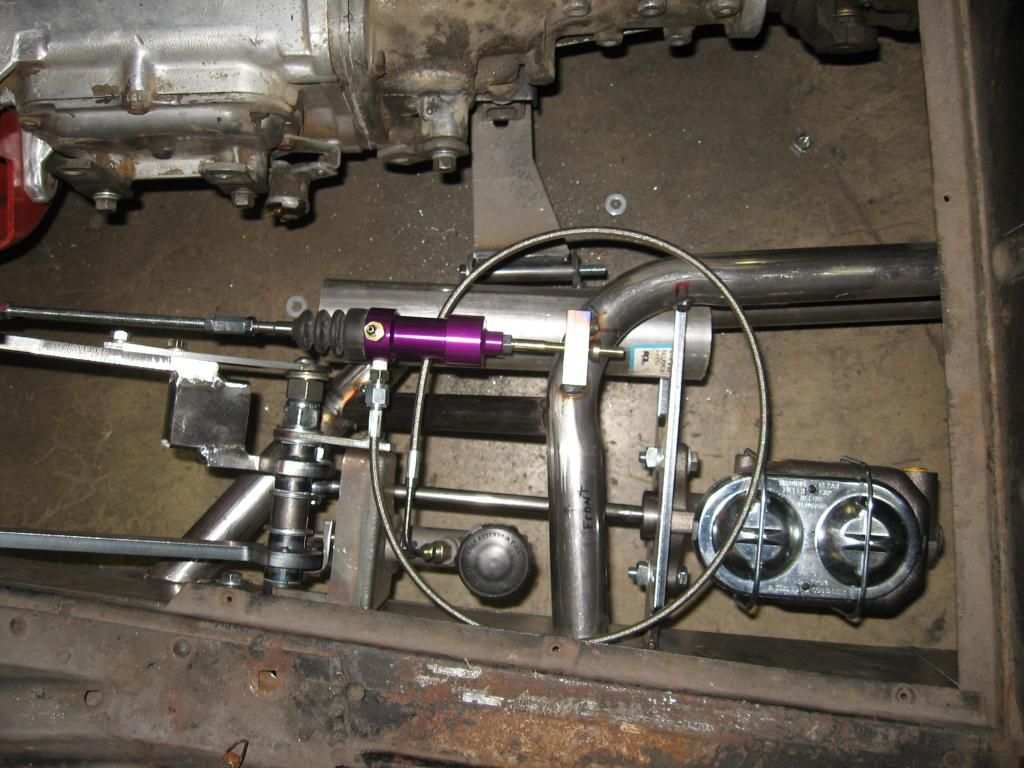
^^You'll see a section of exhaust pipe in the space I made. There's room for 3" if I want it. I'm using a pull type slave cylinder. This gives a view of the proximity with the brake pedal down.
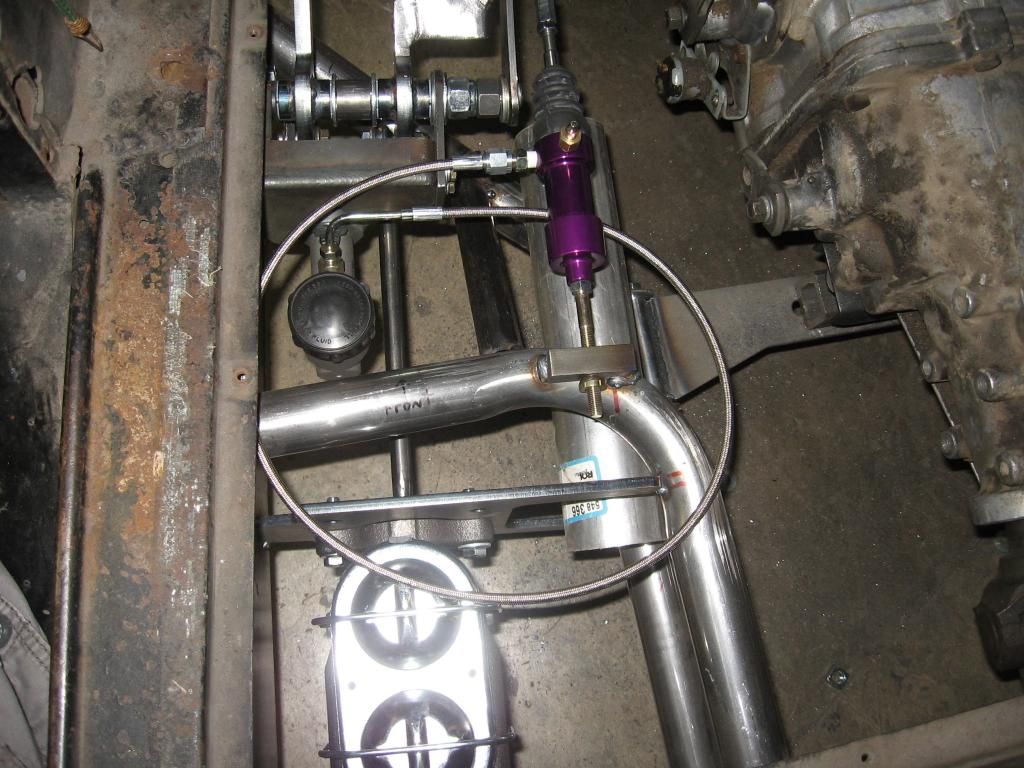
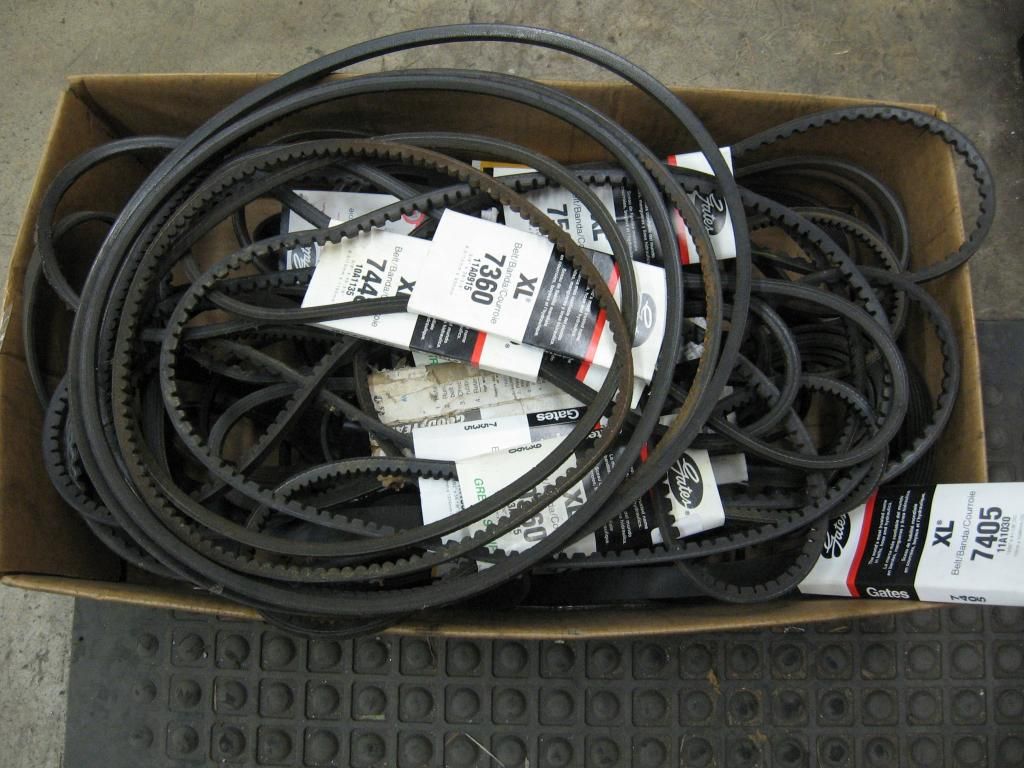
Sometimes being a hoarder pays off. I keep this box full of take-off belts for occasions such as this. Dug through the pile and found a perfect fit for my alternator. That'll give me a part number for the new one to take to the parts store. Also test fit a flex fan.
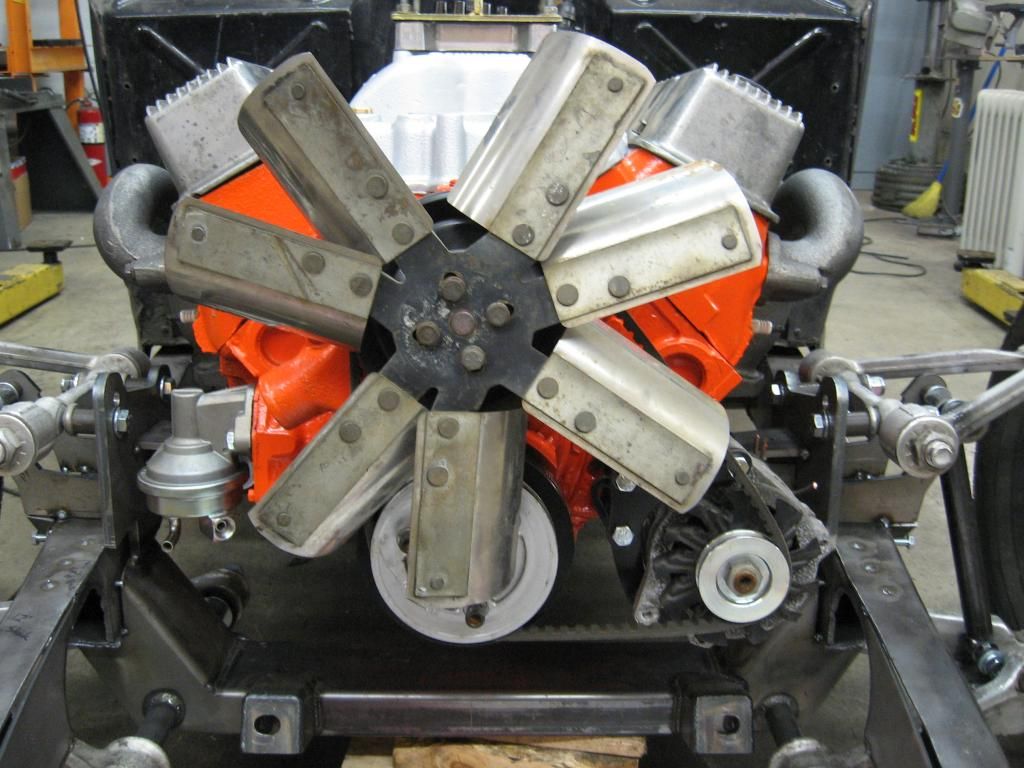
Not shown, but necessary, was dropping the steering rack another 1/2". Gave just enough clearance for the alternator. Last order of business was the simple brackets for the proportioning valve. That will be located directly behind the master cylinder.


It was also necessary to remove a 2" support tube and replace it with a smaller one so that I'd have room for exhaust.

^^Also visible is the master cylinder mounting plate. Note the holes for optional brake booster. I'm really glad I decided not to go that route.
How's this for tight quarters? Still need to leave room for the shifter and linkage.

^^You'll see a section of exhaust pipe in the space I made. There's room for 3" if I want it. I'm using a pull type slave cylinder. This gives a view of the proximity with the brake pedal down.


Sometimes being a hoarder pays off. I keep this box full of take-off belts for occasions such as this. Dug through the pile and found a perfect fit for my alternator. That'll give me a part number for the new one to take to the parts store. Also test fit a flex fan.


Not shown, but necessary, was dropping the steering rack another 1/2". Gave just enough clearance for the alternator. Last order of business was the simple brackets for the proportioning valve. That will be located directly behind the master cylinder.

When the only tool you have is a hammer every problem starts to look like a hippy.