Around Waynos house
- wayno
- Posts: 5309
- Joined: Thu Jun 27, 2013 8:44 pm
- Location: Vancouver WA
- Has thanked: 430 times
- Been thanked: 1295 times
Re: Around Waynos house
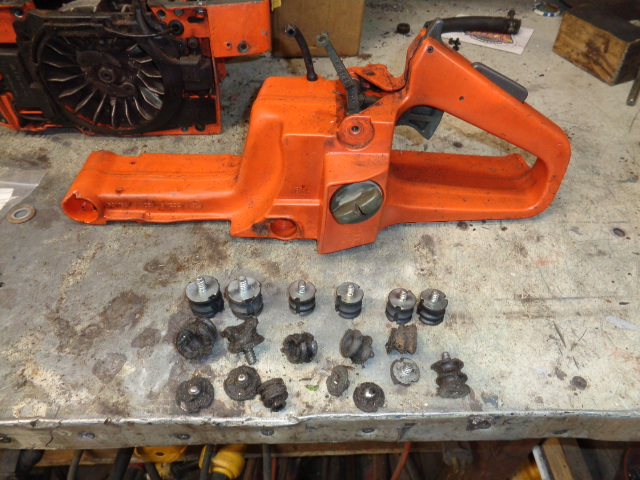
Here is my Husqvarna 266 W, the first photo is of the broken rubber parts in front of the handle/tank.
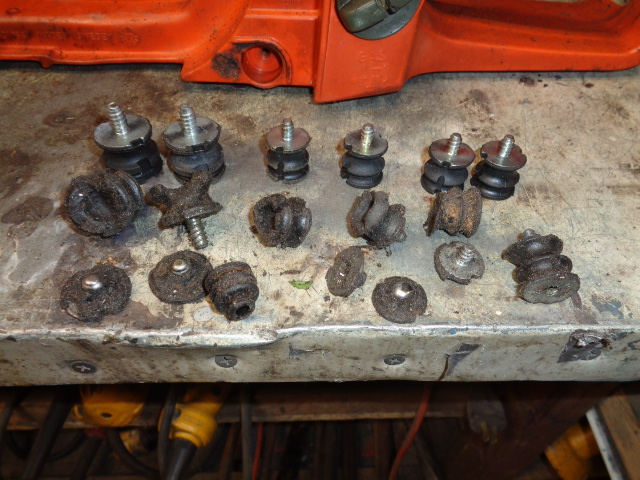
This is a close up of the new and old rubber parts.
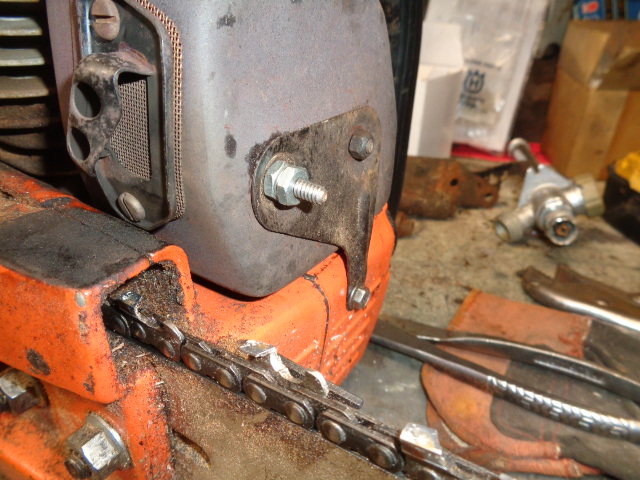
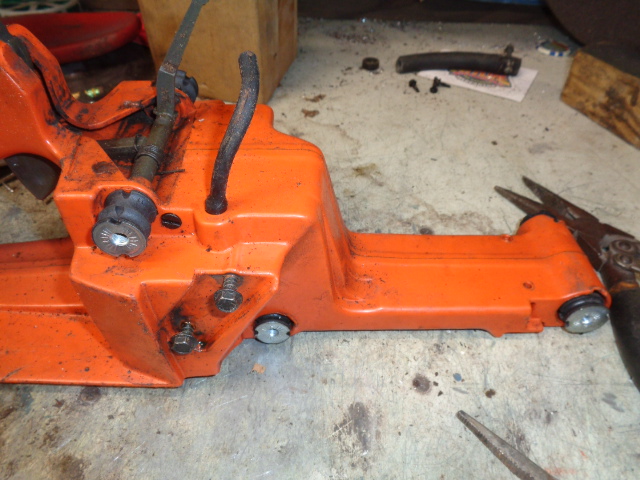
And this is of the handle/tank with the new rubber parts installed, the guy at the shop said the engine assembly would not go over the handle/tank with the 2 upper mounts mounted, it slid right over the handle/tank without any issues, they consider this chainsaw a "frankensaw", they say it was never put together this way at the factory with then 2 extra mounts, they call them anti-vibration mounts.
I did fire it up in my backyard but did not use it, it appears to work fine although it is really loud, I am now looking for a new muffler.
“The difference between genius and stupidly is that genius has its limits” Albert Einstein
- wayno
- Posts: 5309
- Joined: Thu Jun 27, 2013 8:44 pm
- Location: Vancouver WA
- Has thanked: 430 times
- Been thanked: 1295 times
Re: Around Waynos house
I used my chainsaws today, the chains were not sharp on either of them, so once the 24" ran out of fuel I used the 32" until it ran out of fuel, then I put the brand new chain on it and it went thru a 32" log almost like butter, its not a race chainsaw but one has dreams when a new chain is installed, there is one more load left and I believe that is all there was to be had unless the cousin drags some more logs in from somewhere I do not know about.
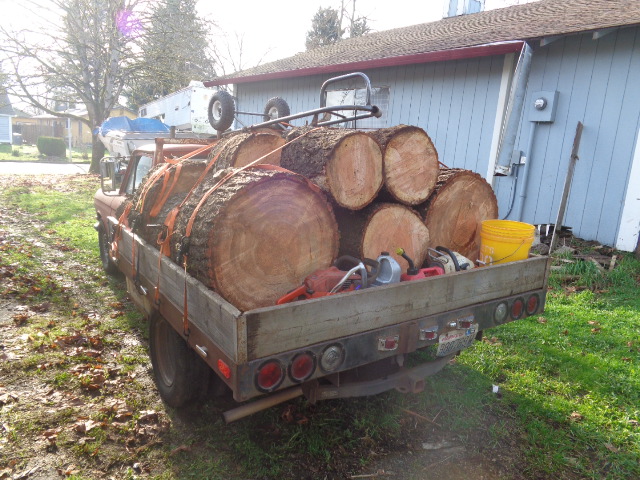
Here is the load today, I did not really fill it up as mentioned as there is only one load left.
This area was for parking my small tractor, but I needed somewhere to put the Fir firewood pile, except for about 10 large rounds it all fit in this area, here is where I was this morning.
And here is it almost completely full, I do not know exactly how much firewood is in this area, I suspect it is close to 6 cord.
The maybe 10 rounds left are all 32" or larger, so far I only have had one piece of wood drop not very hard on my right foot where them bone on bone joints are, it hurt like hell but it appears to have not made the foot worse(happened a couple weeks ago), so I guess I am lucky, I have a couple years of firewood stored now.
The other day I was sitting in my living room doing something other than watching the TV although it was on, I had put some wood in the stove and left the door cracked open to give it air and get it burning good, I heard this howl, it started getting louder, I realized that I had a chimney fire starting/already going, I closed the wood stove door to cut off the air and went outside and the cap/screen was on fire, now I had already had to clean that cap because it had plugged up less than a week before, but one can only get it so clean, so I went onto the roof to check the wood structure and see how hot it was, it was not so hot to worry me so I went into the attic and checked the tube, it was warm also but not so much to worry me, I checked the roof wood again and it had cooled and the chimney fire was out, I went into the attic again and the tube was cooler also, right then I heard a knock on the front door and I called out I would be right there, I opened the front door and the fire dept was there, I told them I had a small chimney fire and it was out, they smiled at me and left as there was no visible fire, I believe my new neighbor that hates my wood stove called them, I got on the roof one more time and looked at the chimney cap, it burned everything squeaky clean, there is zero creosote left, I will look at it/watch it more often now, this wood I am burning now, or at least some of it come from blown down trees last winter, maybe this is why I had creosote build up, the wood I am bring home now is 2+ year old seasoned wood, I should not have as bad of creosote issues with it, maybe I should burn this stuff now or at least try it.
Here is the load today, I did not really fill it up as mentioned as there is only one load left.
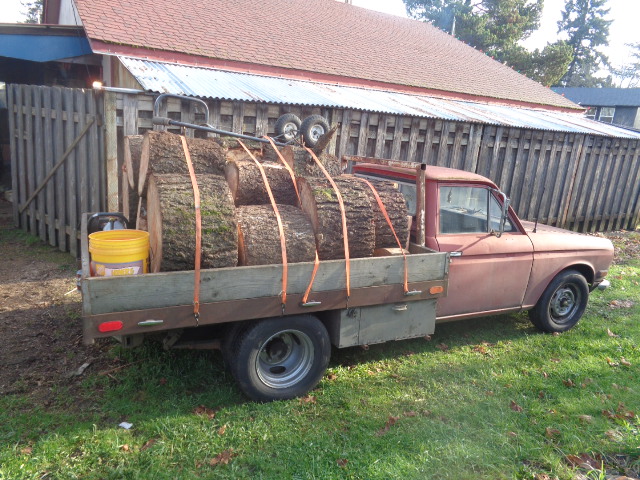
This area was for parking my small tractor, but I needed somewhere to put the Fir firewood pile, except for about 10 large rounds it all fit in this area, here is where I was this morning.
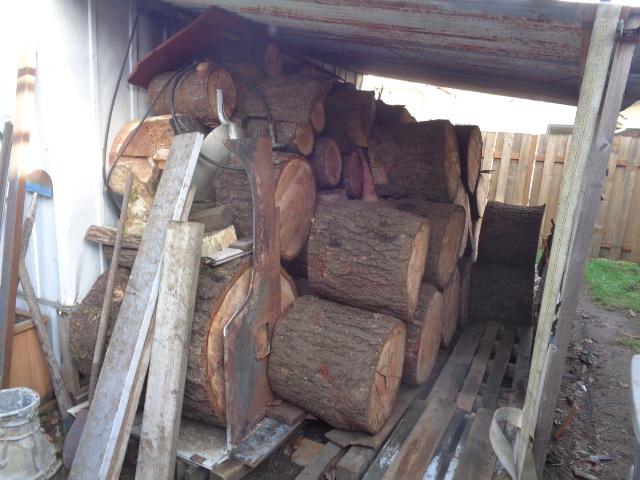
And here is it almost completely full, I do not know exactly how much firewood is in this area, I suspect it is close to 6 cord.
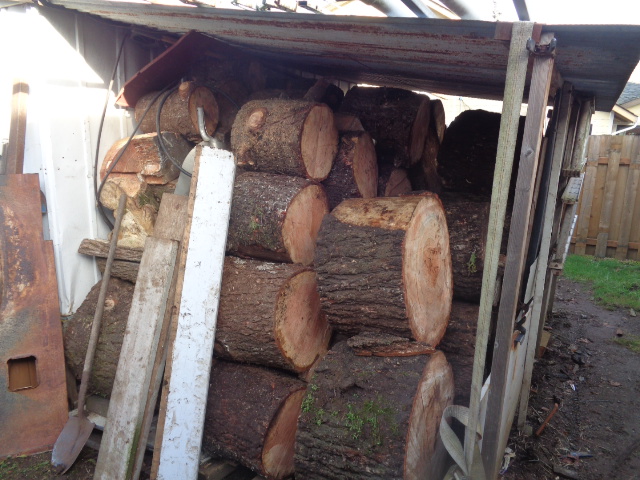
The maybe 10 rounds left are all 32" or larger, so far I only have had one piece of wood drop not very hard on my right foot where them bone on bone joints are, it hurt like hell but it appears to have not made the foot worse(happened a couple weeks ago), so I guess I am lucky, I have a couple years of firewood stored now.
The other day I was sitting in my living room doing something other than watching the TV although it was on, I had put some wood in the stove and left the door cracked open to give it air and get it burning good, I heard this howl, it started getting louder, I realized that I had a chimney fire starting/already going, I closed the wood stove door to cut off the air and went outside and the cap/screen was on fire, now I had already had to clean that cap because it had plugged up less than a week before, but one can only get it so clean, so I went onto the roof to check the wood structure and see how hot it was, it was not so hot to worry me so I went into the attic and checked the tube, it was warm also but not so much to worry me, I checked the roof wood again and it had cooled and the chimney fire was out, I went into the attic again and the tube was cooler also, right then I heard a knock on the front door and I called out I would be right there, I opened the front door and the fire dept was there, I told them I had a small chimney fire and it was out, they smiled at me and left as there was no visible fire, I believe my new neighbor that hates my wood stove called them, I got on the roof one more time and looked at the chimney cap, it burned everything squeaky clean, there is zero creosote left, I will look at it/watch it more often now, this wood I am burning now, or at least some of it come from blown down trees last winter, maybe this is why I had creosote build up, the wood I am bring home now is 2+ year old seasoned wood, I should not have as bad of creosote issues with it, maybe I should burn this stuff now or at least try it.
“The difference between genius and stupidly is that genius has its limits” Albert Einstein
-
- Posts: 1813
- Joined: Wed Jun 26, 2013 6:48 pm
- Cars: (3) s30's , (2) s130's
- Location: Unknown
- Has thanked: 669 times
- Been thanked: 243 times
Re: Around Waynos house
Chimney fire...Thats axtually super scary. I hate to admit it , but i only clean ours out 2x a season. The cap usually gets cleaned 3x a season. I actually bought axlong multiple extension chineny s w e e p off amazon for $60 to clean majority of mine from the bottom , then when in on the roof i can finish from the top/clean or replace our cap as i see fit. Mostly o a k or a l mo nd.
Also , looking at those rounds loaded in your truck , Respectfully , You must be one strong SOB...mechanical assistance or not...
DRIVEN » Sat Oct 11, 2014 10:24 am wrote:
1. Make progress until broke.
2. Go make mo money.
3. Repeat.
- wayno
- Posts: 5309
- Joined: Thu Jun 27, 2013 8:44 pm
- Location: Vancouver WA
- Has thanked: 430 times
- Been thanked: 1295 times
Re: Around Waynos house
I am not as strong as I used to be even a few years ago.BLUE wrote: ↑Fri Dec 15, 2023 10:31 pm Chimney fire...Thats axtually super scary. I hate to admit it , but i only clean ours out 2x a season. The cap usually gets cleaned 3x a season. I actually bought axlong multiple extension chineny s w e e p off amazon for $60 to clean majority of mine from the bottom , then when in on the roof i can finish from the top/clean or replace our cap as i see fit. Mostly o a k or a l mo nd.
Also , looking at those rounds loaded in your truck , Respectfully , You must be one strong SOB...mechanical assistance or not...
I get them on the truck with a board ramp/ramps, I am as careful as I can be with something that weighs likely 500lbs plus, I put the rear axle in a low spot to get the rear of the bed as low as possible, smaller rounds I only need one board as I can roll it up a pretty steep ramp, but the large ones I put a small round on the ground and the board on the bed/round, then I use another board between the round and the ground, this makes the ramp less steep, then I slowly roll the big rounds up the double ramp, I am very careful, the last foot or two is the hardest as the round is chest level by then and all I can do is push it with my arms while trying to balance it on the 2X6 board, rolling them off the bed is easy.
I have chimney fires every once in a while, they always start when I leave the wood stove door slightly open trying to get it warmed up or get fresh wood going, I leave the wood stove door open too long as my attention is else ware, then I can hear the howl and I close the wood stove door and go outside to see how bad it is, it normally goes out after closing the wood stove door after a couple minute as it cannot get enough air.
I had one fire because of this chimney fire thing on X-mas day a few years ago, the reason it happened was because of more than one issue, first the wood area around the chimney was dry rotted(T-111), next I had put a cover over the whole chimney because the metal cap had pinholes in the metal base cover, the cover stopped the leaks, but the cover held in heat and the dry rotted wood caught fire, I put the fire out, removed all the wood, made a new chimney structure, and I made a better cap to replace the one with pin holes, then on the next dry day I painted it and you cannot tell there ever was a fire, it did not burn anything in the attic.
“The difference between genius and stupidly is that genius has its limits” Albert Einstein
- DRIVEN
- Posts: 7696
- Joined: Thu Jun 27, 2013 7:05 pm
- Location: I've been everywhere
- Has thanked: 1204 times
- Been thanked: 1180 times
Re: Around Waynos house
I've heard throwing a wet blanket in your stove puts out chimney fires. Creates an instant steam bomb. Hope I never have to find out.
I'm still looking for wood stoves for my shop and basement.
When the only tool you have is a hammer every problem starts to look like a hippy.
- wayno
- Posts: 5309
- Joined: Thu Jun 27, 2013 8:44 pm
- Location: Vancouver WA
- Has thanked: 430 times
- Been thanked: 1295 times
Re: Around Waynos house
I got the last of the wood today, I forgot to take photos of the load, it was only 8 pieces, but them 8 pieces filled the truck bed, 5 pieces were between 30" and 32" round and they were heavy, 3 pieces very close to 30", my chainsaw had a sharp chain and I only had to make 5 cuts, 3 were already cut yesterday, I spent more time getting them in the truck bed, I think that is it for chain sawing this year or the next, so now I do not need a 16" chainsaw.
“The difference between genius and stupidly is that genius has its limits” Albert Einstein
- wayno
- Posts: 5309
- Joined: Thu Jun 27, 2013 8:44 pm
- Location: Vancouver WA
- Has thanked: 430 times
- Been thanked: 1295 times
Re: Around Waynos house
I have an older free standing Orley wood stove(old round type with glass front) you could have, but I modified it(drilled 2 holes) to burn extra motor oil, it is not very big.
“The difference between genius and stupidly is that genius has its limits” Albert Einstein
- DRIVEN
- Posts: 7696
- Joined: Thu Jun 27, 2013 7:05 pm
- Location: I've been everywhere
- Has thanked: 1204 times
- Been thanked: 1180 times
Re: Around Waynos house
Much appreciated, but I'm probably looking for something larger. Shop is 36x48 with 13 foot walls and open trusses. I'm looking for something medium sized for my unfinished basement. I'd put it about 10 feet from my basement stairs to help heat the main level. Electric heat sucks.
When the only tool you have is a hammer every problem starts to look like a hippy.
- wayno
- Posts: 5309
- Joined: Thu Jun 27, 2013 8:44 pm
- Location: Vancouver WA
- Has thanked: 430 times
- Been thanked: 1295 times
Re: Around Waynos house
I understand, most the older people I know that have large shops make their own wood stove out of a large drum(slightly smaller than a 55 gallon drum), they are positioned away from the wall so heat is radiated from all sides, I found that if a fan is running pointed at the stove it heats the larger spaces better.DRIVEN wrote: ↑Sat Dec 16, 2023 4:29 pm Much appreciated, but I'm probably looking for something larger. Shop is 36x48 with 13 foot walls and open trusses. I'm looking for something medium sized for my unfinished basement. I'd put it about 10 feet from my basement stairs to help heat the main level. Electric heat sucks.
I used this one in a fish room I had back in the early 2000s, I used heat off the exit/exhaust tube also by putting another tube around it and pushing air thru that tube with a push fan, if one pushes air thru it does not suck smoke out of the seams of the inner tube, I learned that by trial and error, 2 fans were running full time in the fish room(garage), it kept it about 80 degrees all the time, it was insulated on all sides except the cement floor.
“The difference between genius and stupidly is that genius has its limits” Albert Einstein
- DRIVEN
- Posts: 7696
- Joined: Thu Jun 27, 2013 7:05 pm
- Location: I've been everywhere
- Has thanked: 1204 times
- Been thanked: 1180 times
Re: Around Waynos house
Sounds like a nice setup.
On a somewhat related note; I read that some areas of the south are setting up firewood banks, like a food bank, to help folks get through the winter. Sign of the times, I suppose. You're a rich man, Wayno. Even if it doesn't always feel that way.
When the only tool you have is a hammer every problem starts to look like a hippy.
- wayno
- Posts: 5309
- Joined: Thu Jun 27, 2013 8:44 pm
- Location: Vancouver WA
- Has thanked: 430 times
- Been thanked: 1295 times
Re: Around Waynos house
If I were rich I would not live where I live now, I would likely be in the high desert in Arizona(somewhere in that area) where it don't get cold in the winter like it does in the Canadian border States like Idaho, Montana, ect; below zero is not my cup of tea.DRIVEN wrote: ↑Mon Dec 18, 2023 1:18 pm Sounds like a nice setup.
On a somewhat related note; I read that some areas of the south are setting up firewood banks, like a food bank, to help folks get through the winter. Sign of the times, I suppose. You're a rich man, Wayno. Even if it doesn't always feel that way.
“The difference between genius and stupidly is that genius has its limits” Albert Einstein
- wayno
- Posts: 5309
- Joined: Thu Jun 27, 2013 8:44 pm
- Location: Vancouver WA
- Has thanked: 430 times
- Been thanked: 1295 times
Re: Around Waynos house
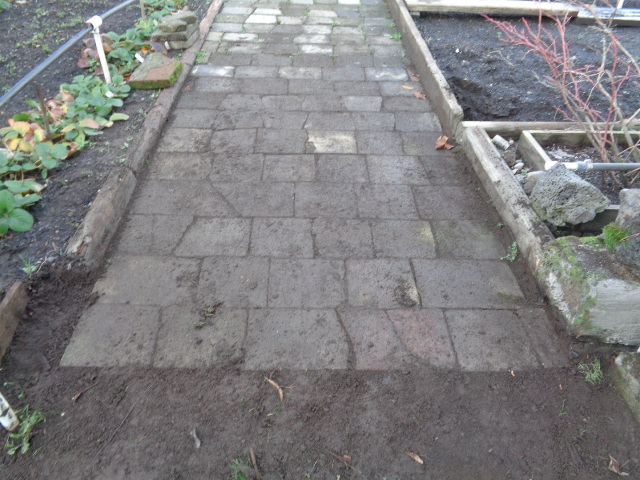
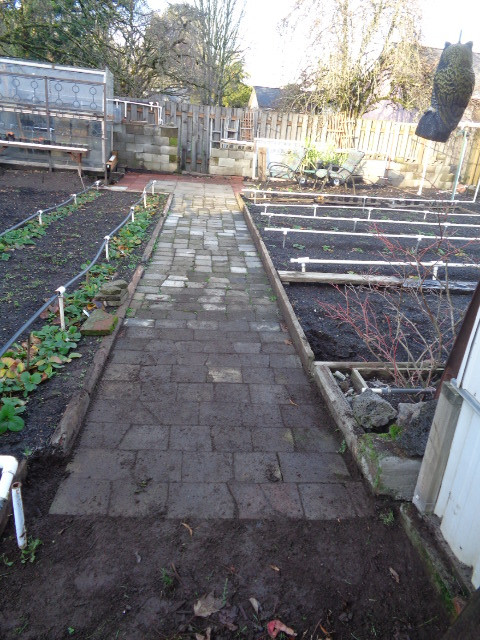
I finished the garden path to my telescope observing spot, I had over 50 broken 1.5" X 8" X 16" cement blocks/pavers, so I gathered them all together and started putting them together like a jigsaw puzzle, if I could not make a row across work then I cut a block for the end on that side, I used everything I had to finish the path, I found a couple more broken ones near the shed so I have a couple extra broken ones now.
“The difference between genius and stupidly is that genius has its limits” Albert Einstein
- wayno
- Posts: 5309
- Joined: Thu Jun 27, 2013 8:44 pm
- Location: Vancouver WA
- Has thanked: 430 times
- Been thanked: 1295 times
Re: Around Waynos house
I forgot to mention that I bought 2 new aftermarket exhaust mufflers and I put one on the Husqvarna 266 W(big chainsaw), the stock studs were not long enough and they do not make longer ones for either of my chainsaws(both use the same muffler), so I bought some threaded 6mm rods and made my own studs, the aftermarket studs will not fit a stock muffler but they will fit the aftermarket muffler, the chainsaw was so loud it hurt my ears even with ear plugs, now I really don't need ear plugs, the change was dramatic, but I already bought ear muffs as that last load I made 5 cuts and my whole body could feel the exhaust noise, I cannot even hear the TV with the volume on full with them ear muffs.
By the way, I am sick yet again, my sinuses/ears are fucked up big time(have photos of blood splatter in the sink), the last two loads were hard on me to load(not just because of the size of the rounds), I got it from the wife of the last guy I got it from last year(October 22, 2022), the ear plugs actually made my ears hurt when I put them in my ears, that is why I bought ear muffs.
“The difference between genius and stupidly is that genius has its limits” Albert Einstein
- DRIVEN
- Posts: 7696
- Joined: Thu Jun 27, 2013 7:05 pm
- Location: I've been everywhere
- Has thanked: 1204 times
- Been thanked: 1180 times
Re: Around Waynos house
Yeah, it's cold season at my house too. Lots of vitamin C and zinc seems to help me. Rest up.
When the only tool you have is a hammer every problem starts to look like a hippy.
- wayno
- Posts: 5309
- Joined: Thu Jun 27, 2013 8:44 pm
- Location: Vancouver WA
- Has thanked: 430 times
- Been thanked: 1295 times
Re: Around Waynos house
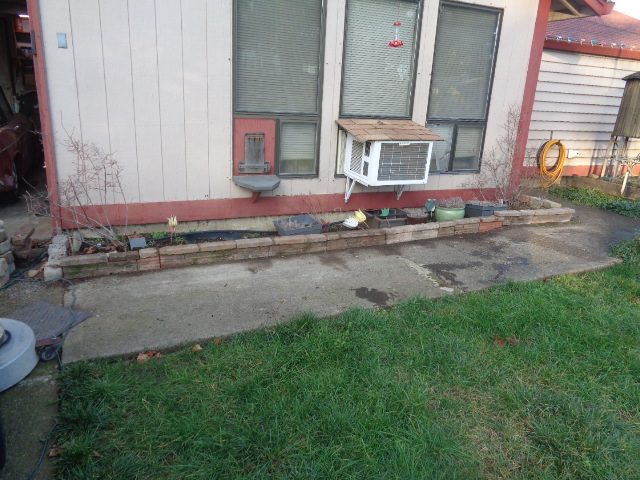
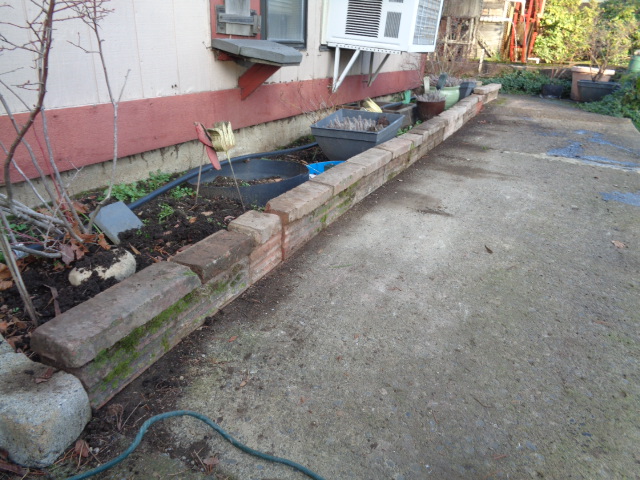
I picked up some free brick wall pieces that were knocked apart with a sledge, I made a mini wall for my front entrance walk, I was hoping to make it 4 or 5 bricks high, but it was not to be, 2 bricks high and the top bricks(3 bricks high I guess), I had just enough to make it the length of the walk, there was not enough to do the 3' sides, I will use something else.
“The difference between genius and stupidly is that genius has its limits” Albert Einstein
- wayno
- Posts: 5309
- Joined: Thu Jun 27, 2013 8:44 pm
- Location: Vancouver WA
- Has thanked: 430 times
- Been thanked: 1295 times
Re: Around Waynos house
I guess I never took a photo of my Husqvarna 61 when the muffler was kinda jury rigged on, I have mentioned the exhaust stud stripped out nearest to the chain, but threads go deeper into the head, so I can screw the stud deeper into the head but then it is not long enough to stick out of the muffler to put a nut on it to tighten it down unless I don't screw the stud all the way into the head, I also cannot put the muffler brace on it, so I have been tightening it down on that side, then putting the brace on over the nut and then putting the nut on the other stud and screwing the other bolt into the housing holding the brace in place, it bugged me a lot that brace sticking out at an angle, and I could not find anyone that had a longer stud.
This morning I decided to make my own stud, this is not an easy thing to do because the head threads are 6mm, while the shaft is smaller and so are the threads that that have the nut that holds the muffler on, the holes in the muffler are too small to fit a 6mm threaded shaft thru and the sleeves are too thin to drill them out to except a 6mm shaft, so I cut the end of a threaded 6mm bolt off, I found a long thin bolt that fit in the muffler hole, I cut it to about the right length and welded the threads onto the smaller shaft, it was very hard to get the threaded section on the smaller shaft straight but I did the best I could, then I ground everything down until it would work with the new stud installed, you can see the shaft is slightly out of center on the threads.
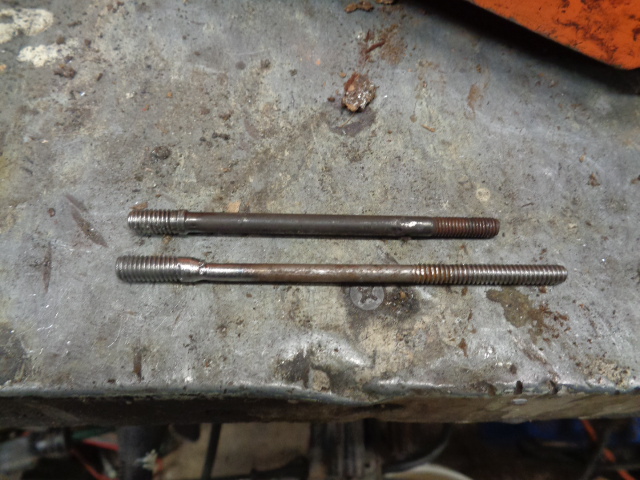
As you can see in the photo below the new longer shaft is below the stock shaft, the upper stock shaft has a lip where the threads end, I could not replicate this lip, that lip centers the exhaust gasket and muffler on the shaft, so I made the threaded section slightly longer so it stuck out about the same distance as the lip, I had to slightly ream out the muffler holes so it mated to the head properly as the exhaust gasket is very thin, I succeeded.
Below is a photo of the finished modification, the threads stick out farther than the stock stud that the threads are good in that hole so I just use the stock lock/jam nut, I double nutted the new stud with a lock washer between the nuts, the threads sticking out do not appear to get in the way of anything as the spikes that dig into the wood when cutting are longer, so for now I am not going to cut the extra threads off.
One thing that does concern me is if the weld breaks off and that would leave the threads in the head hole, I did not tighten that stud down really tight, I started the chainsaw without ear plugs or the ear muffs and it was not that loud. I stuck my fingers as far as I dared around the gasket area and could not feel any exhaust leaks, this is my backup saw, but anymore I use the one with the sharpest chain, they are both big to me.
“The difference between genius and stupidly is that genius has its limits” Albert Einstein
- wayno
- Posts: 5309
- Joined: Thu Jun 27, 2013 8:44 pm
- Location: Vancouver WA
- Has thanked: 430 times
- Been thanked: 1295 times
Re: Around Waynos house
So I went down to my cousins property he bought back in May, it is 3 lots(not subdivided yet, has one house and one well), homeless people had lived in it in the past so it is full of crap, it is real close to the Columbia River, there is one row of houses and railroad tracks between the property and the river, it has a great view of the river and Sand Island.
I have brought home 27 tires on rims and removed them, I keep the metal rims to sell as scrap, he gets the tires because he has a cheaper place to get rid of them than I do, there is likely another 27 rims/tires still down there that I will need to deal with, if it was the summer it likely would be a lot easier to remove the tires from the rims, a few took me close to a half hour to get them off the rims, one rim was so rusty the tire remover dug into the metal and stopped so I had to start over in a different area, I was lucky I got it off that rim.
I would never want to live next to the railroad tracks, even though they weld the track sections together now which stops the clickity clack noise, the locomotives are so loud, and the house is within a 100 feet of the tracks, maybe closer to 50 feet, a train did not come by while I was there, but I suspect the ground shakes when they come by, I have always wondered why anyone would own a house next to train tracks.
My latest project is a coffee table train, it will have 3 separate trains in the one coffee table, I am moving a two-train setup into a larger coffee table and adding another train circuit around the existing setup because I have an extra locomotive, extra track, and it is something to do, I will have photos in the future.
“The difference between genius and stupidly is that genius has its limits” Albert Einstein
- DRIVEN
- Posts: 7696
- Joined: Thu Jun 27, 2013 7:05 pm
- Location: I've been everywhere
- Has thanked: 1204 times
- Been thanked: 1180 times
Re: Around Waynos house
When my parents lived on the river across from Sauvie Island their house was about 100 yards from the tracks. As long as they didn't hit the horn, it was mostly not an issue. I'd still prefer not to though.
When the only tool you have is a hammer every problem starts to look like a hippy.
- wayno
- Posts: 5309
- Joined: Thu Jun 27, 2013 8:44 pm
- Location: Vancouver WA
- Has thanked: 430 times
- Been thanked: 1295 times
Re: Around Waynos house
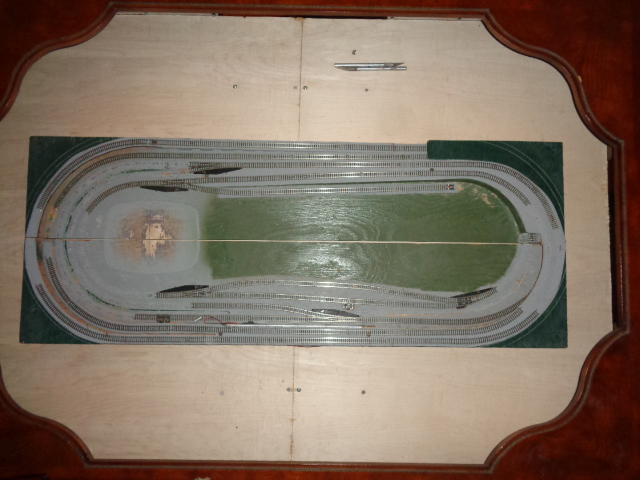
Back around 2005 I built a coffee table train, I suppose I might have a photo somewhere of it but that was when I did not have a computer, I inherited this from him when he died, it has been in the closet since then as I was too busy to deal with this kind of thing, if I had free time I was working on Datsuns.
Recently I pulled it out, the tracks were dirty and it would not run right, as it had tunnels that I could not get to the tracks to clean them, the coffee table was not that nice either, it was very small and had 2 completely different train circuits(2 different trains blended together), I bought a much nicer coffee table that was larger over 10 years ago but did nothing with it, well I got all of it out.
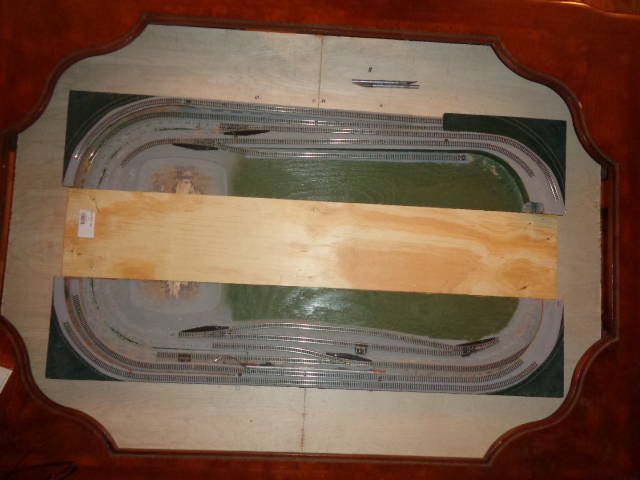
I do not recall, I do not appear to have a before photo, in the photos below I removed the tracks on both ends and sliced the drop in track in half, you can see where it was cut down the middle.
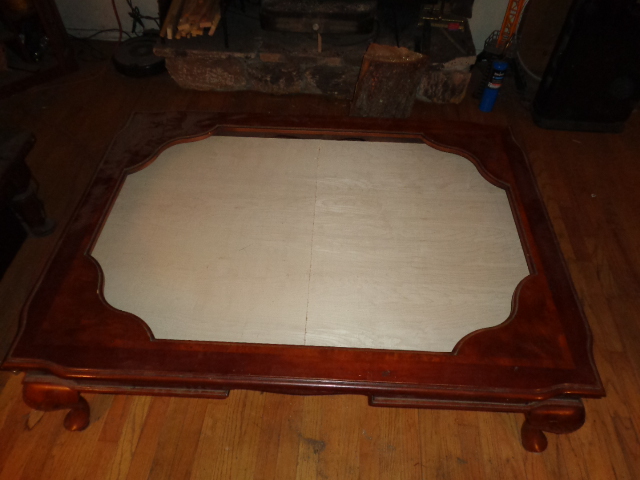
Here is the coffee table.
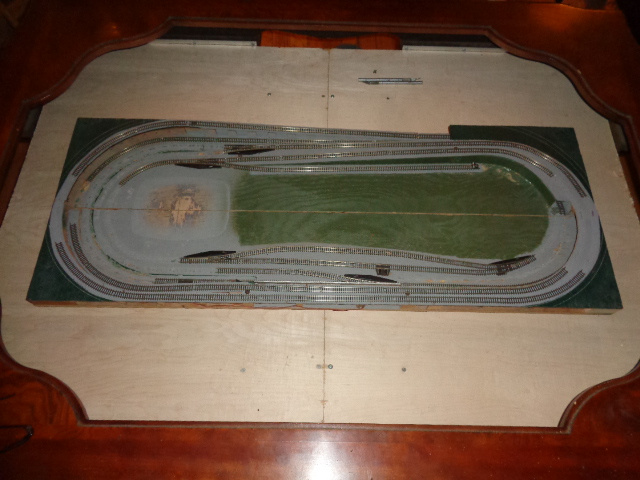
Here the drop in track assembly is sitting in the middle of the coffee table hole, it is too small to be in there by itself this way and that is why I cut it in half.
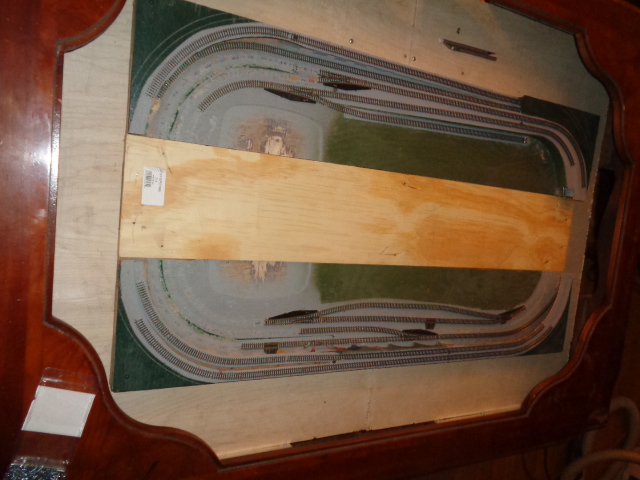
Here it is with a 7 inch piece stuck in the middle to make it fit the hole better.
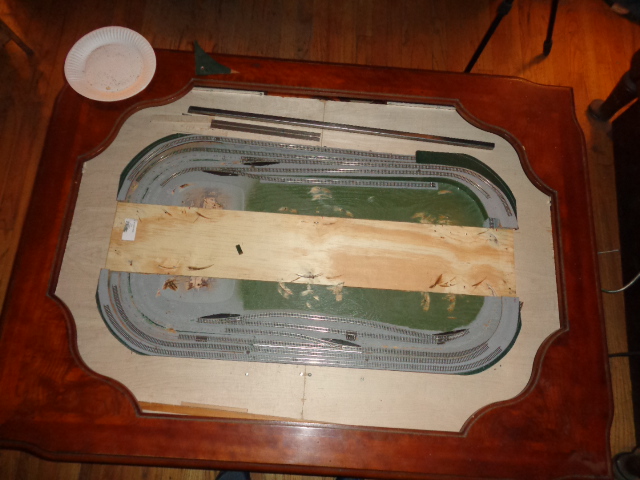
In the photo below you can see I cut out the pointed corners and made them round, I did this for a reason.
I will rebuild the drop in track assembly and add what it needed to connect all the tracks back together, I need to add plywood to the upper levels to mount the new pieces of track, once all that is done then I will add new drop in pieces on all four sides to make it level at the base level, I will still be able to remove the drop in center part(green part), then I will add a 3rd stand-alone track design outside of the green part for a 3rd locomotive that could not make the corners on the smaller drop in as the turns were too sharp and it would derail, I have yet to design that part yet, I am still searching for 3/32" plywood for the upper level, then I design what I want and draw it on the surface, then I use either a jigsaw or a band saw to cut areas that will be bent down so I can make it multi-level, this outside track might have 3 levels, the only drawback is it is hard to clean track when track is under the level above it, 3 levels might be too much of a pain, I do plan on having the outside circuit have a piece of track enter into the center of the middle drop in section, this might make it not a "drop in section" anymore, more to come as I make progress.
“The difference between genius and stupidly is that genius has its limits” Albert Einstein
- wayno
- Posts: 5309
- Joined: Thu Jun 27, 2013 8:44 pm
- Location: Vancouver WA
- Has thanked: 430 times
- Been thanked: 1295 times
Re: Around Waynos house
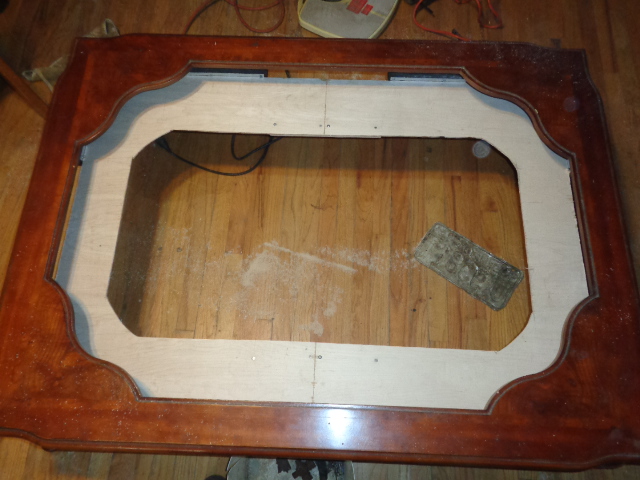
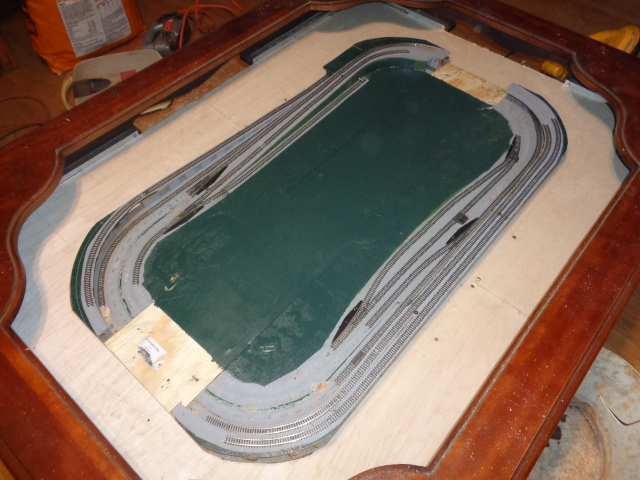
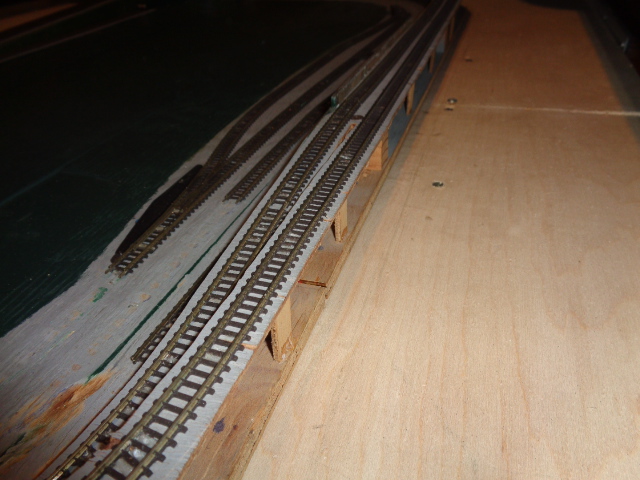
I made some progress on the installation of the drop in part, I cut the hole in the base I made and dropped it in the hole, I am doing it this way because I want it as low as possible so when I make the part around the drop in part that part will step up as it reaches the sides yet nothing will hit the glass cover.
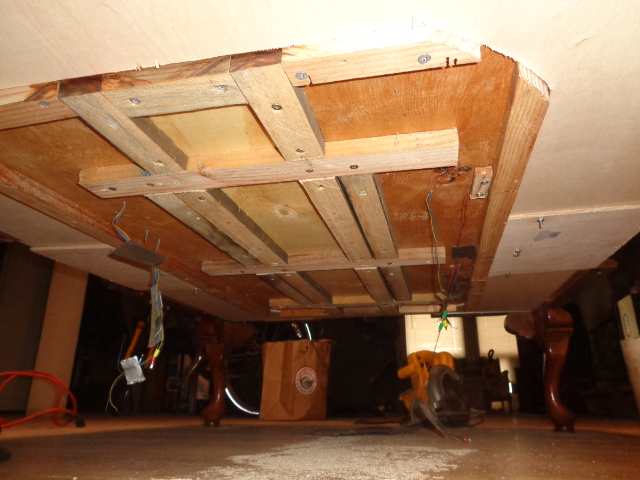
Here is a photo of the bottom.
I have 3 more tracks to connect/put back together and then I can plug all the wires back together and test it to make sure it works properly, then I will start building the sections around it.
Here is a photo of the bottom.
I have 3 more tracks to connect/put back together and then I can plug all the wires back together and test it to make sure it works properly, then I will start building the sections around it.
“The difference between genius and stupidly is that genius has its limits” Albert Einstein